This Routine Can Save So Many Climbers from Injury - Take it from a PT
Hooper’s Beta Ep. 155
Introduction
Today we’re at Mesa Rim North City to teach you how to increase your strength and reduce your risk of injury on pockets without having to add a ton of new training to your routine. All it takes is a little bit of off-the-wall loading and a cool little anatomy hack. So rather than feeling like any non-four-finger hold could end your session in an instant, you’ll be able to handle the odd pocket with confidence.
Sponsor
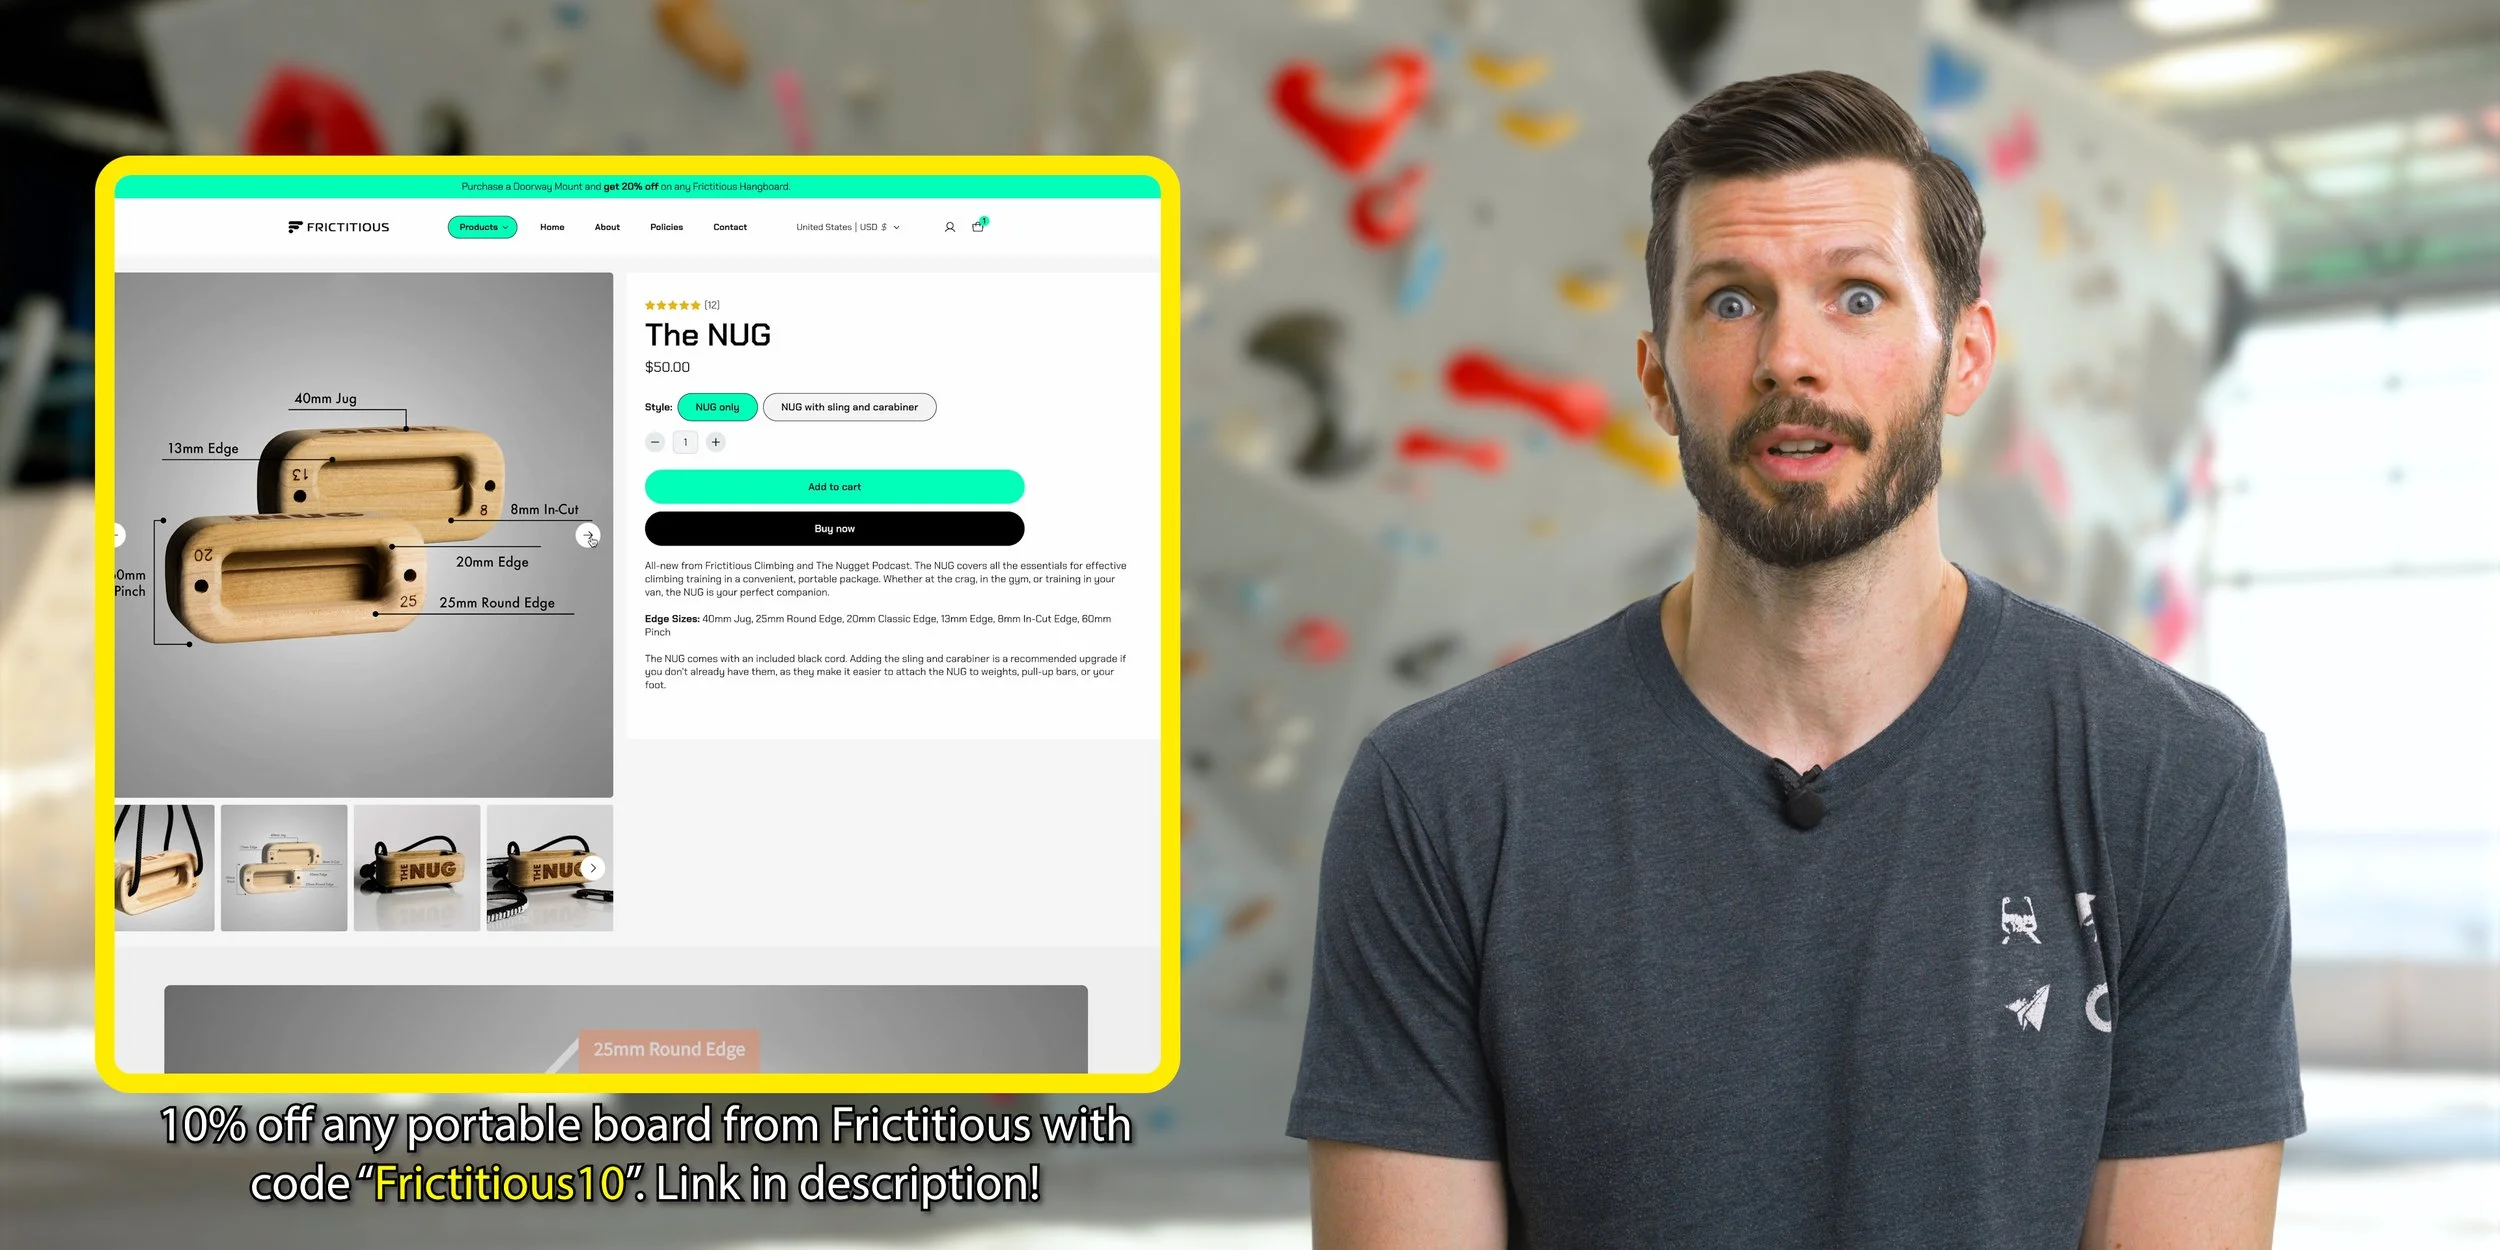
By the way, this video is sponsored by Frictitious! Use the link in the description and get 10% off any of their portable hangboards when you use code ‘Frictitious10’! We actually filmed this video before Frictitious was the sponsor, but we still used the Nug for most of the demonstration shots because we like it so much. I’ve been a fan of the Nug since it came out, taking it with me on every climbing trip and gym session as my main warm-up and training edge. Frictitious has been a sponsor of this channel for longer than just about anyone else, so we’re super thankful to have their support. And we love supporting a small Colorado business in turn! They’ve got all kinds of high quality finger training devices from portable to wall-mounted. They’ve even got the game-changing doorway mount that we still haven’t seen any other company match. They’ve even recently come out with a claw or talon trainer that we love for lumbrical injury recovery. It’s all super high quality wood with comfy rounded edges. So don’t forget to use our link and code ‘Frictitious10’, and now back to the video.
Why It’s Needed
So why do I recommend virtually *all* climbers do this?
It’s mainly because our typical four-finger grip training does not adequately tax the lumbrical muscles. Plus, gyms tend to only sporadically set pocket climbs and outdoor pocket encounters are similarly infrequent. As a result, most peoples’ lumbricals are not prepared for pockets at the grade they normally climb, which often ends with an injury called lumbrical shift syndrome. If this applies to you, you should head over to our video on lumbrical recovery or get one of our Recovery Blueprints to guide you. But if you’re *not* injured and you want to stay that way, let’s continue.
The Routine
The bulk of our pocket training strategy will be centered around the following off-the-wall exercises. We’ve broken these down into three different levels based on complexity. You can choose your level based on what equipment you have, how much time you want to spend on it, or how far you want to progress. You can even combine multiple levels into single sessions if you want to ramp things up even more. However, if you’re completely new to this type of training, start at level 1 and work your way up gradually.
Level 1: Getting Acquainted
Level 1 is going to be single finger recruitment pulls, which are great because they can be done with minimal equipment, minimal time, and maximal auto-regulation. This is the level you should choose if you just want the quick and simple approach.

Now I know what you might be thinking: “Level 1 is monos? Who do you think we are, Sharma on Perfecto Mundo?" I know single finger pulls might seem intimidating, and if you're new to pocket or lumbrical training, this exercise might feel a little strange at first. That’s totally normal. It’s a very novel stimulus for most climbers, which is why it’s important to start at a low, manageable intensity to help your fingers adapt and avoid any unwanted tweaks. Stick with it—after a few sessions, it’ll start to feel much more natural.
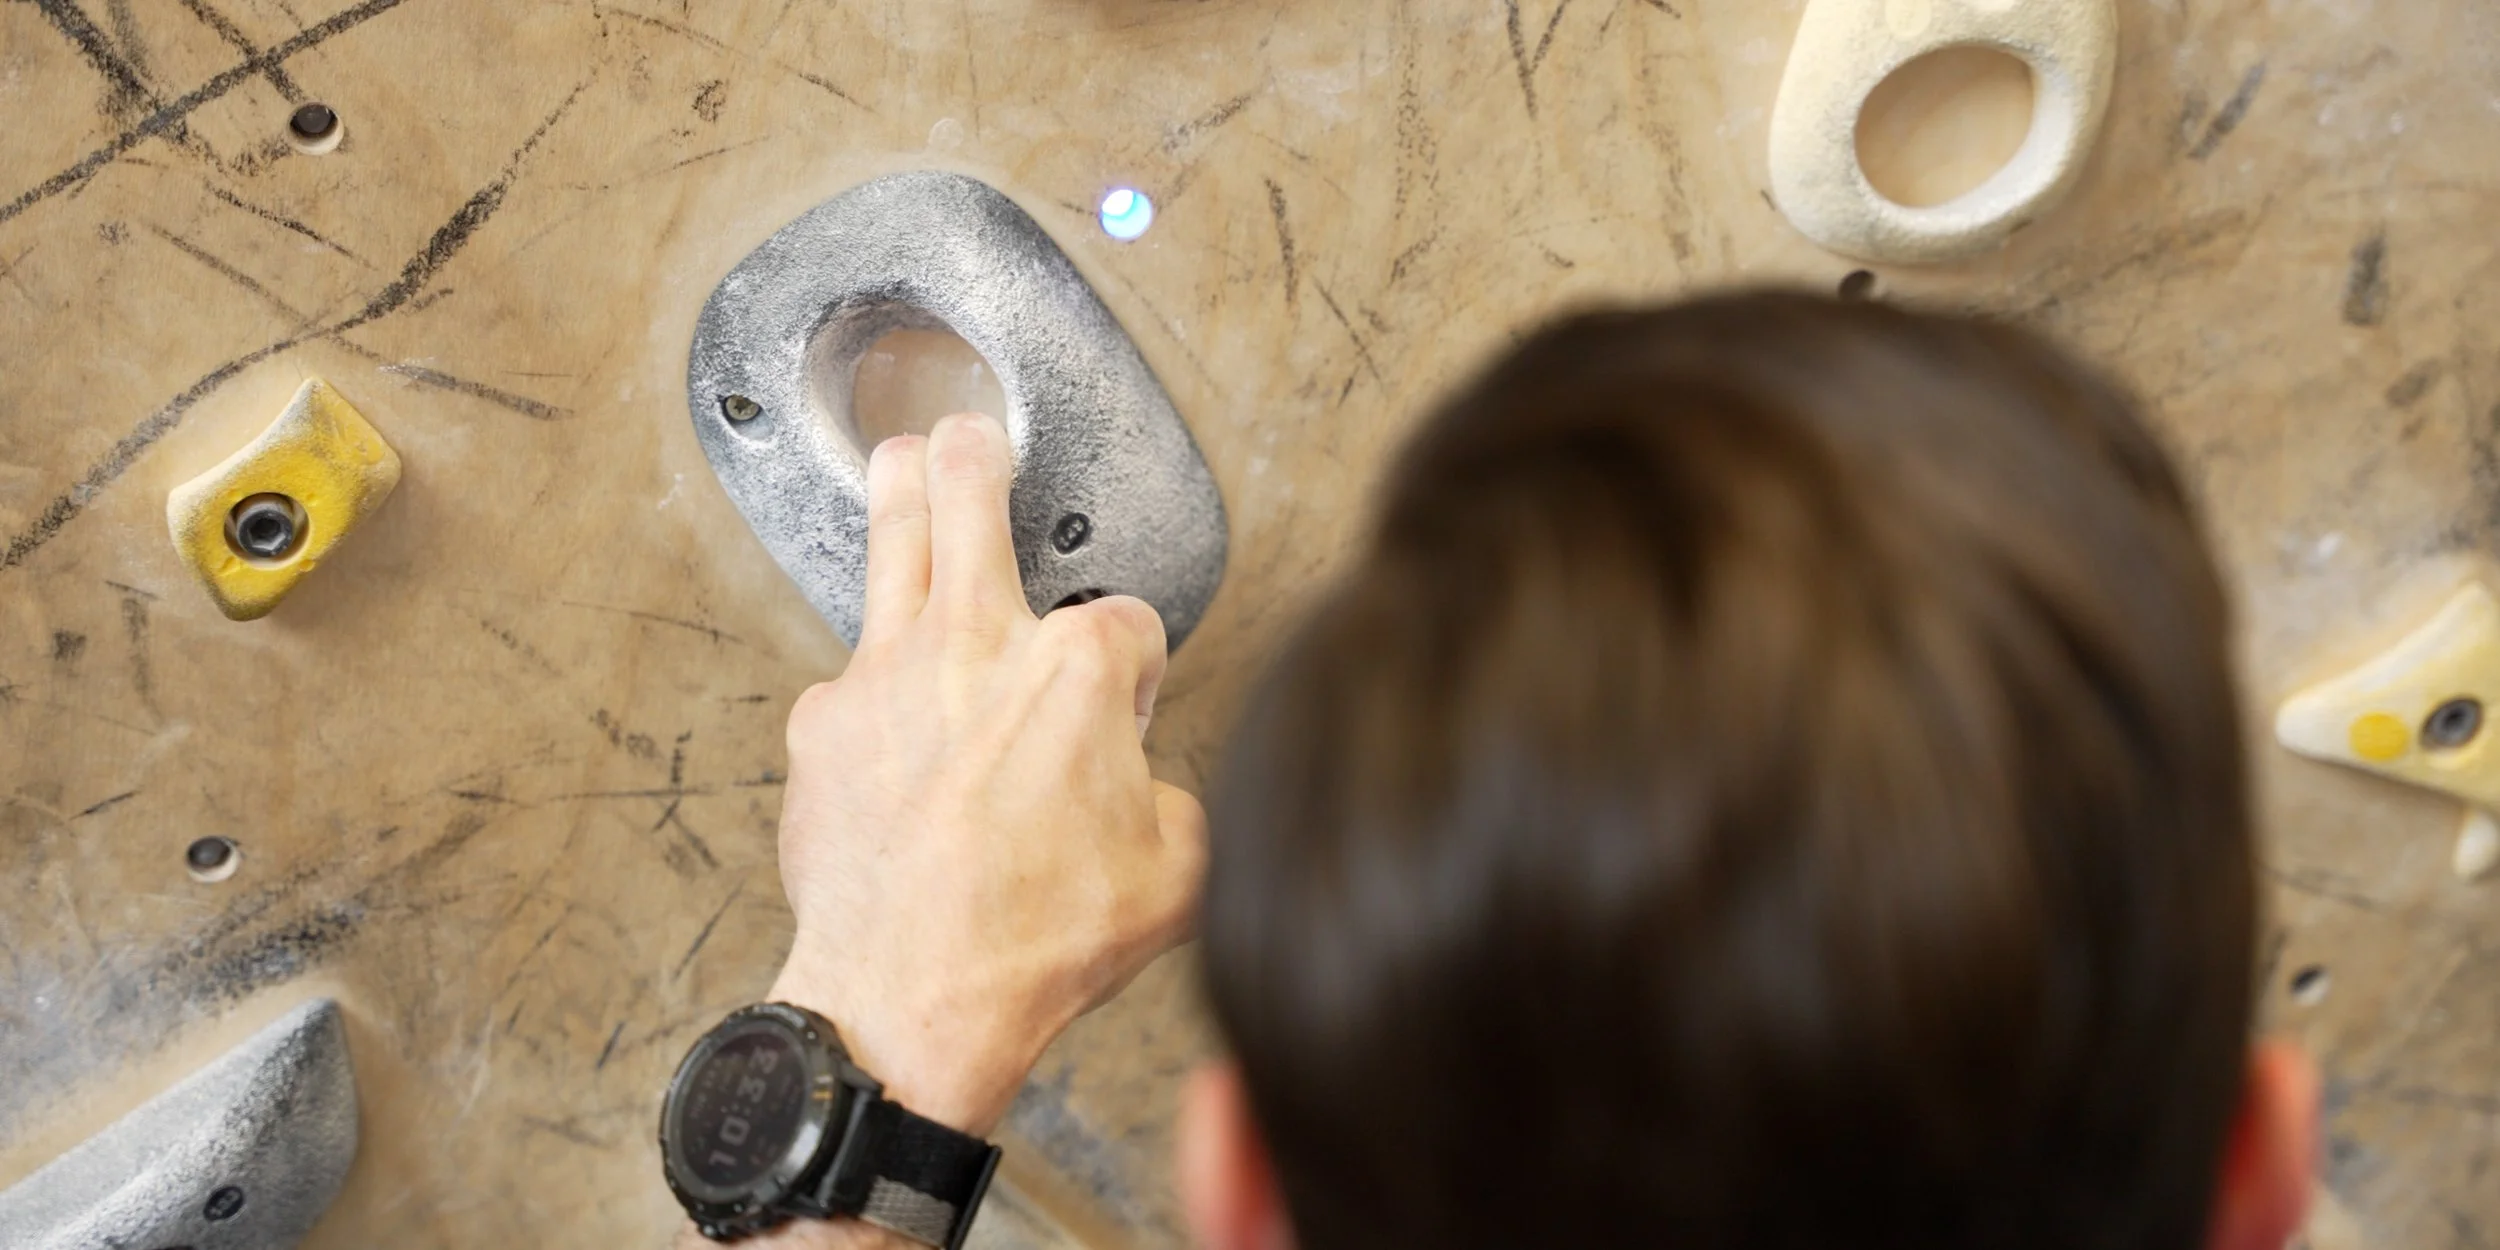
To start, all you really need is a comfortable edge or pocket hold and a way to anchor it. Then you’ll just grab the hold in an open or half crimp position with your middle finger and try to flex it into the edge. Over the course of a few seconds, gradually increase the force until you reach your max tolerable intensity (without going over 2/10 discomfort). If this is your first time, your max tolerable intensity may only be around 60-75% effort. Regardless, hold the rep for about 5-8 seconds in total, rest for a second or two, and repeat.

Keep in mind, these are isometric, meaning there shouldn’t be any range of motion here. You should be *trying* to flex your finger, but it should not actually move. Also, try to generate the force from your finger rather than pulling with the rest of your body.
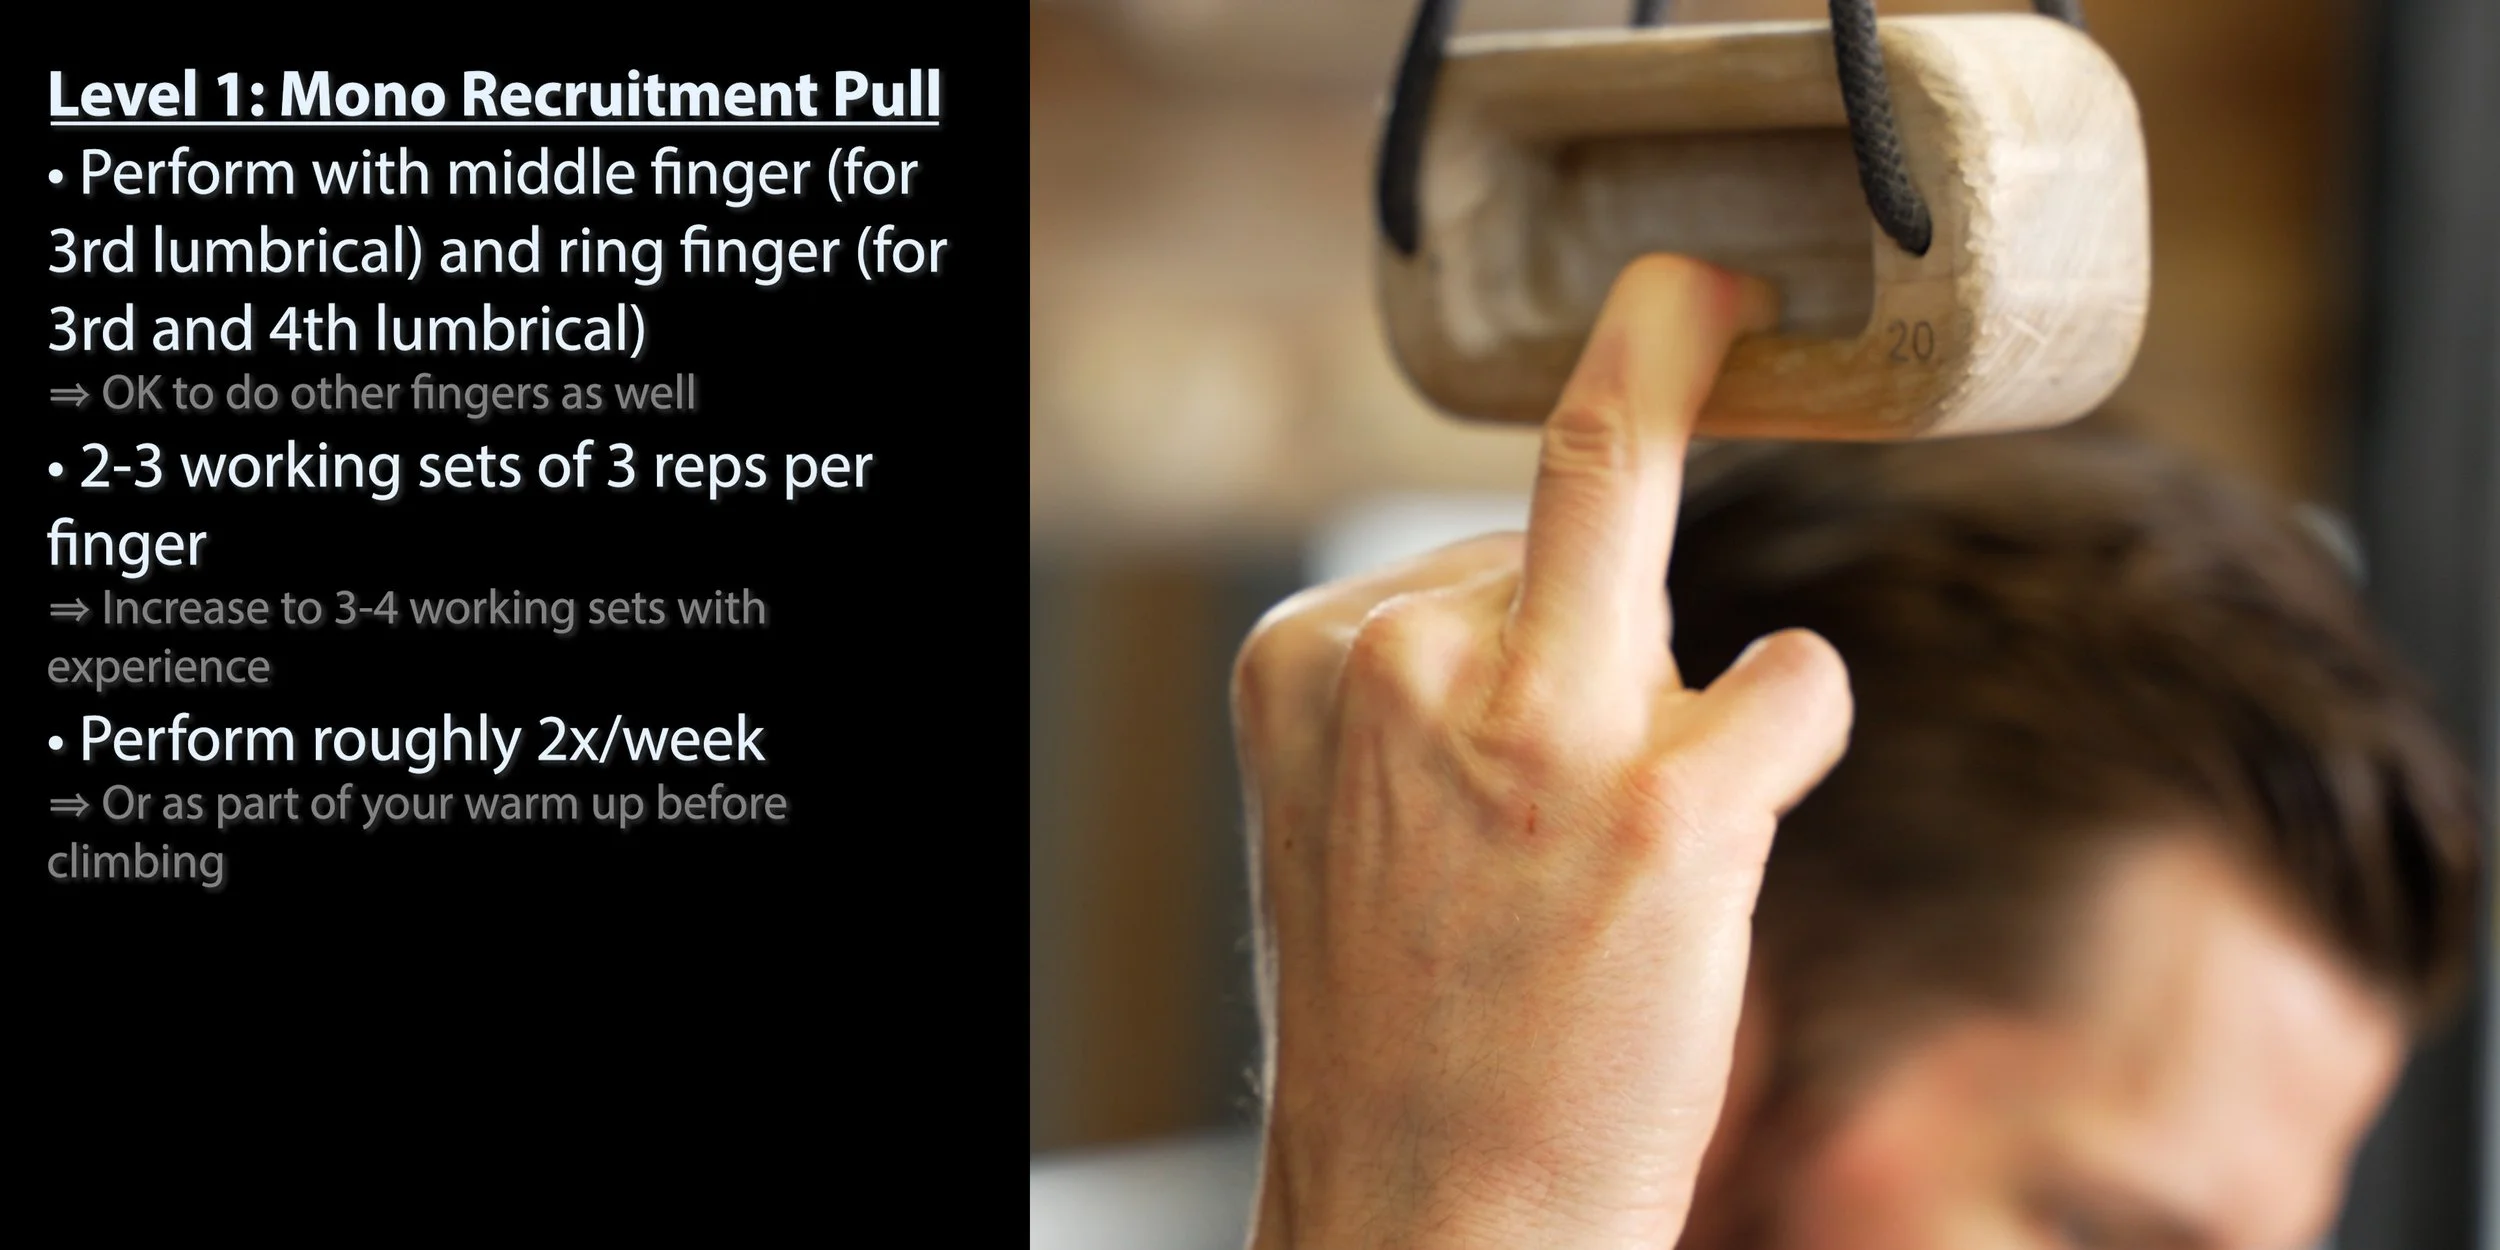
I recommend you do this with your middle finger and ring finger to target the 3rd and 4th lumbricals, though you can certainly perform these with your other fingers as well if you have time. If you’re new to this, perform 2-3 working sets of 3 reps per finger. If you’re a bit more experienced, increase to 3-4 sets. Do this roughly twice a week as part of your warmup before climbing.

By the way, if you have a force gauge, now is a great time to use it as it’ll make tracking your progress that much easier (and more fun). Just don’t fall into the trap of thinking you’re *failing* if you don’t beat your previous numbers every single session or every single week. We’re trying to reduce injury risk here, not tempt it, so play the long game.
Level 2: Gaining Specificity

Level 2 is going to be band-resisted pocket rows. These introduce a more dynamic stimulus, which is more akin to what we encounter on the wall.
To start, you’ll need a comfortable edge or pocket hold once again and a decent resistance band. Anchor the resistance band to something solid, then pull on the edge in a row-like motion. I recommend you do this with your middle two fingers as well as front two. The middle two will stimulate the 4th lumbrical while the front-two stimulates the 3rd lumbrical. If you want, you can add in some reps with the back two (which also stimulates the 3rd lumbrical) but this position is less important since it’s quite uncommon on the wall.

For each grip position you choose to do, perform 2-3 working sets of 8 reps with about 2 reps in reserve (or about 8/10 RPE, if you prefer), about 2-3 times per week or as part of your pre-climbing routine.
You can progress the difficulty of these over time by using thicker bands, stretching the band out further, or even increasing the speed of the contraction. Just make sure you have a secure grasp of the hold; you don’t want to accidentally create a sling-shot.
Level 3: Maximizing Progressability
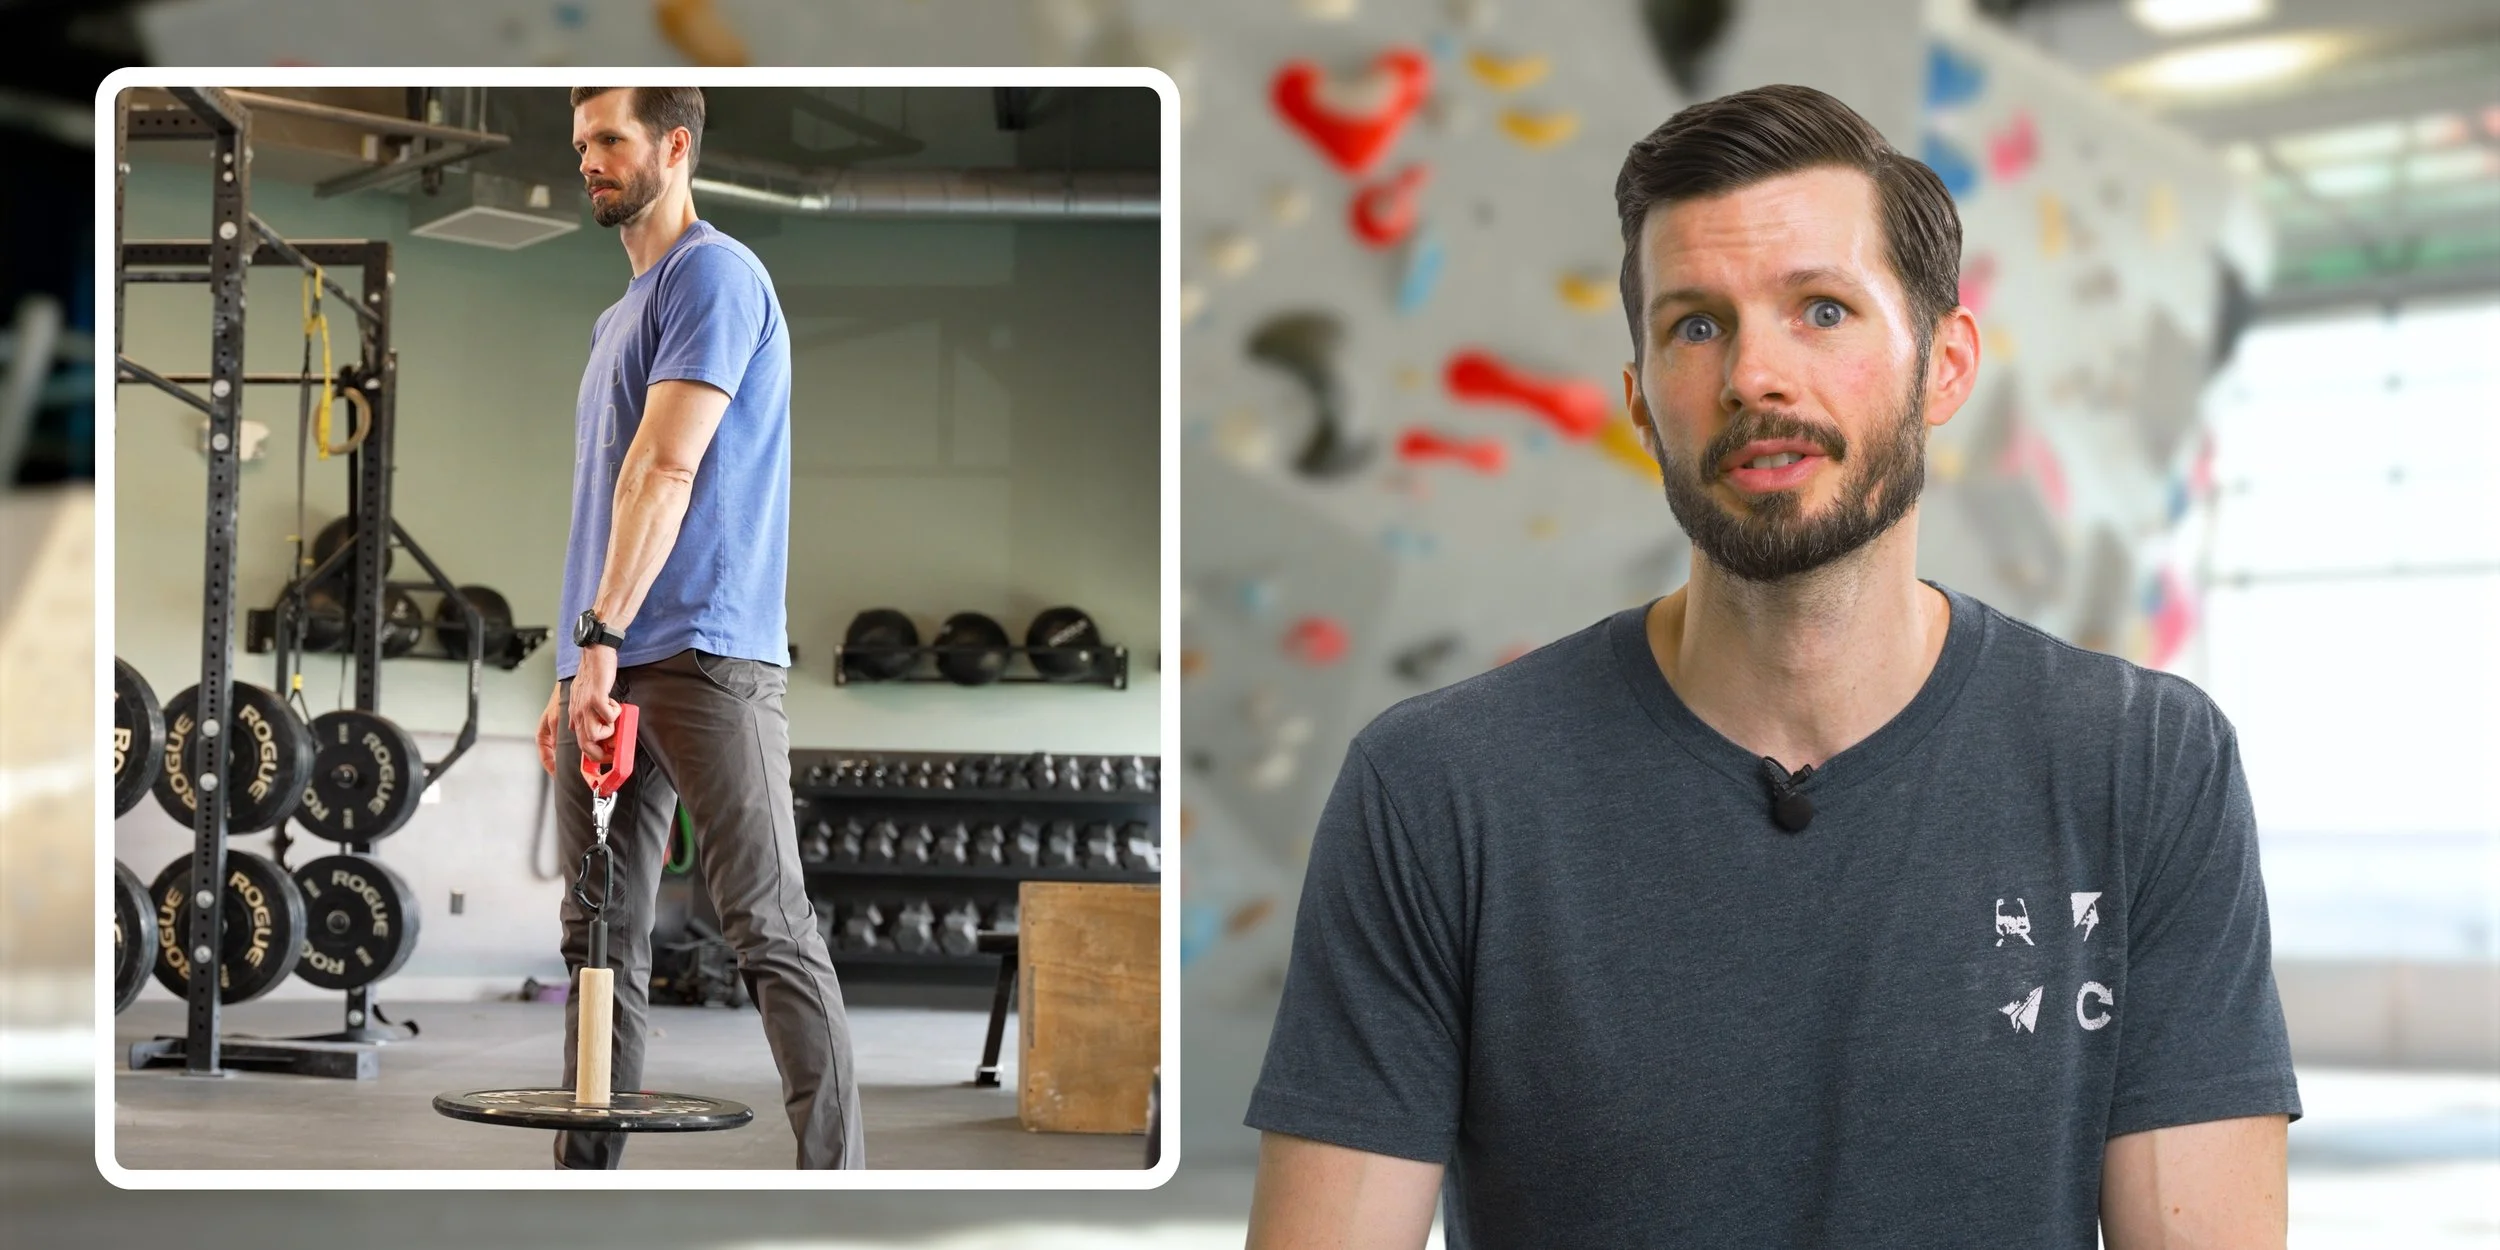
Finally, level 3 is going to be weighted pocket block pulls. These require the most equipment as you’ll need a set of incremental or adjustable weights, but the benefit is they’re extremely easy to progress to just about any intensity level. Just keep in mind: these do require a bit more care as I’ve found climbers are prone to overdoing it; they get too caught up chasing higher *intensity* without focusing on set *quality*.
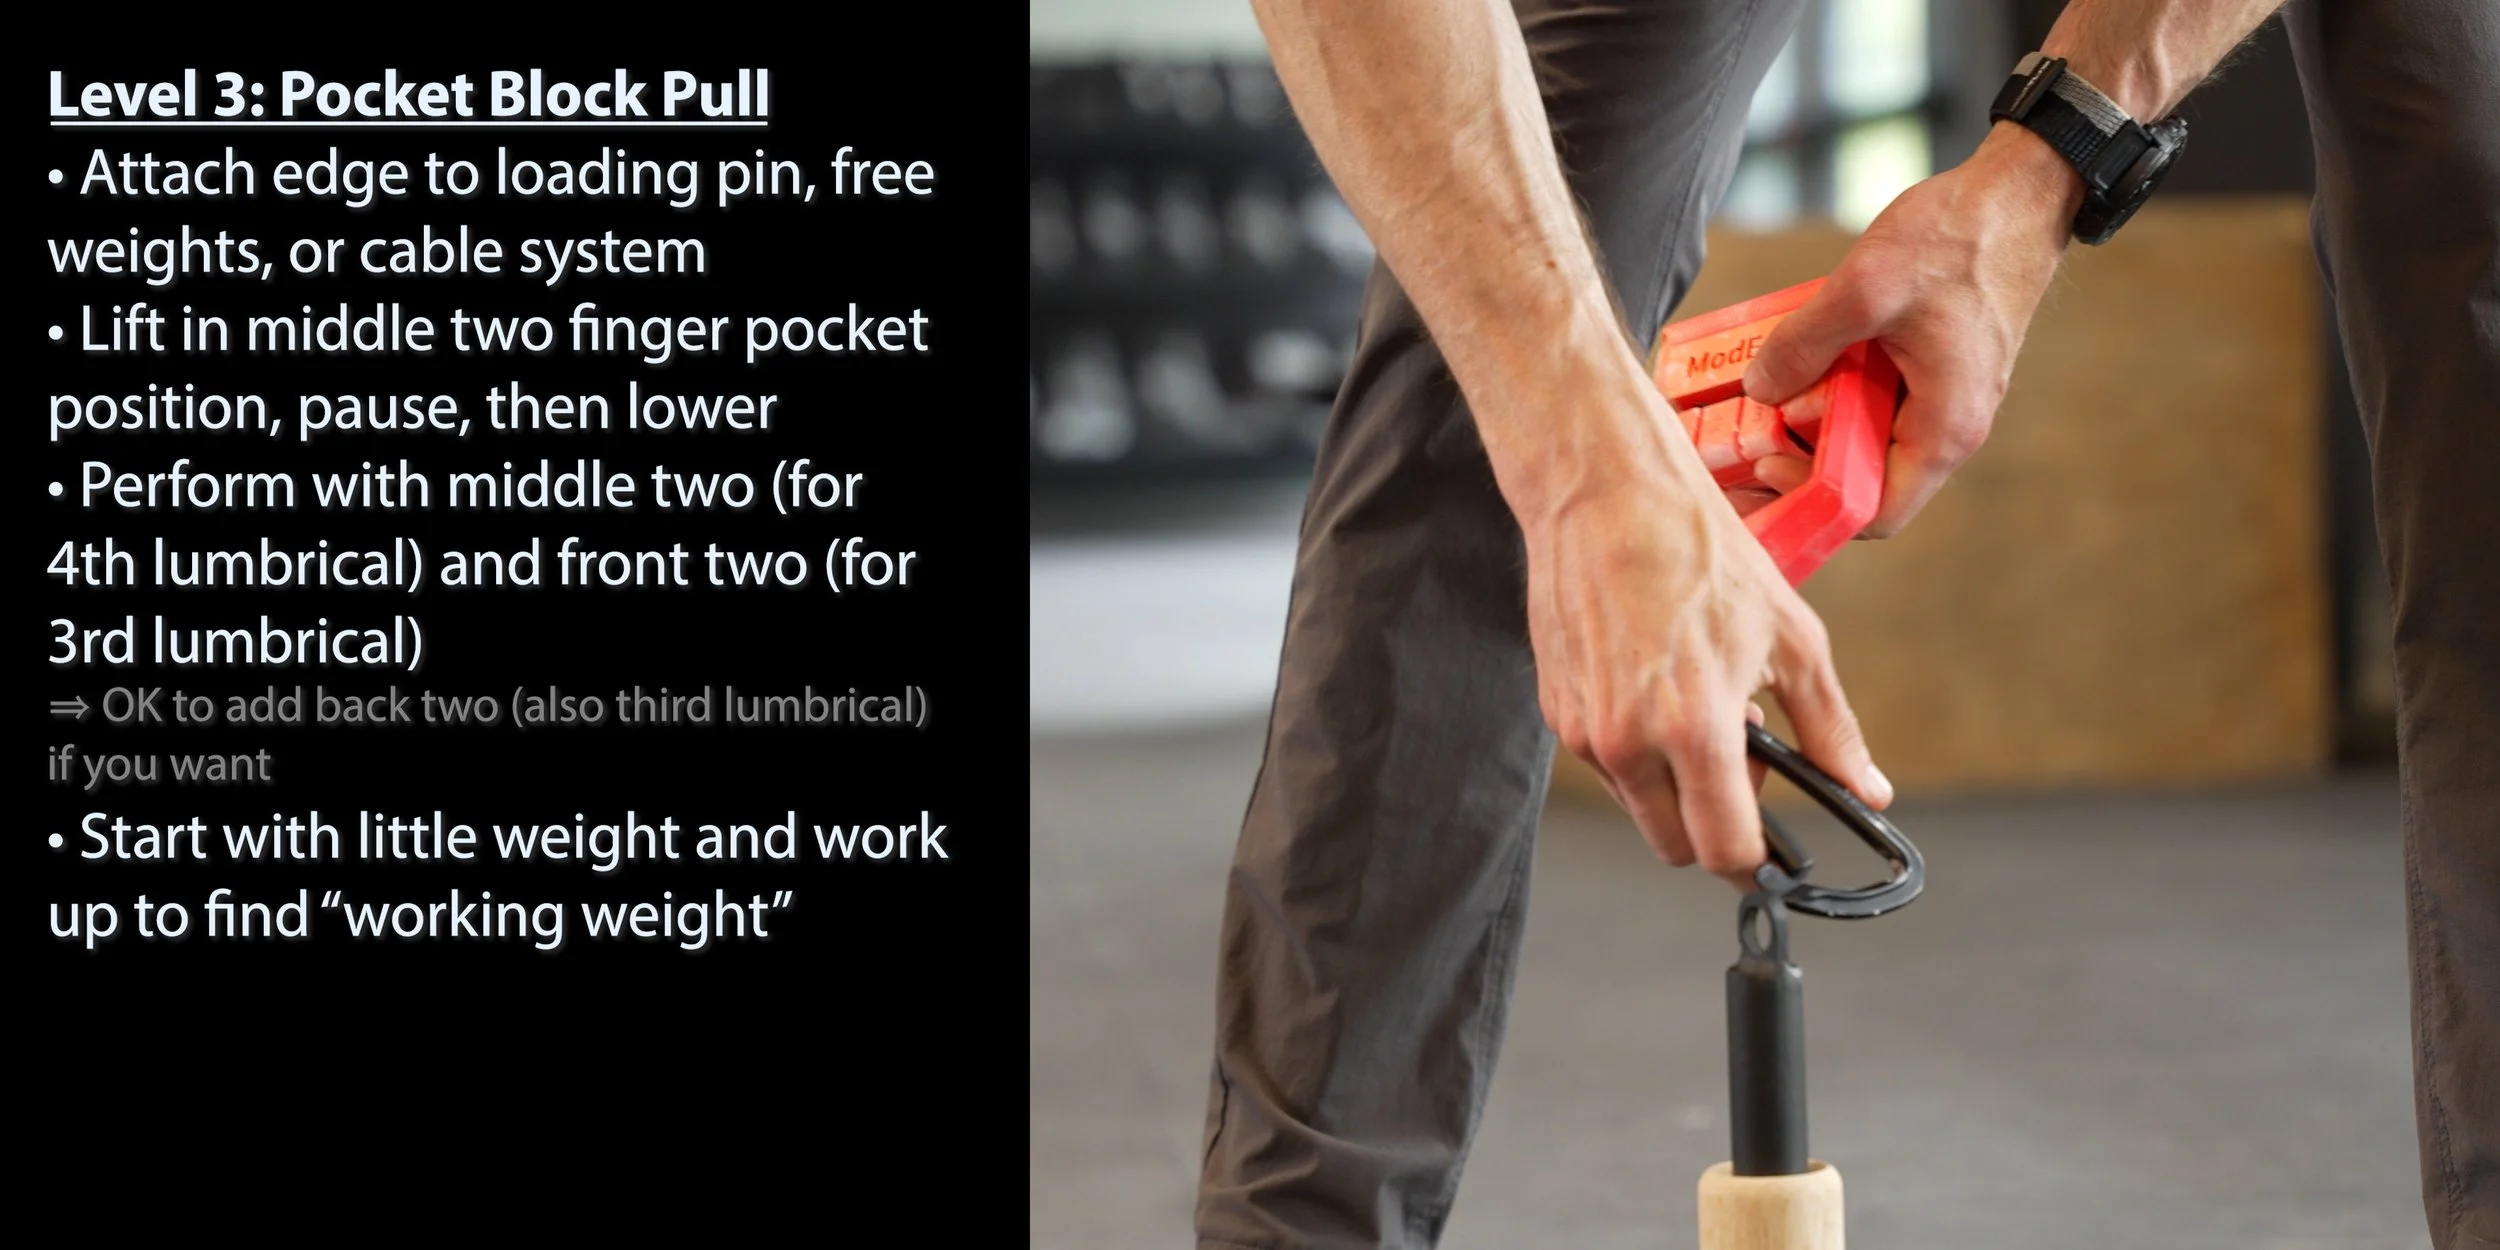
To start, attach your board to the weights (or a cable system at the floor), set your fingers in a middle two pocket position, and lift the weight off the ground. Hold for 1-2 seconds, then set it back down and repeat for several reps. You’ll want to do the same thing with your front two fingers as well, though you may have to adjust the weight to compensate for the difference in strength. Similar to level 2, you can do this with your back two as well if you like, but it’s not strictly required.
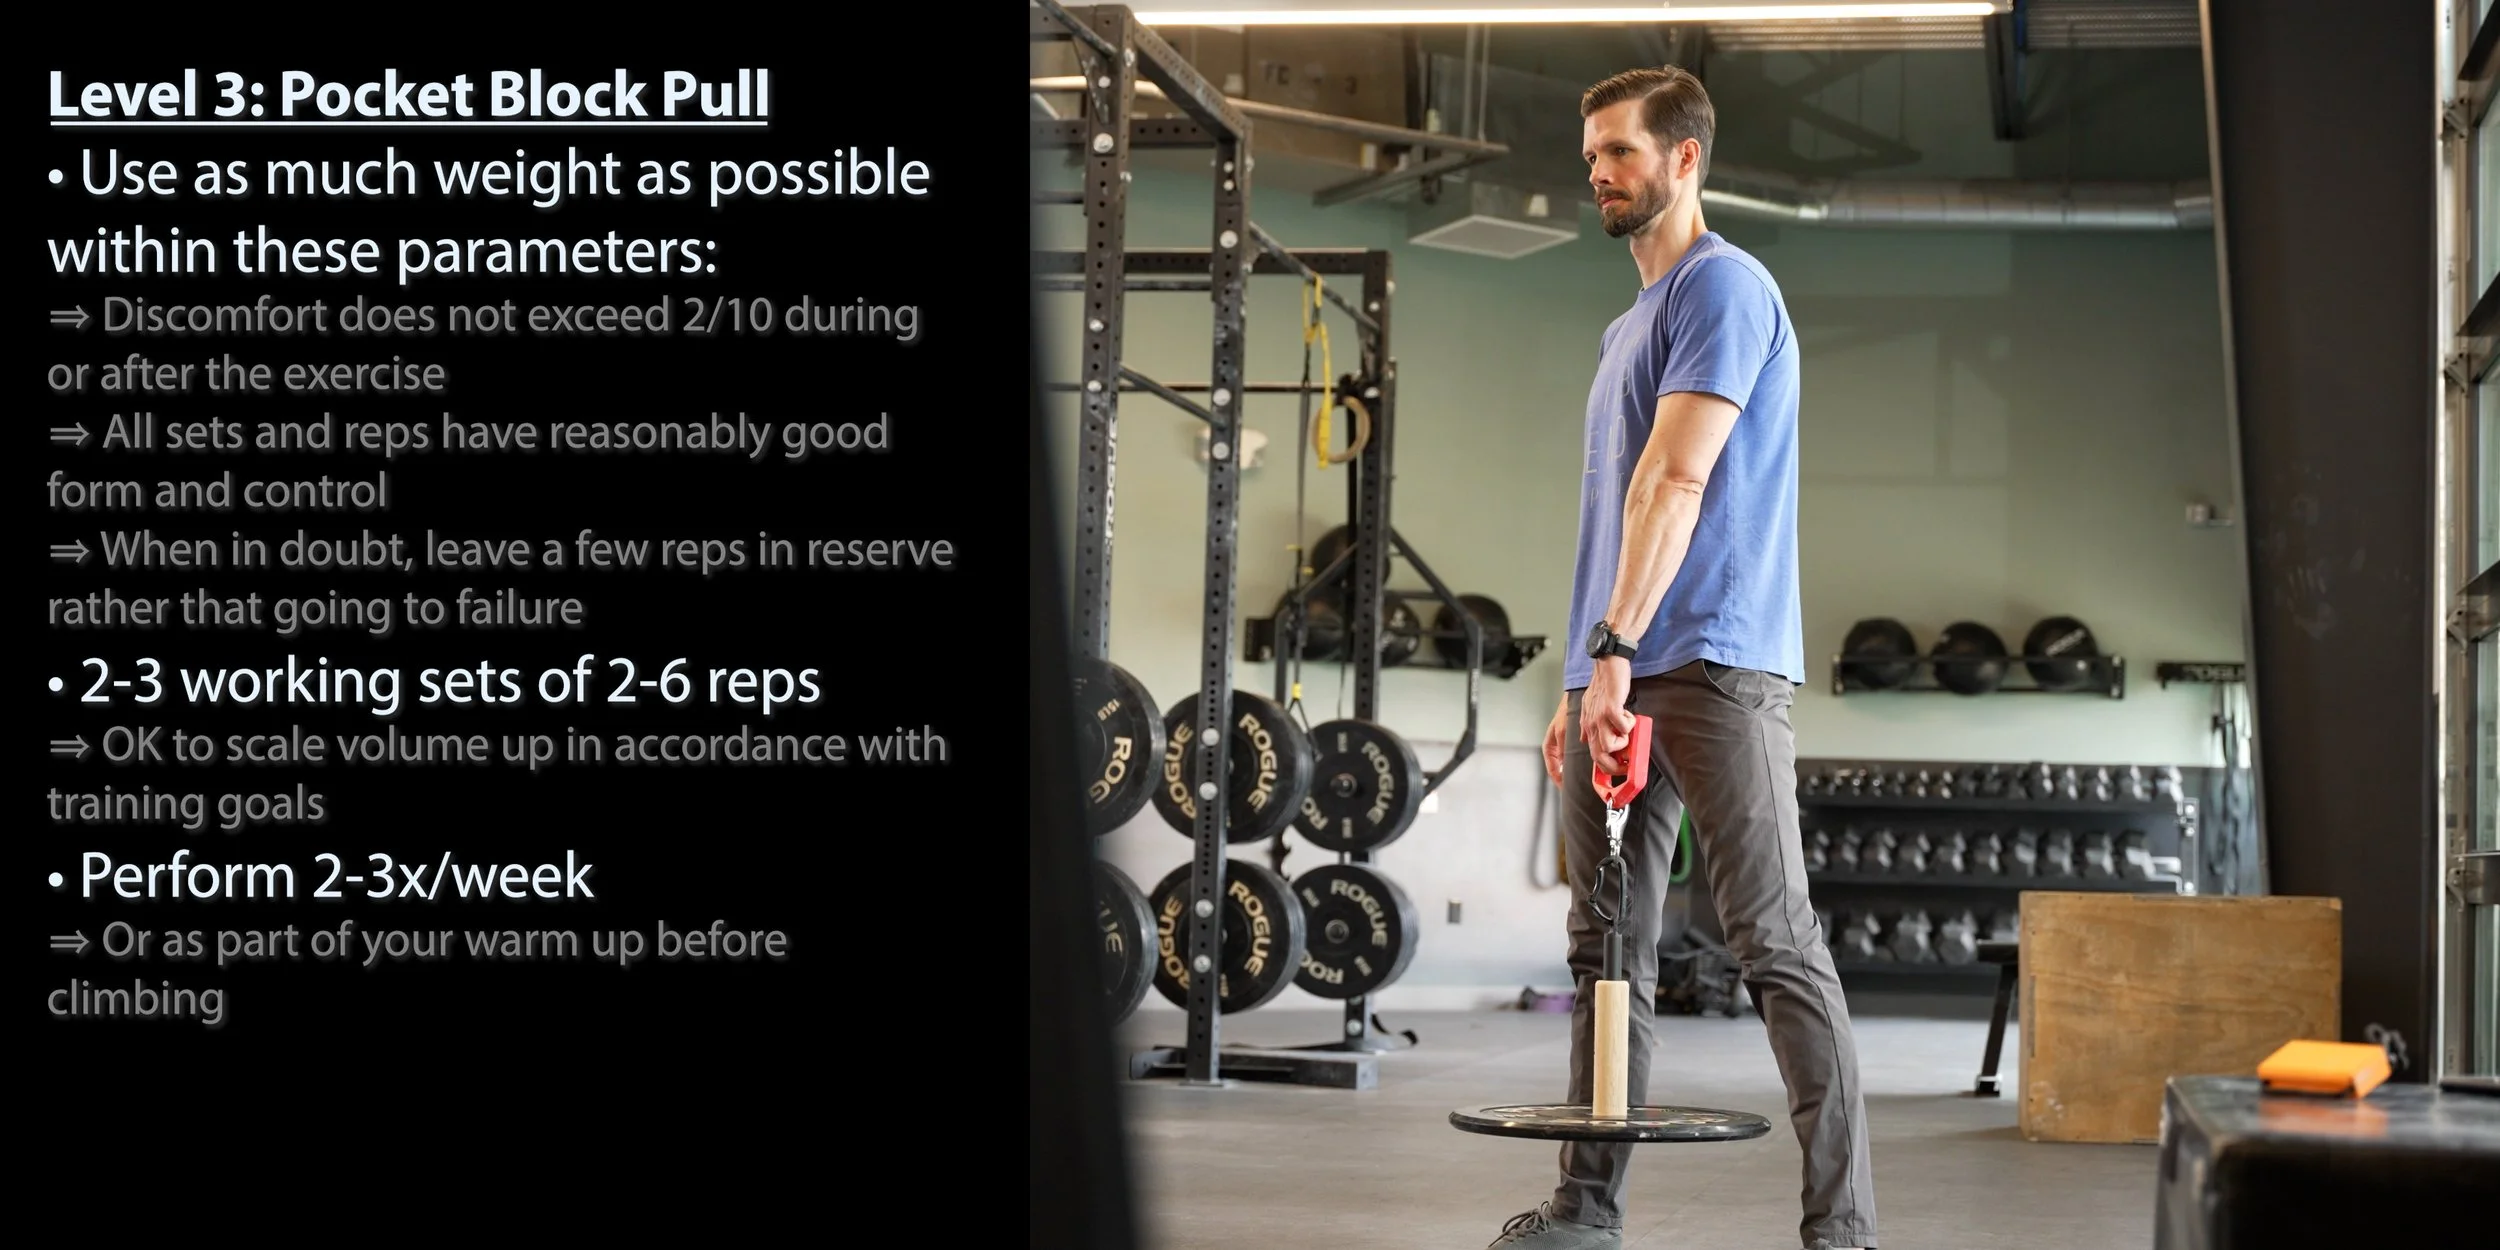
I recommend starting out with very little weight and incrementally increasing over a few sets until you find a “working weight.” Working sets should feel challenging but not overly strenuous or tweaky. You should ultimately aim to do as much weight as possible while ensuring you meet the following criteria:
Discomfort should not exceed 2/10 during or after the workout
All sets and reps should have good form and control
If in doubt, leave 2-3 reps in reserve (don’t go to complete failure)
If you can’t meet these criteria, you should reduce the weight.
I recommend you perform about 2-3 working sets of 4-6 reps, 2-3 times per week or as part of your pre-climbing routine. However, you can of course scale the volume up in accordance with your training goals.
What about hangboarding?

You can adapt these levels to a hangboard instead if you really want to, but if possible I recommend you stick to the techniques we show here as they tend to be easier to modulate and progress over time.
Anatomy Hack to Avoid Lumbrical Strain

Finally, here’s a cool little anatomy hack that’s extremely useful for modulating the strain on your lumbricals. If you’ve seen any of our past videos on lumbricals, you’ll know that most pocket injuries are caused by the lumbricals getting pulled in different directions when one finger is extended and the other is flexed. This flexion happens for a good reason; most climbers naturally pull down with their outside fingers because it actually increases the amount of force you can exert on the pocket – something known as the “Quadriga Effect.”

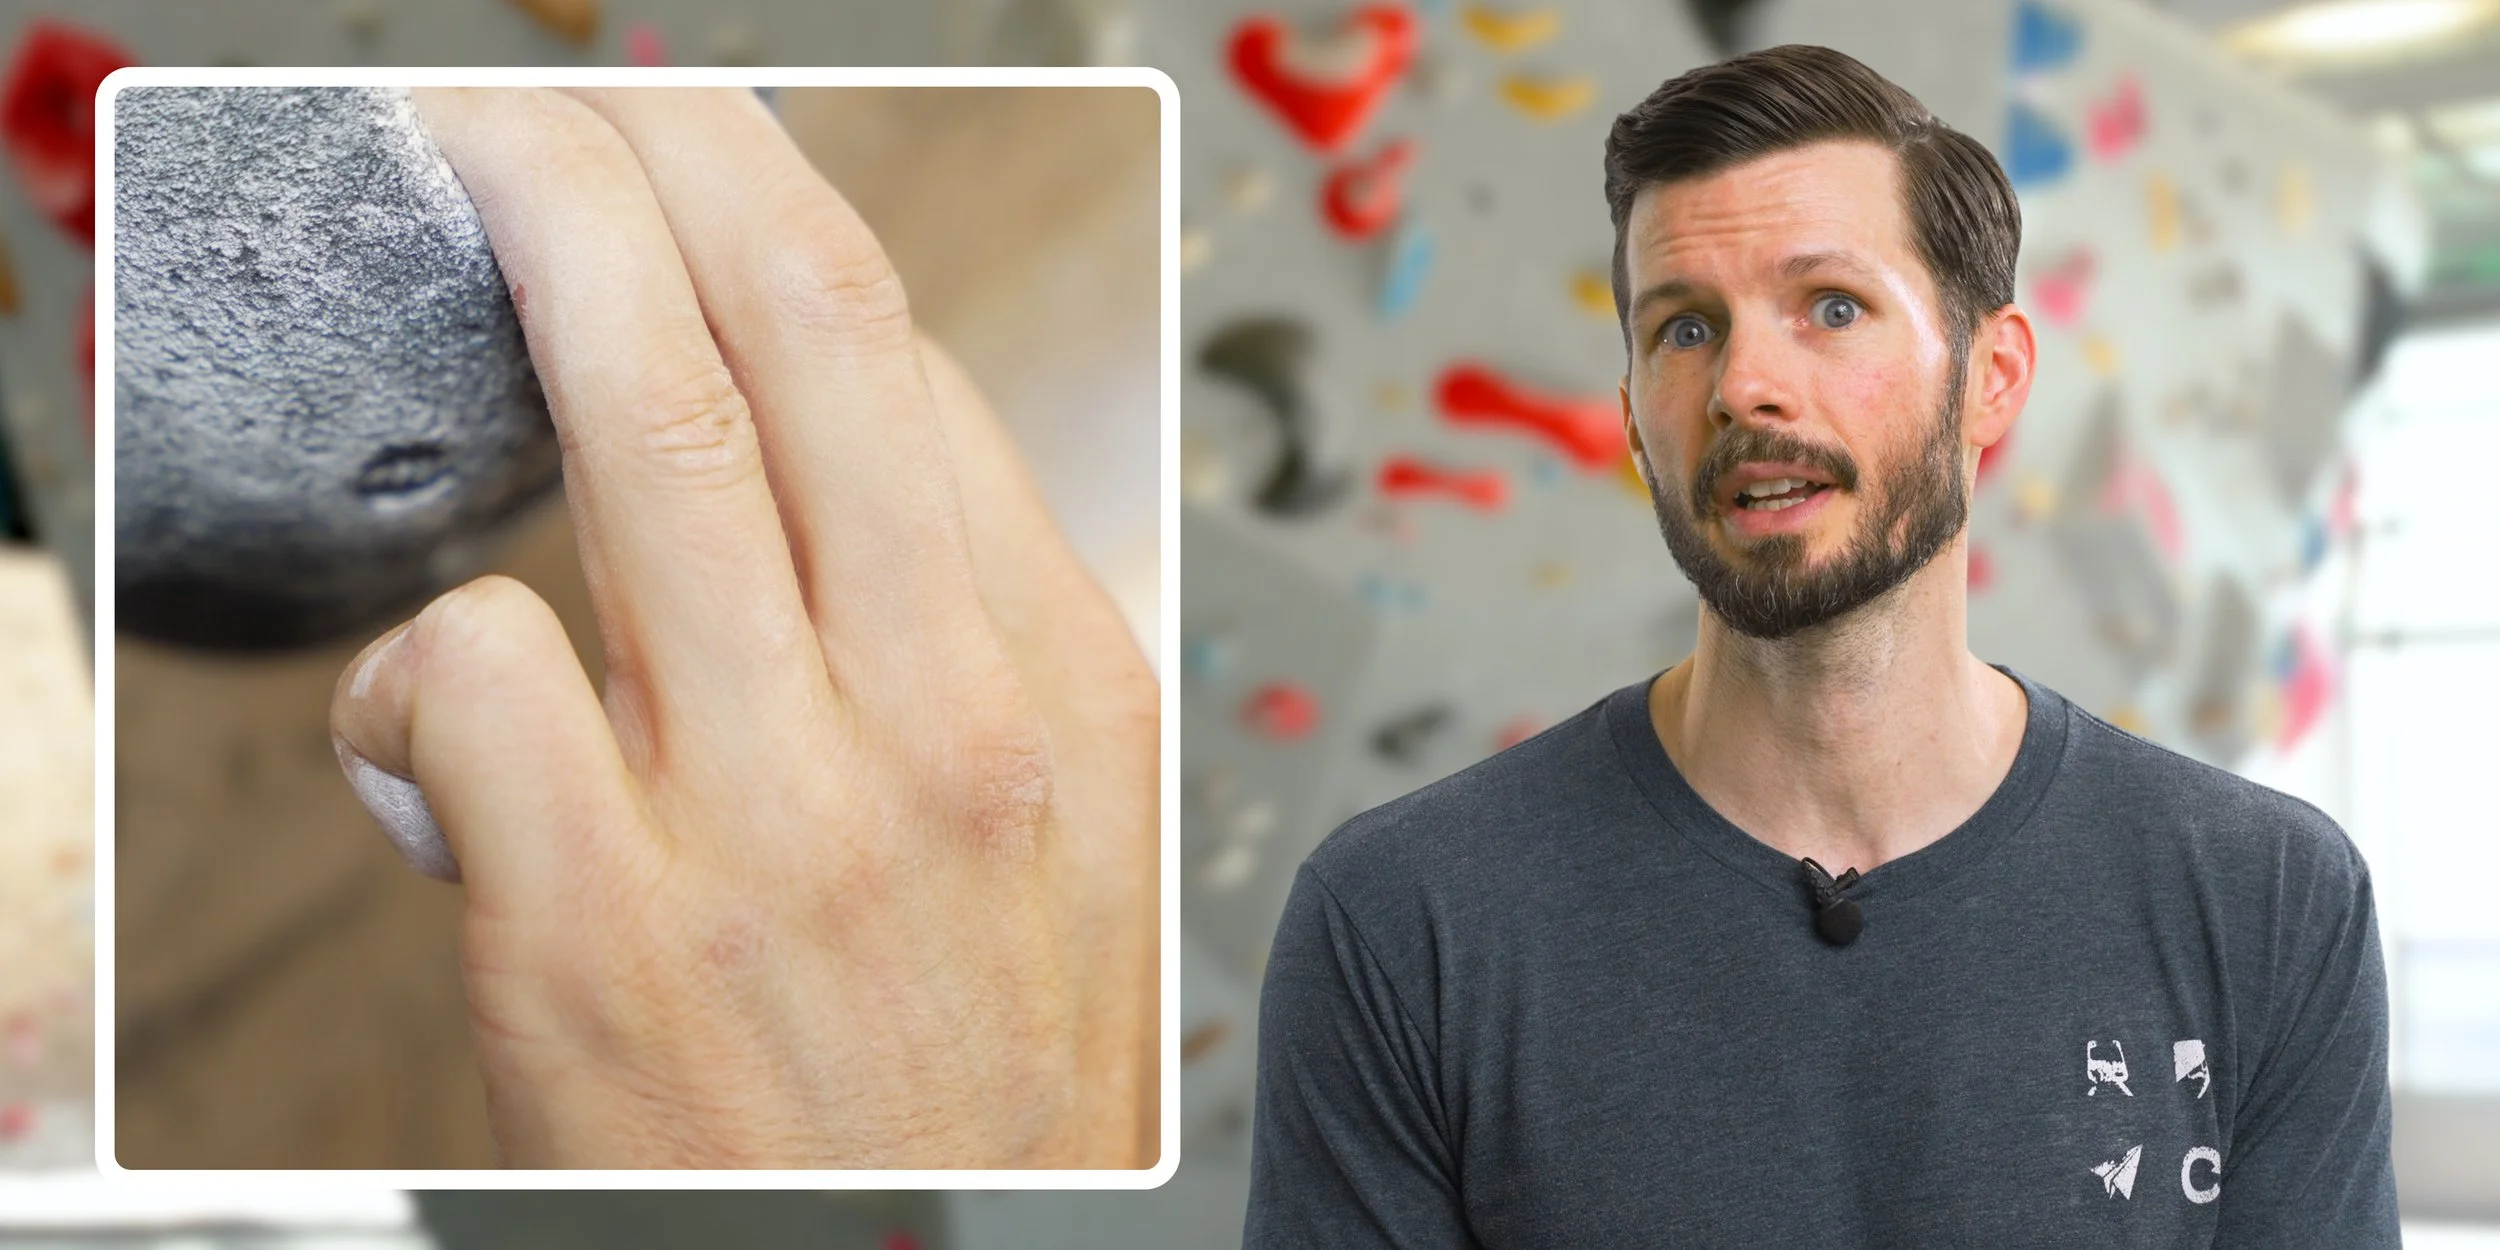
What most don’t realize is that the inverse is true as well. If you’re willing to give up some amount of grip strength, you can significantly reduce the strain on the lumbricals by reducing the flexion of your outside fingers. If you reduce the flexion all the way to the point where the first segment of your fingers are all parallel, there will be much less load on the lumbricals.


So, while climbing and training on pockets, use this method to modulate how much load your lumbricals are taking. You can even use this as a progression variable by starting out with minimal flexion and gradually building up a tolerance to full flexion at higher loads.
Conclusion
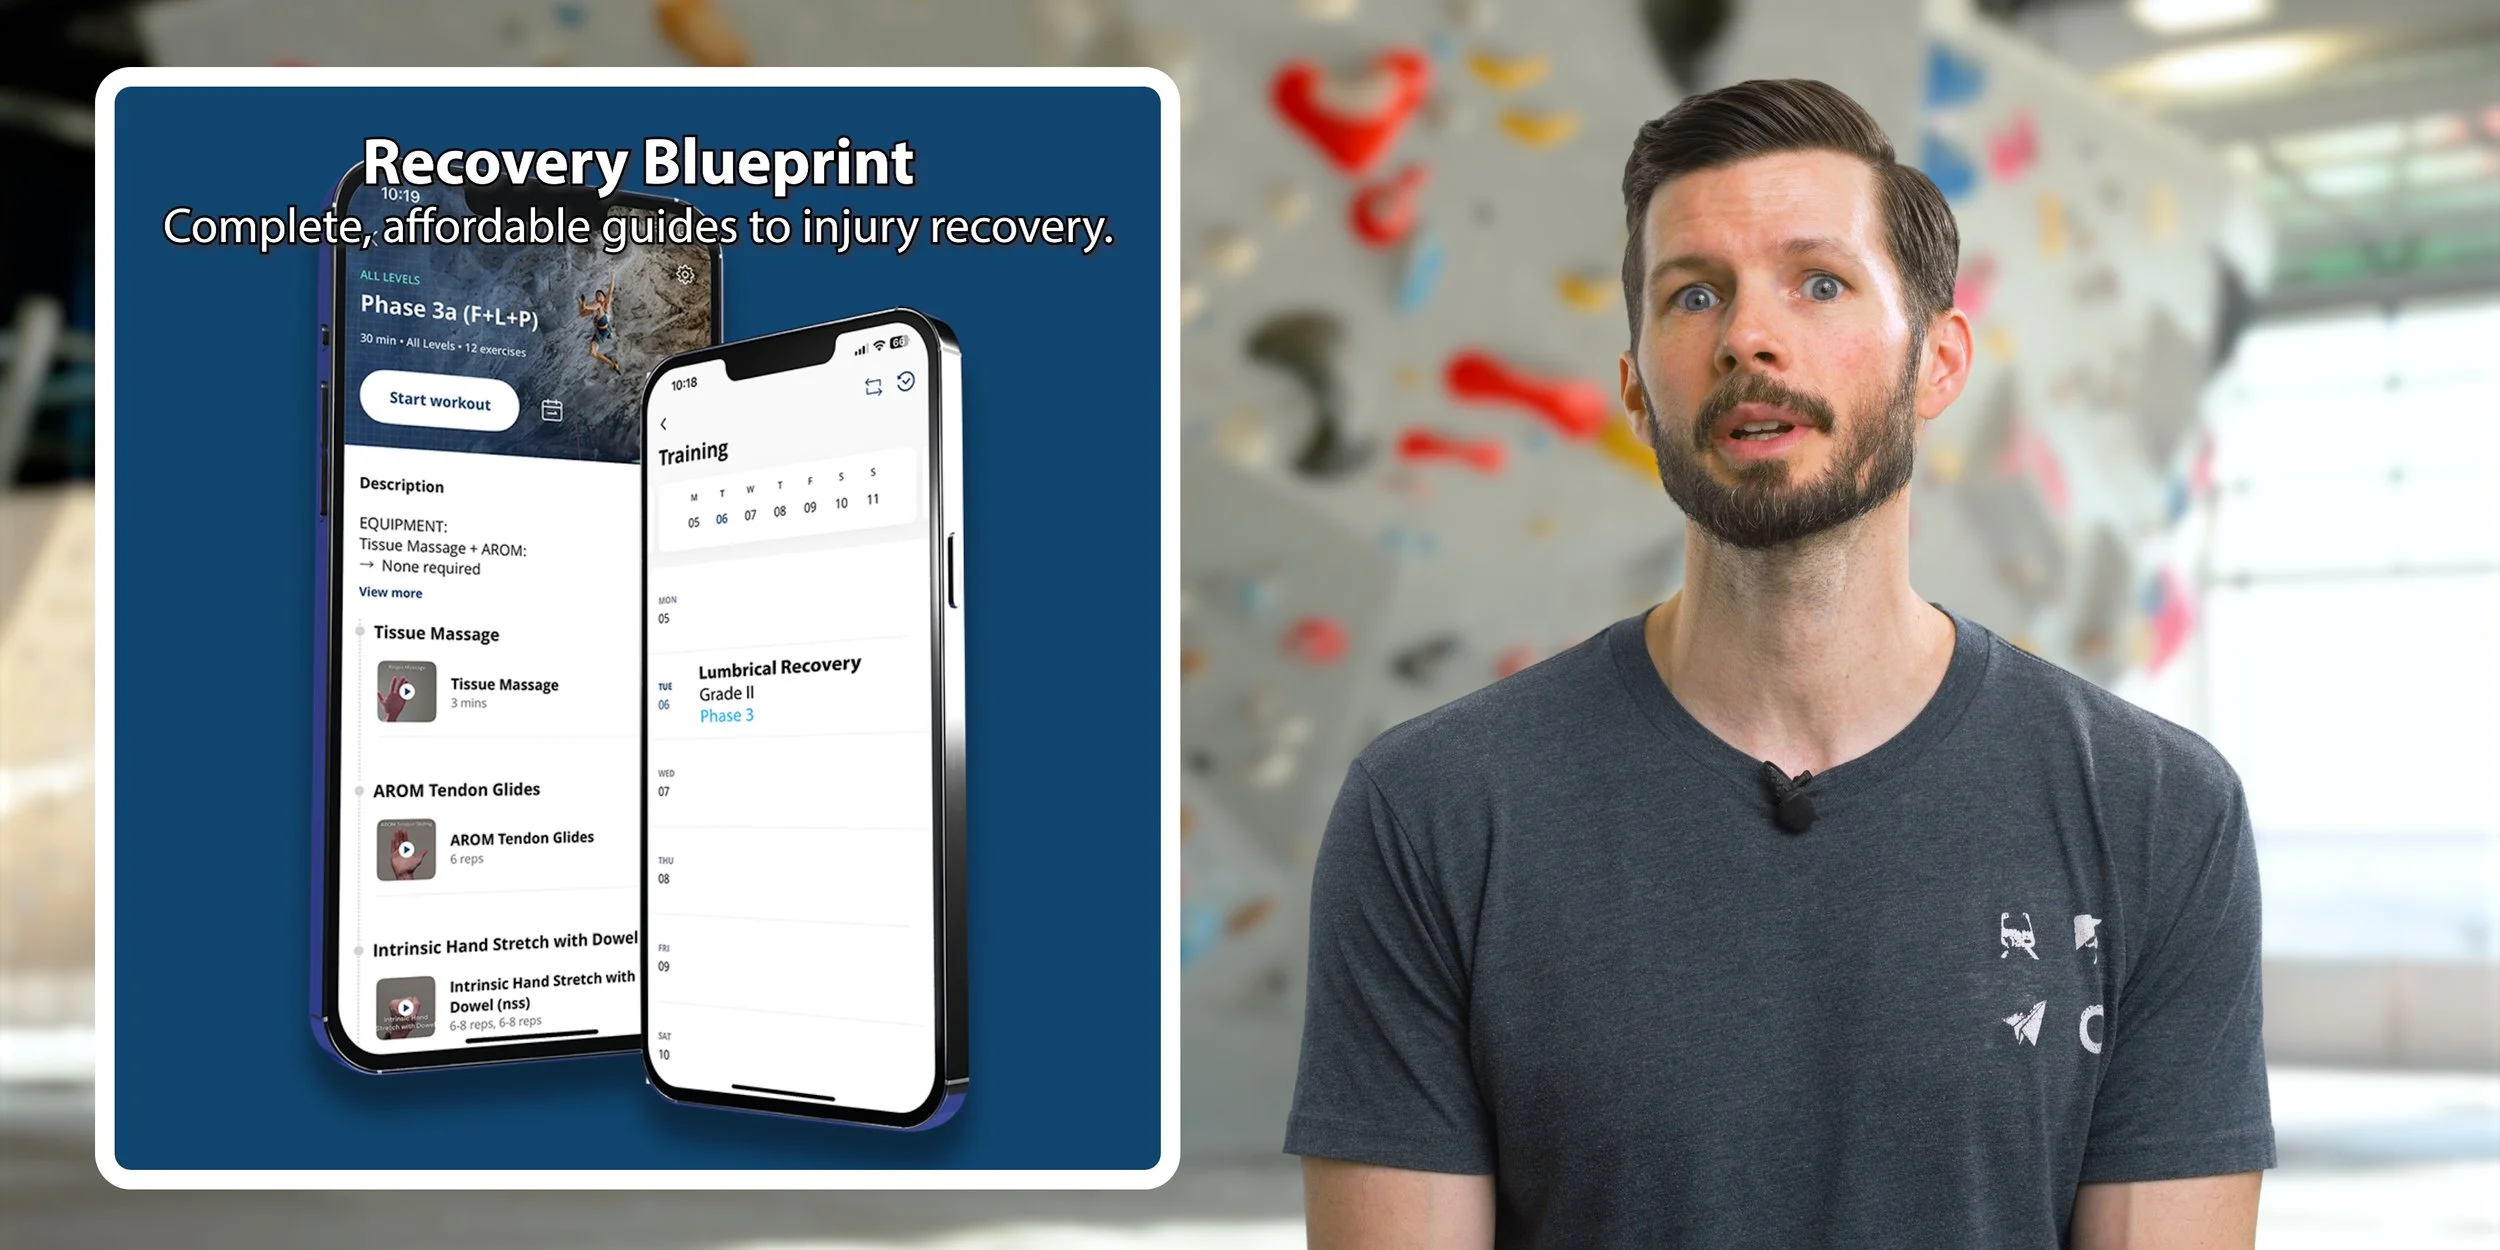
Don’t forget to check out our insanely affordable Recovery Blueprints if you’ve got an injury, and use code ‘Frictitious10’ for 10% off any portable Frictitious board. Until next time: train, climb, send, repeat!
DISCLAIMER
The Beta Agency is providing content on its website that aims to inform rock climbing enthusiasts and/or individuals interested in the field of physical therapy of the various physical conditions that may befall those engaged in the sport of rock climbing, for informational purposes only. None of the information provided by The Beta Agency should be regarded as medical advice or construed to be a medical diagnosis of any form. By using our products, services, and/or the information on our website, you acknowledge that you understand this information is not meant to be a substitute for medical advice from an appropriate licensed healthcare professional, and that you will not rely on any of the information you acquire from us as the sole basis, personally or as a suggestion to others, to make any healthcare-related decision(s). If you suspect that you may have a medical condition that you are trying to diagnose, we strongly urge you to seek the advice of an appropriate medical practitioner. If you have a medical emergency, you should contact emergency services immediately.
Click for full Terms and Conditions and Privacy Policy