Why Does No One Teach this Climbing Technique? [Scorpion]
Hooper’s Beta Ep. 144
Introduction
Today we’ll be teaching you an extremely useful technique that is widely applicable in climbing, yet not often taught. It’s referred to as the scorpion, and unlike in many other sports where the scorpion can ruin your day, in climbing, the scorpion technique is useful when reducing or controlling a swing, and any time your feet cut, whether that is intentional or not, which could end up saving your day.


The scorpion technique gets its name from the somewhat extravagant movement you get in the lower half of your body. In reality, this technique is an example of scapular control where the lower half is moving more dynamically. The best part is that learning this technique will not only apply to dynamic movements, making them more successful and energy efficient, but it will also improve your overall scapular engagement and control which applies to loads of climbing situations.
We’ll be identifying why to use this technique and compare it to alternatives, drills to learn how to perform it, and exercises to train for it.

Scorpion Drills
Disclaimer: The scorpion drill should not be performed by those with current upper extremity injuries, and assumes that the individual is able to perform body weight hangs or pull ups on a large and intermediate/small edge on a fingerboard, and can control dynamic movement in their shoulders. If an individual cannot perform those activities, they should hold off on this drill until they have built more shoulder/finger strength.

Off-The-Wall - Fingerboard
Step 00: Hyperextension / Floor Scorpion
This precursor exercise may be worthwhile as a check to make sure you understand the form of the back arch that gives the scorpion its name.
Set Up: Lie facedown on a yoga mat, crash pad, or acceptably soft piece of ground.
Movement: With your arms in a “face pull” position (elbow and shoulders both bent around 90 degrees), arch your back, lifting your arms and legs off the ground. Your scapula should be squeezed together to get your hands and elbows behind the line of your body. Flex your glutes and hamstrings to curl your legs into a “C” Shape.
Tips:
You should not experience any lower back pain with this exercise. If you do, reduce the amount you arch until you find a pain free position, and / or seek out in person instruction.
This can be a nice posterior chain exercise, as something of an opposite to the “hollow body hold.” If you find the position difficult, add it into your routine 3-5x / week until you are able to comfortable hold the Hyperextension position for at least 30s
Step 0: Swings on bar
Before we get into the more challenging drills, we’ll start on a pull up bar working on swings. This activity will prepare us for the first drill by getting our body accustomed to feeling the back bend and lower body engagement, as well as preparing the shoulders a bit more.
Setup: Find a sturdy pull up bar, ideally high enough that you can hang, fully extended, without your feet hitting the ground.
Movement: First, hang from a bar, with elbows anywhere from straight (180 degrees) to a 90 degree lock off. Pull your elbows backwards to position your chest under the bar while arching into the hyperextension / back bend position pictured. If you don’t feel comfortable getting into this position, or don’t fully understand the position, go to step 00 and learn the body position on the ground before proceeding.
Once you are comfortable with the back arch while hanging from a bar, relax out of the arch to generate a little bit of swing. Use this momentum to swing back and forth a few times, transitioning between a low angle front lever type position in front of the bar and the scorpion / back arch position behind the bar.
Tip: There are many reasonable elbow angles to use for this exercise, and it is worth experimenting with different ones. For each set, however, I would try to hold a single fixed elbow angle to reduce the urge to control the swing at the elbow instead of through the shoulders and back.
This may be an optional step if the person is already quite warmed up or feels that they are strong enough to start with step 1.
Step 1: Large Swing with Large Edge to Pull

Setup: The first step in learning the scorpion technique is to find a relatively large (30-45mm), flat, edge on a fingerboard. You will need space in front and behind you so that you can safely swing.
Movement: Start by generating a large swing with your arms relatively straight, trying to generate movement from your lower half.
As you begin to swing back, pull yourself up into a pull up position while allowing your legs to scorpion behind you. The relatively flat edge should almost force you into an appropriate scorpion technique:
The rep / set range here is pretty flexible, as our goal is to learn a movement and not to generate too much fatigue. 5-10 swings per session, broken into as many sets as necessary should be a good place to start.
Tips:
Edges should *not* be incut, as this will be too easy to perform the movement incorrectly. Flat, or slightly down sloped holds tend to work better.
On larger edges, it can be tempting to try and control your swing at the elbow rather than the shoulder.
Let your elbows track forward as your legs swing toward the fingerboard, and backwards as your legs swing away from the fingerboard
Until you get the hang of it, it is helpful to choose edges that are roughly 1-1.5x shoulder width apart. This will help bring your elbows out to the side, and encourage the “back and forth” motion of the elbows, rather than a narrower grip which may lead to your elbows getting thrust out in front of your body.
Try to generate your swing from your legs and lower body, as you would on a playground swing. Use this to transition between a little bit of a “front lever” position when your body is in front of your hands, to the “hyperextension” position when your body swings behind your hands.
Step 2: Small Swing with Smaller Edge to Pull

Setup: Step two is going to be very similar to step one, but you want to find a smaller edge -- one that you can still hold onto well, but that you find a bit more challenging. It should still be flat and not incut.
Movement: First, generate a small swing, hanging with elbows almost straight, but not locked. Try to feel out the same back and forth tempo from step 1. Once this feels solid, try again, but this time, during the swing, pull yourself up into a pull-up position as your body travels behind you.
The rep / set range here is pretty flexible, as our goal is to learn a movement and not to generate too much fatigue. 5-10 swings per session, broken into as many sets as necessary should be a good place to start.
Tips:
An elbow angle of 90-120 degrees is likely to be easiest, while near straight arm, or a very deep pull up is likely to be harder.
This exercise can be made a little bit harder, and for some people more intuitive, by doing the swings on a sloper instead of a small edge.
Remember to let your elbows track forward as your legs swing toward the fingerboard, and backwards as your legs swing away from the fingerboard.
On-The-Wall - Overhangs
General Tips/Background

To perform the next steps, we’ll want to move to an overhanging section of the wall.
You’ll want to select two holds. The holds can be offset from one another meaning they do not have to be perfectly parallel like the fingerboard was.
You don’t want them to be extremely juggy, nor do you want them to be facing each other so much that they feel like a side pull or compression like move.
Step 3: On The Wall Feet Cut with Replacement

After selecting two good holds, find a low foot. The lower the foot, the more momentum you’ll generate and the more you will have to control the cut.
Start by allowing your foot to cut, generating a swing back just like you did on the fingerboard.
After performing the scorpion technique, try to place your foot back on the wall. Repeat this 2-4 times, stopping if you need to change holds or adjust your grip.
3-5 sets is a good place to start for most people.
If you find yourself getting tired, or the movement begins to make less sense rather than more, it’s time to move on for the day.
Tips:
Focus on replacing your foot as quietly and precisely as possible. A lot of “clunking” and adjustment is indicative of poor accuracy (make sure to watch your foot as you swing back into the wall). Requiring multiple swings to replace your foot suggests a timing issue, and perhaps inadequate scapular engagement (focus on setting your shoulders and levering into the wall).
A common error here is to tilt your head down too much while looking at your foot hold. This leads to shoulders rising and scapula rounding. This significantly reduces your tension and control.
When successfully executed, this whole movement should feel gentle and “floaty”. Keep practicing until the cut and replacement feels smooth and controlled.
Step 4: On The Wall Dynamic Move
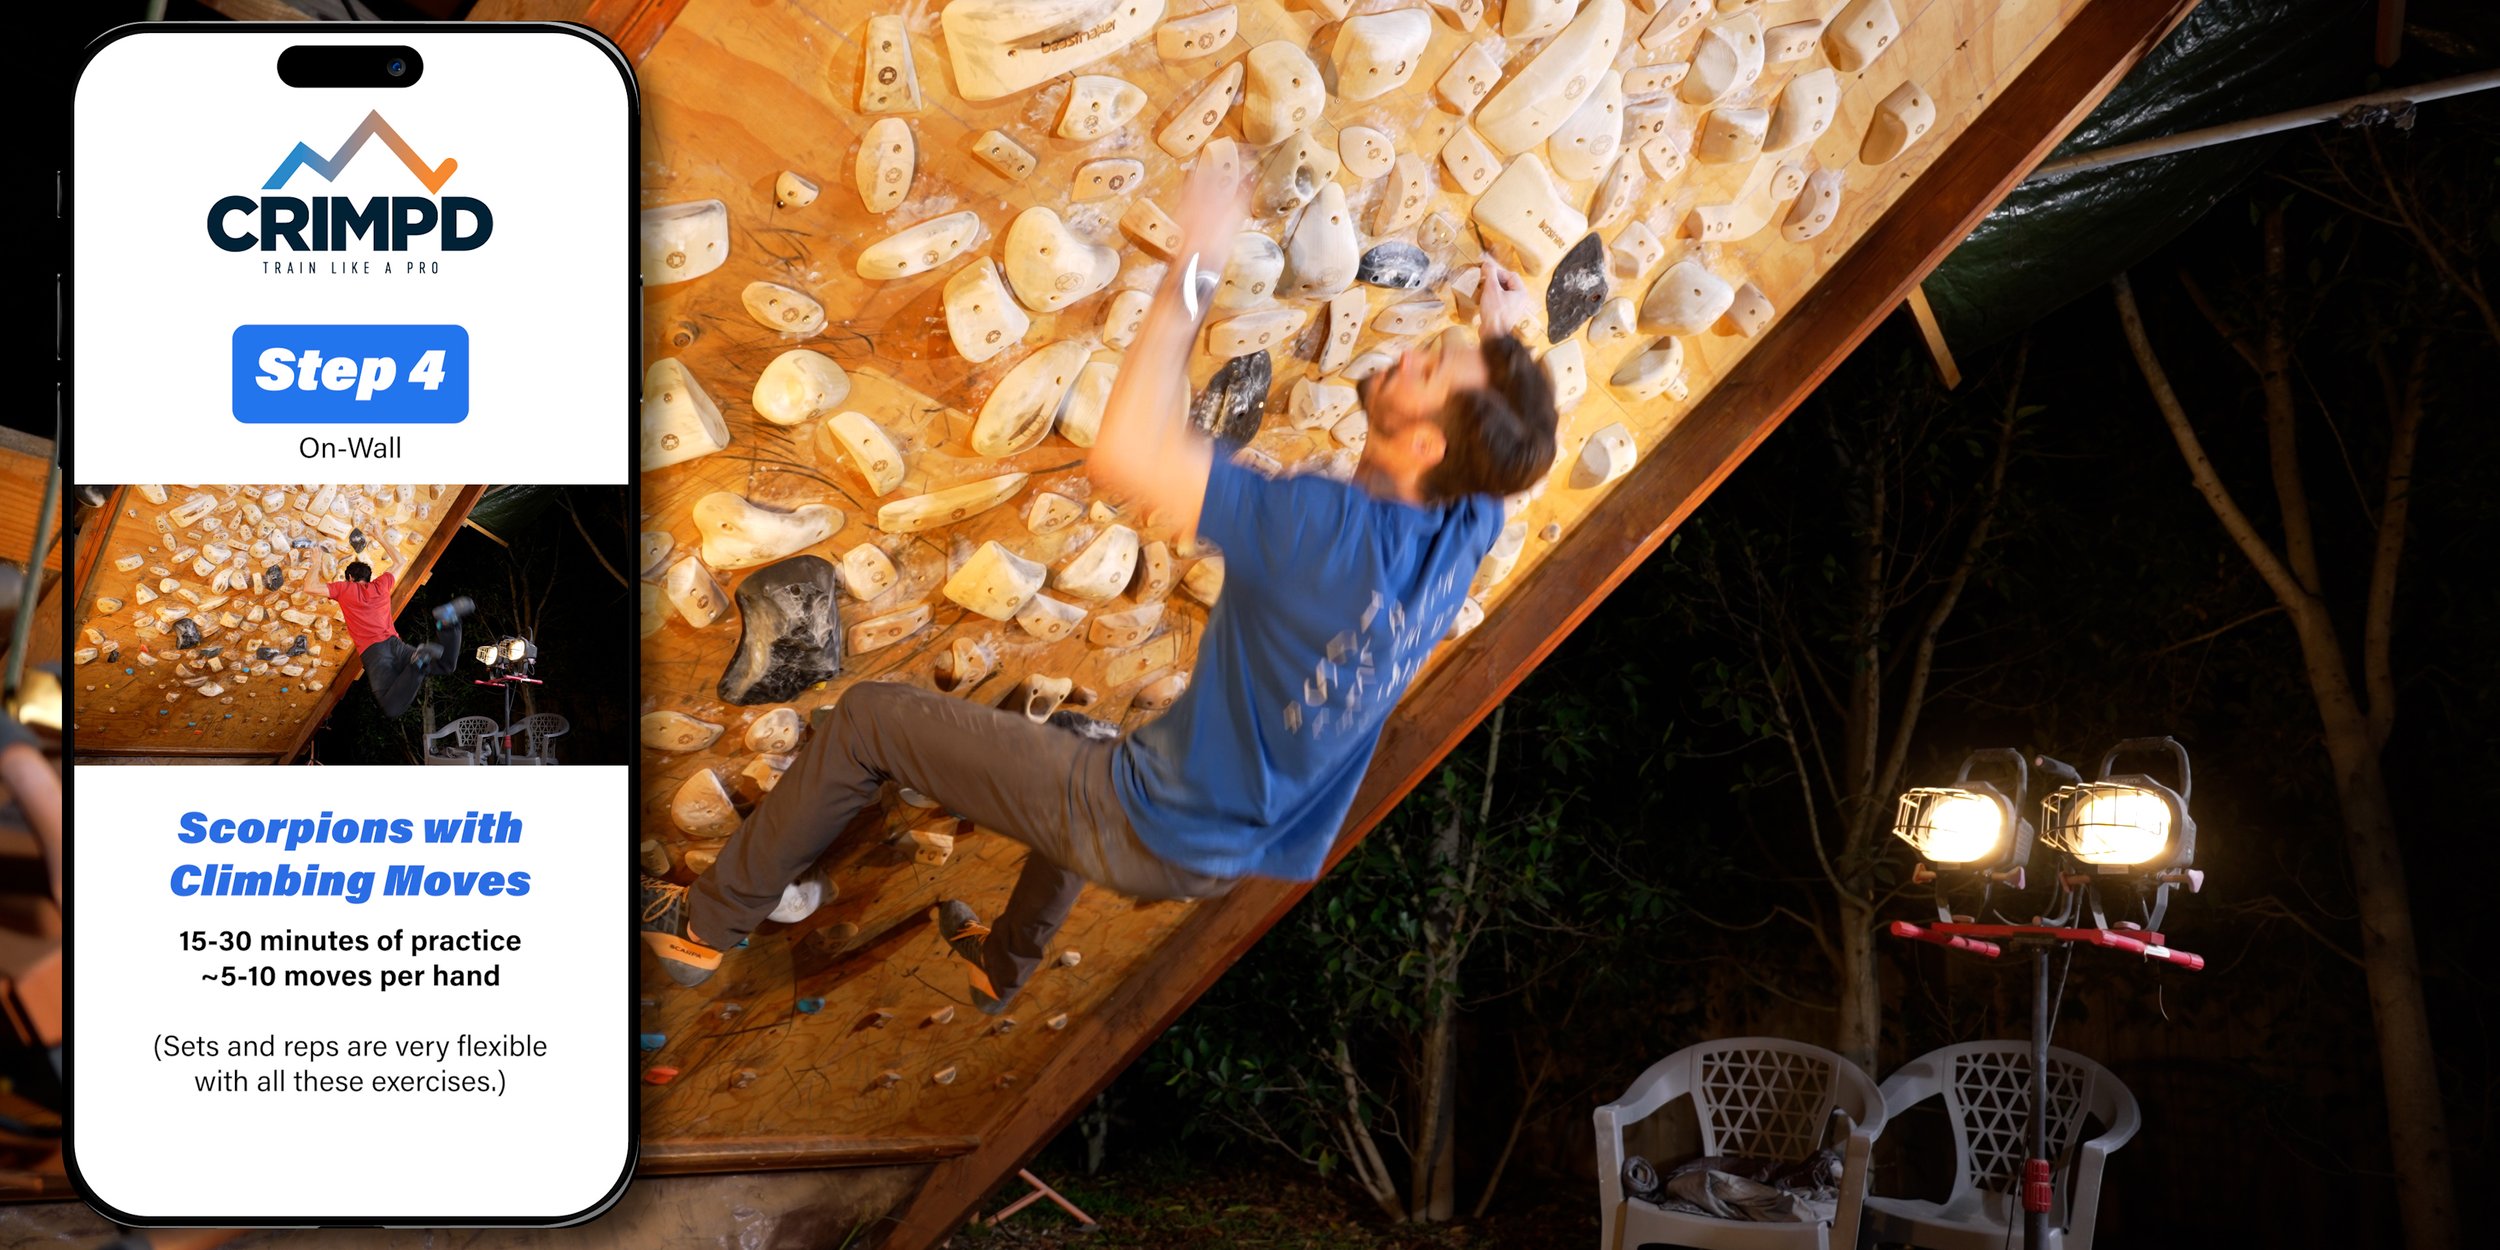

To make this one step more challenging, we’ll now move to the hold we were just on and perform the scorpion move dynamically.
To do this, select a hold below the previous target hold, or select new holds that you can move to.
Place your feet wherever appropriate, and then make a dynamic move to the target hold.
Allow your feet to cut, perform the scorpion move, then control the return swing as you try to place your feet back on the wall.
This should force you to adopt the scorpion position more quickly, and in a fashion that aligns better with actual climbing.
Tips:
Listen to your body, but a good target range here is 15-30 minutes of practice, and 5-10 moves per hand.
These are not meant to be jump moves.
Attempt to keep good tension throughout the hand movement, only allowing your feet to cut once your hand has settled on the target hold. This situation is common in bouldering, such as deadpoints between extended hands and bad feet.
Step 5: Dynos


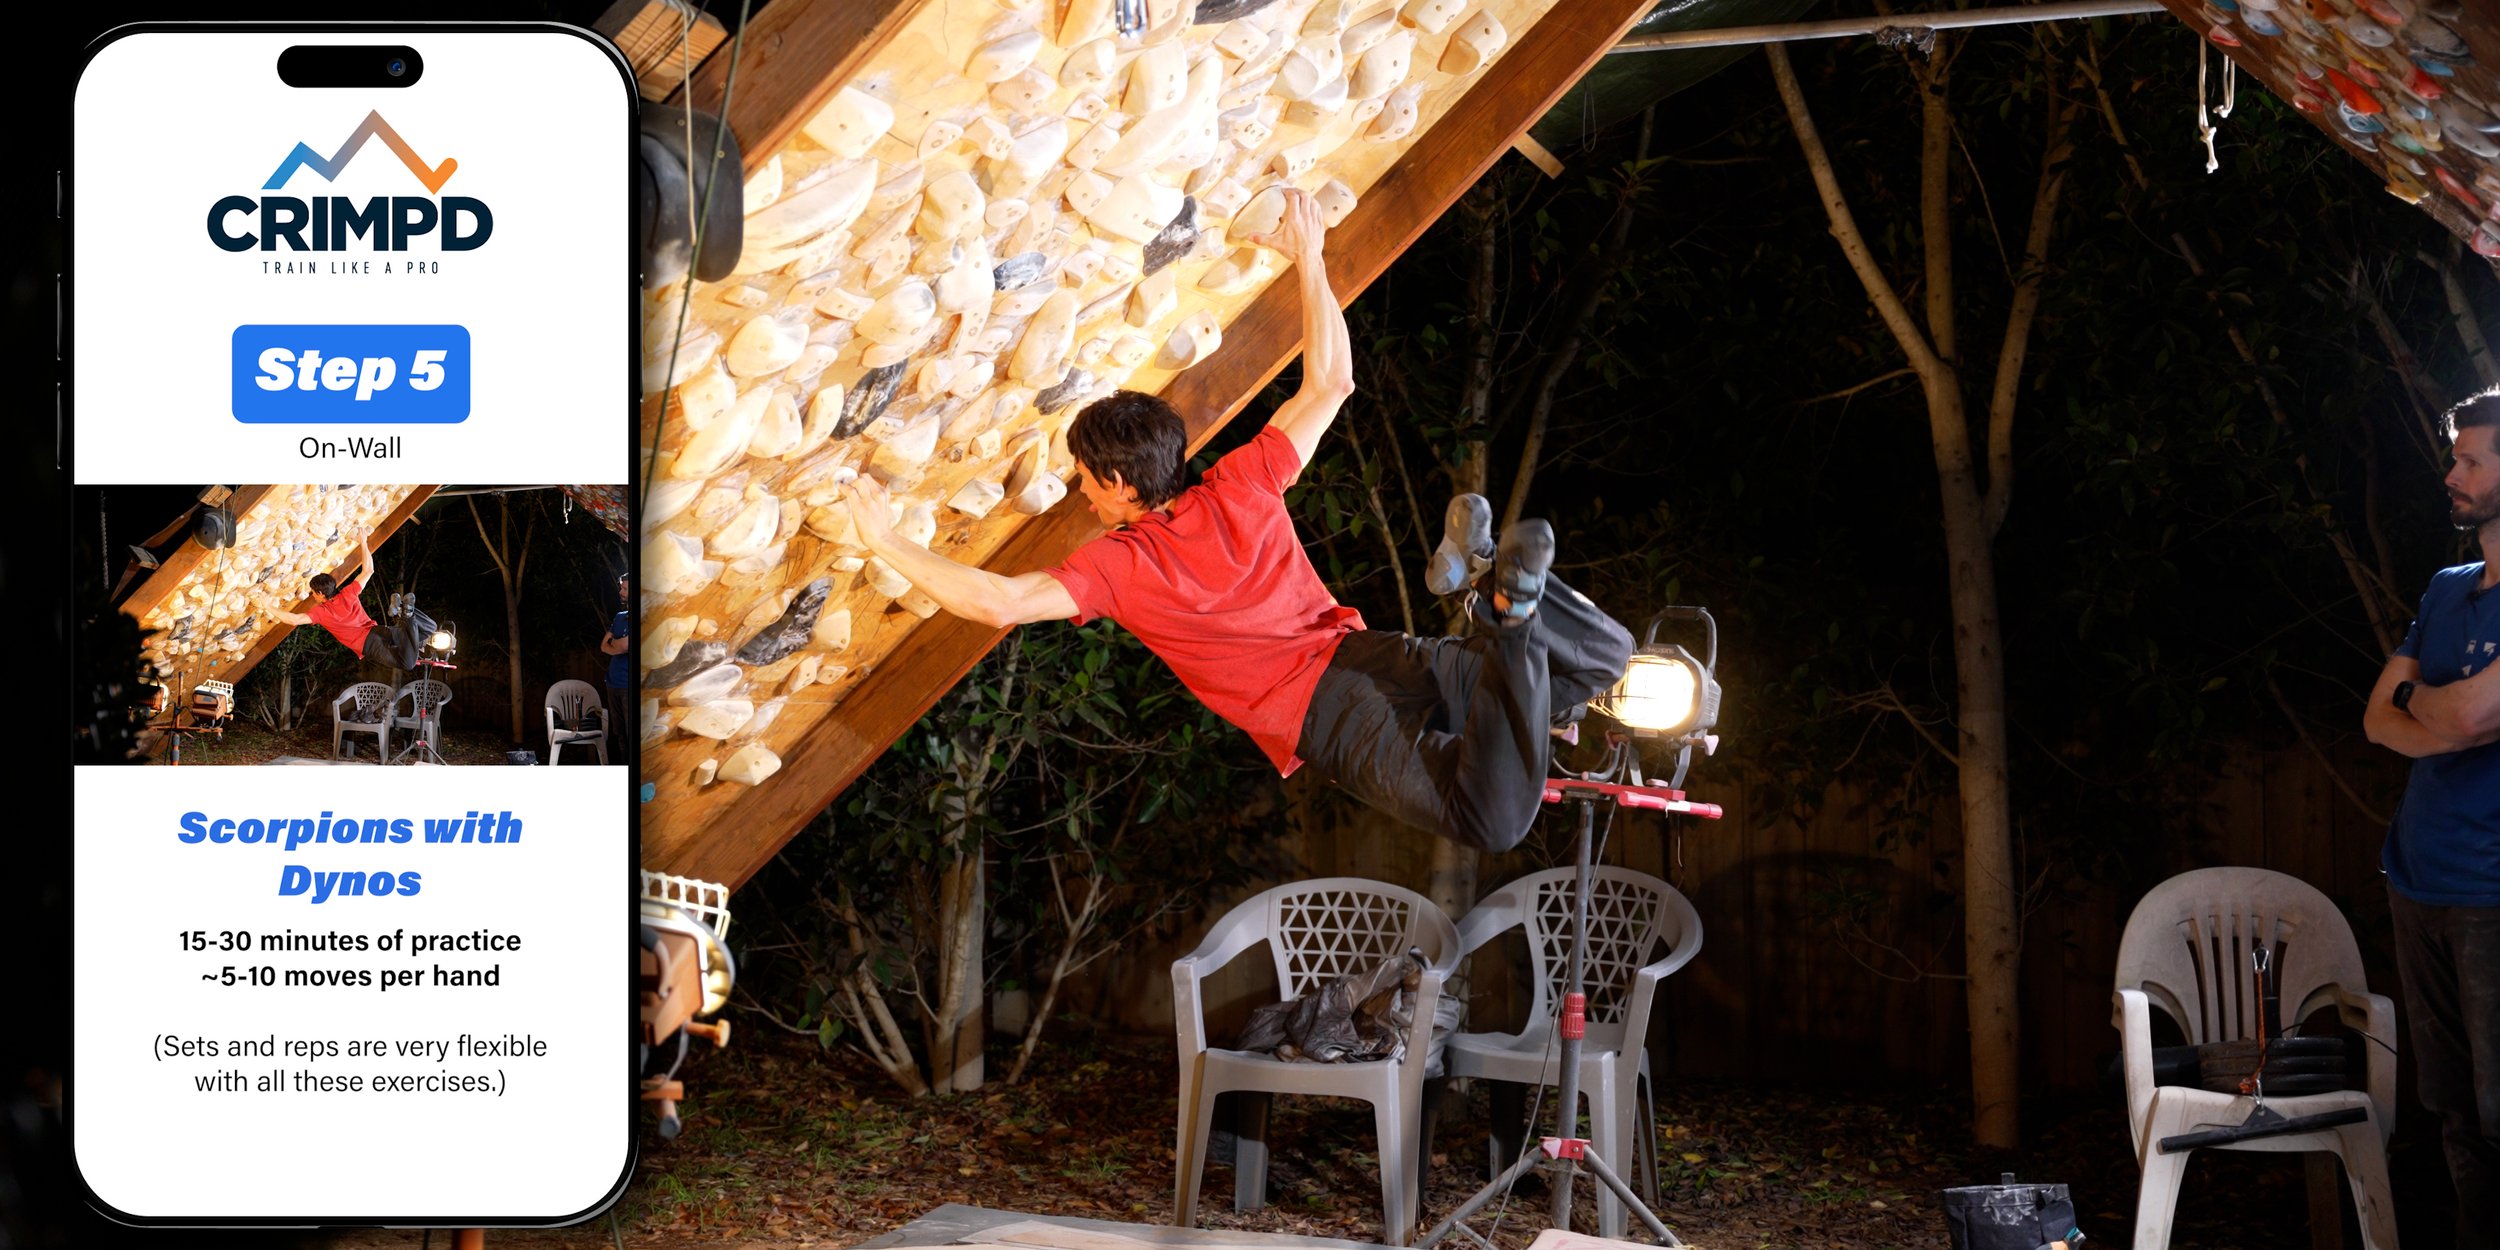
Similar to step 4, but graduating to full on jumps. The larger the moves the faster you’ll be moving and the more important it will be that you finish the move in precisely the right place. This will force you to be conscientious with your movement overall, and require your timing and execution of the scorpion to become more refined.
Ideally you will be selecting holds that you can comfortably hang from, but that would be difficult to hold a swing. Moderately good slopers, small incut edges, or somewhat medium sized flat edges are all good choices.
Tips:
Listen to your body, but a good target range here is 15-30 minutes of practice, and 5-10 jump moves per hand.
These can all be on one move (jumping too and from the same set of hands), or spread out between a couple of similar positions.
Concentrating all your attempts on one move will help you solidify the movement pattern initially.
Trying similar but different moves will let you broaden and reinforce your technique so that you’re able to intuitively achieve the scorpion position during a normal climbing session.

DISCLAIMER
As always, exercises are to be performed assuming your own risk and should not be done if you feel you are at risk for injury. See a medical professional if you have concerns before starting new exercises.
Written and Presented by Jason Hooper, PT, DPT, OCS, SCS, CAFS
IG: @hoopersbetaofficial
Filming and Editing by Emile Modesitt
www.emilemodesitt.com
IG: @emile166