Unlock Insane Functional Mobility (Full Follow Along)
Hooper’s Beta Ep. 140
Introduction
Most climbers would love to have better hip, shoulder, knee, or spine mobility, but without a routine to follow we tend to give up quickly. So in this video Ieva and I guide you through our custom mobility routine designed to hit all four of these areas at once! We spent many hours collecting the movements that we personally find useful in our professions as well as ones inspired by the incredible feats of top climbers [b-roll of Adam Ondra doing a crazy heel hook or some impressive example]. It’s made to improve your resistance to injuries, relieve common aches and pains, unlock a new world of technique on the wall, and make you feel loose as a goose. It takes no equipment other than a couple weights here and there, which are optional and can even be substituted with something like a heavy water jug.
Before we get started, I want to mention that this entire routine is available in the Crimpd mobile app. In fact, Crimpd kindly reached out to sponsor this video. The routine will be broken down into easy-to-follow sections that you can follow along at your own pace! If you don’t know, Crimpd is an app made for climbers that contains all kinds of workouts and training advice, some of which from people you already know! They make it easy to add some structure to your climbing routine while also providing simple instructions for you to follow along. Crimpd has a lot of info available for free, and there are even more great features with Crimpd+. Crimpd+ lets you customize your own training plan, access pre-built skill templates and schedule your training more effectively. And the best part is that they’re actively adding more content from creators like us! It’s also cheaper than a Netflix subscription, which is kinda wild.
Special Thanks
Special Thanks to Ieva for making this into such a great flow! Follow her at: IG: @luna.al.sol // YouTube:
🙏 SPECIAL THANKS to Mesa Rim North City! @mesarim_nc & The Wall Climbing Gym @thewallclimbinggym
- Mesa Rim North City: Mention "Hooper's Beta" at the front desk for a one-week pass with free gear rental!
- The Wall: Get a Day Pass and Gear for $15 when you mention Hooper's Beta at the front desk: https://www.thewallclimbinggym.com/
Mobility Routine:
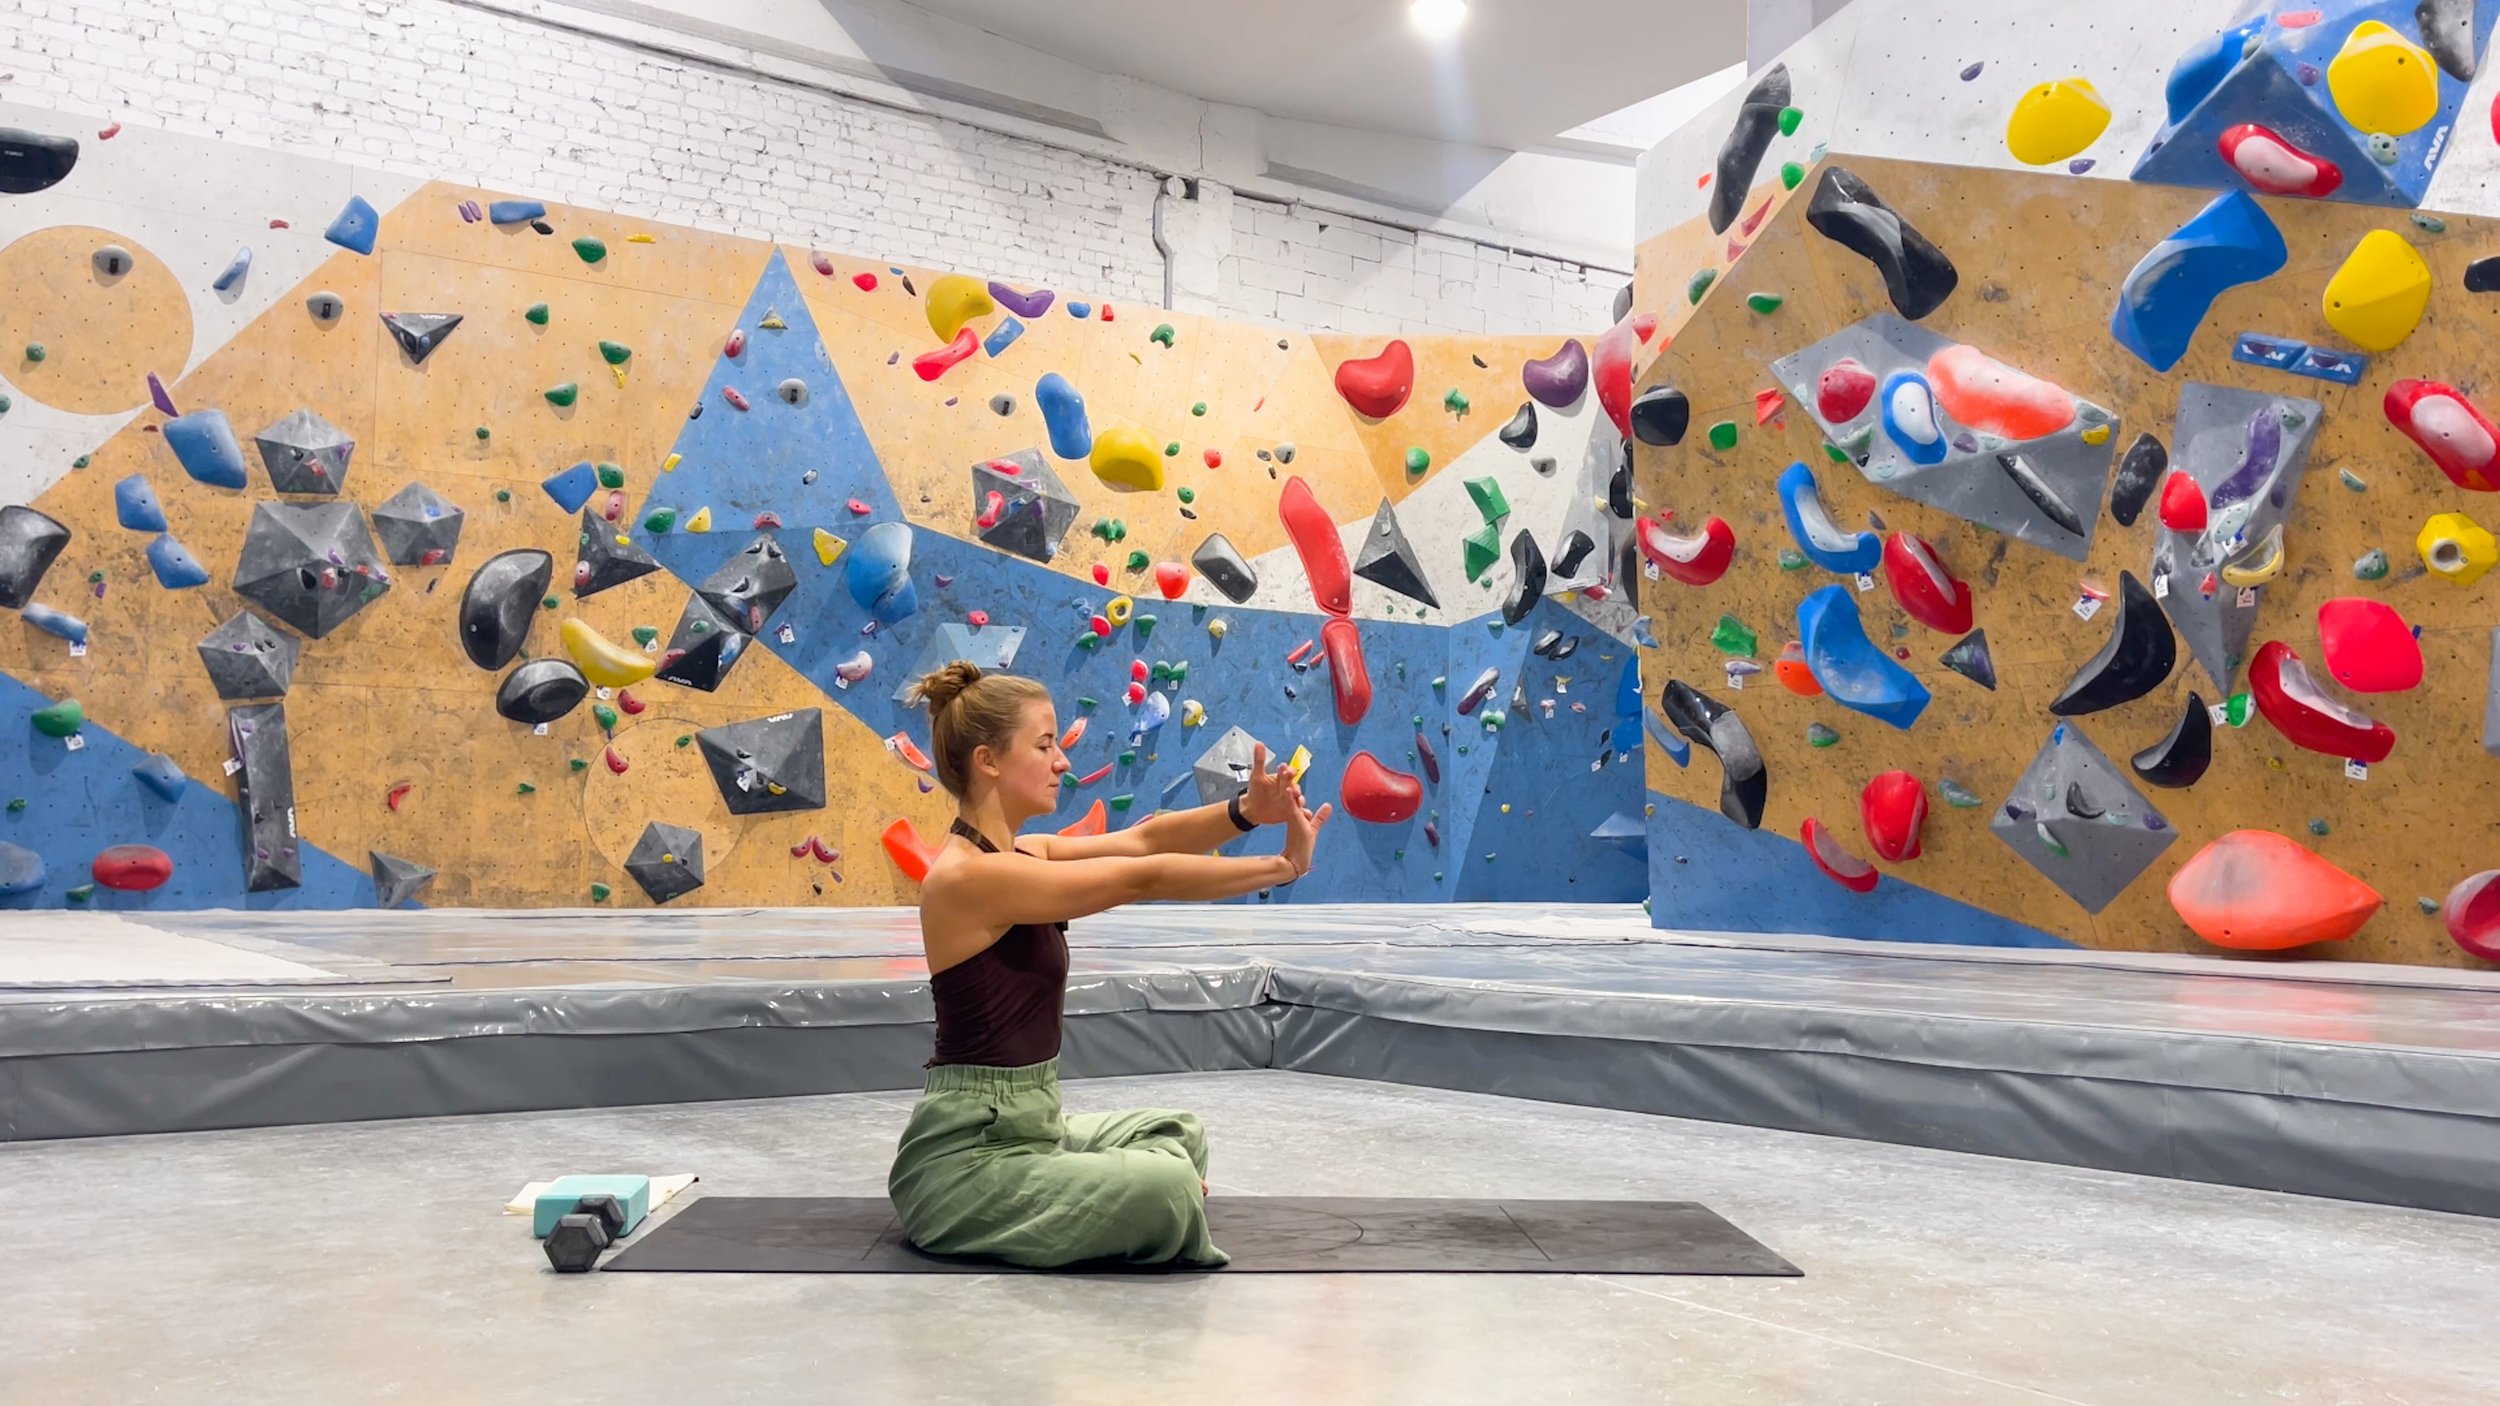
Forearm/nerve glide technique


Setup:
With your arm by your side and palm down (pronated), use your other hand to extend your fingers back until a gentle stretch is felt.
Movement:
While maintaining an equal amount of stretch from the fingers, push your arm away (extending the elbow), and hold this end stretch for a second or two.
Then, reverse this motion and bend the elbow as deeply as you comfortably can. It’s OK if the elbow is now behind your body.
Hold at this end range for a second or two.
Repeat, straightening and bending the elbow a few times.
Purpose:
This is a great movement to keep our vital finger and wrist flexors mobile and healthy, but it’s also useful for mobilizing some key nerves that run down our arms. It can help prevent (or identify) nerve-related discomfort that could lead to larger issues in the future (such as elbow pain) if not addressed.
Notes/Tips:
If you have discomfort, especially at the end ranges, simply reduce the total range of motion (straightening or bending)
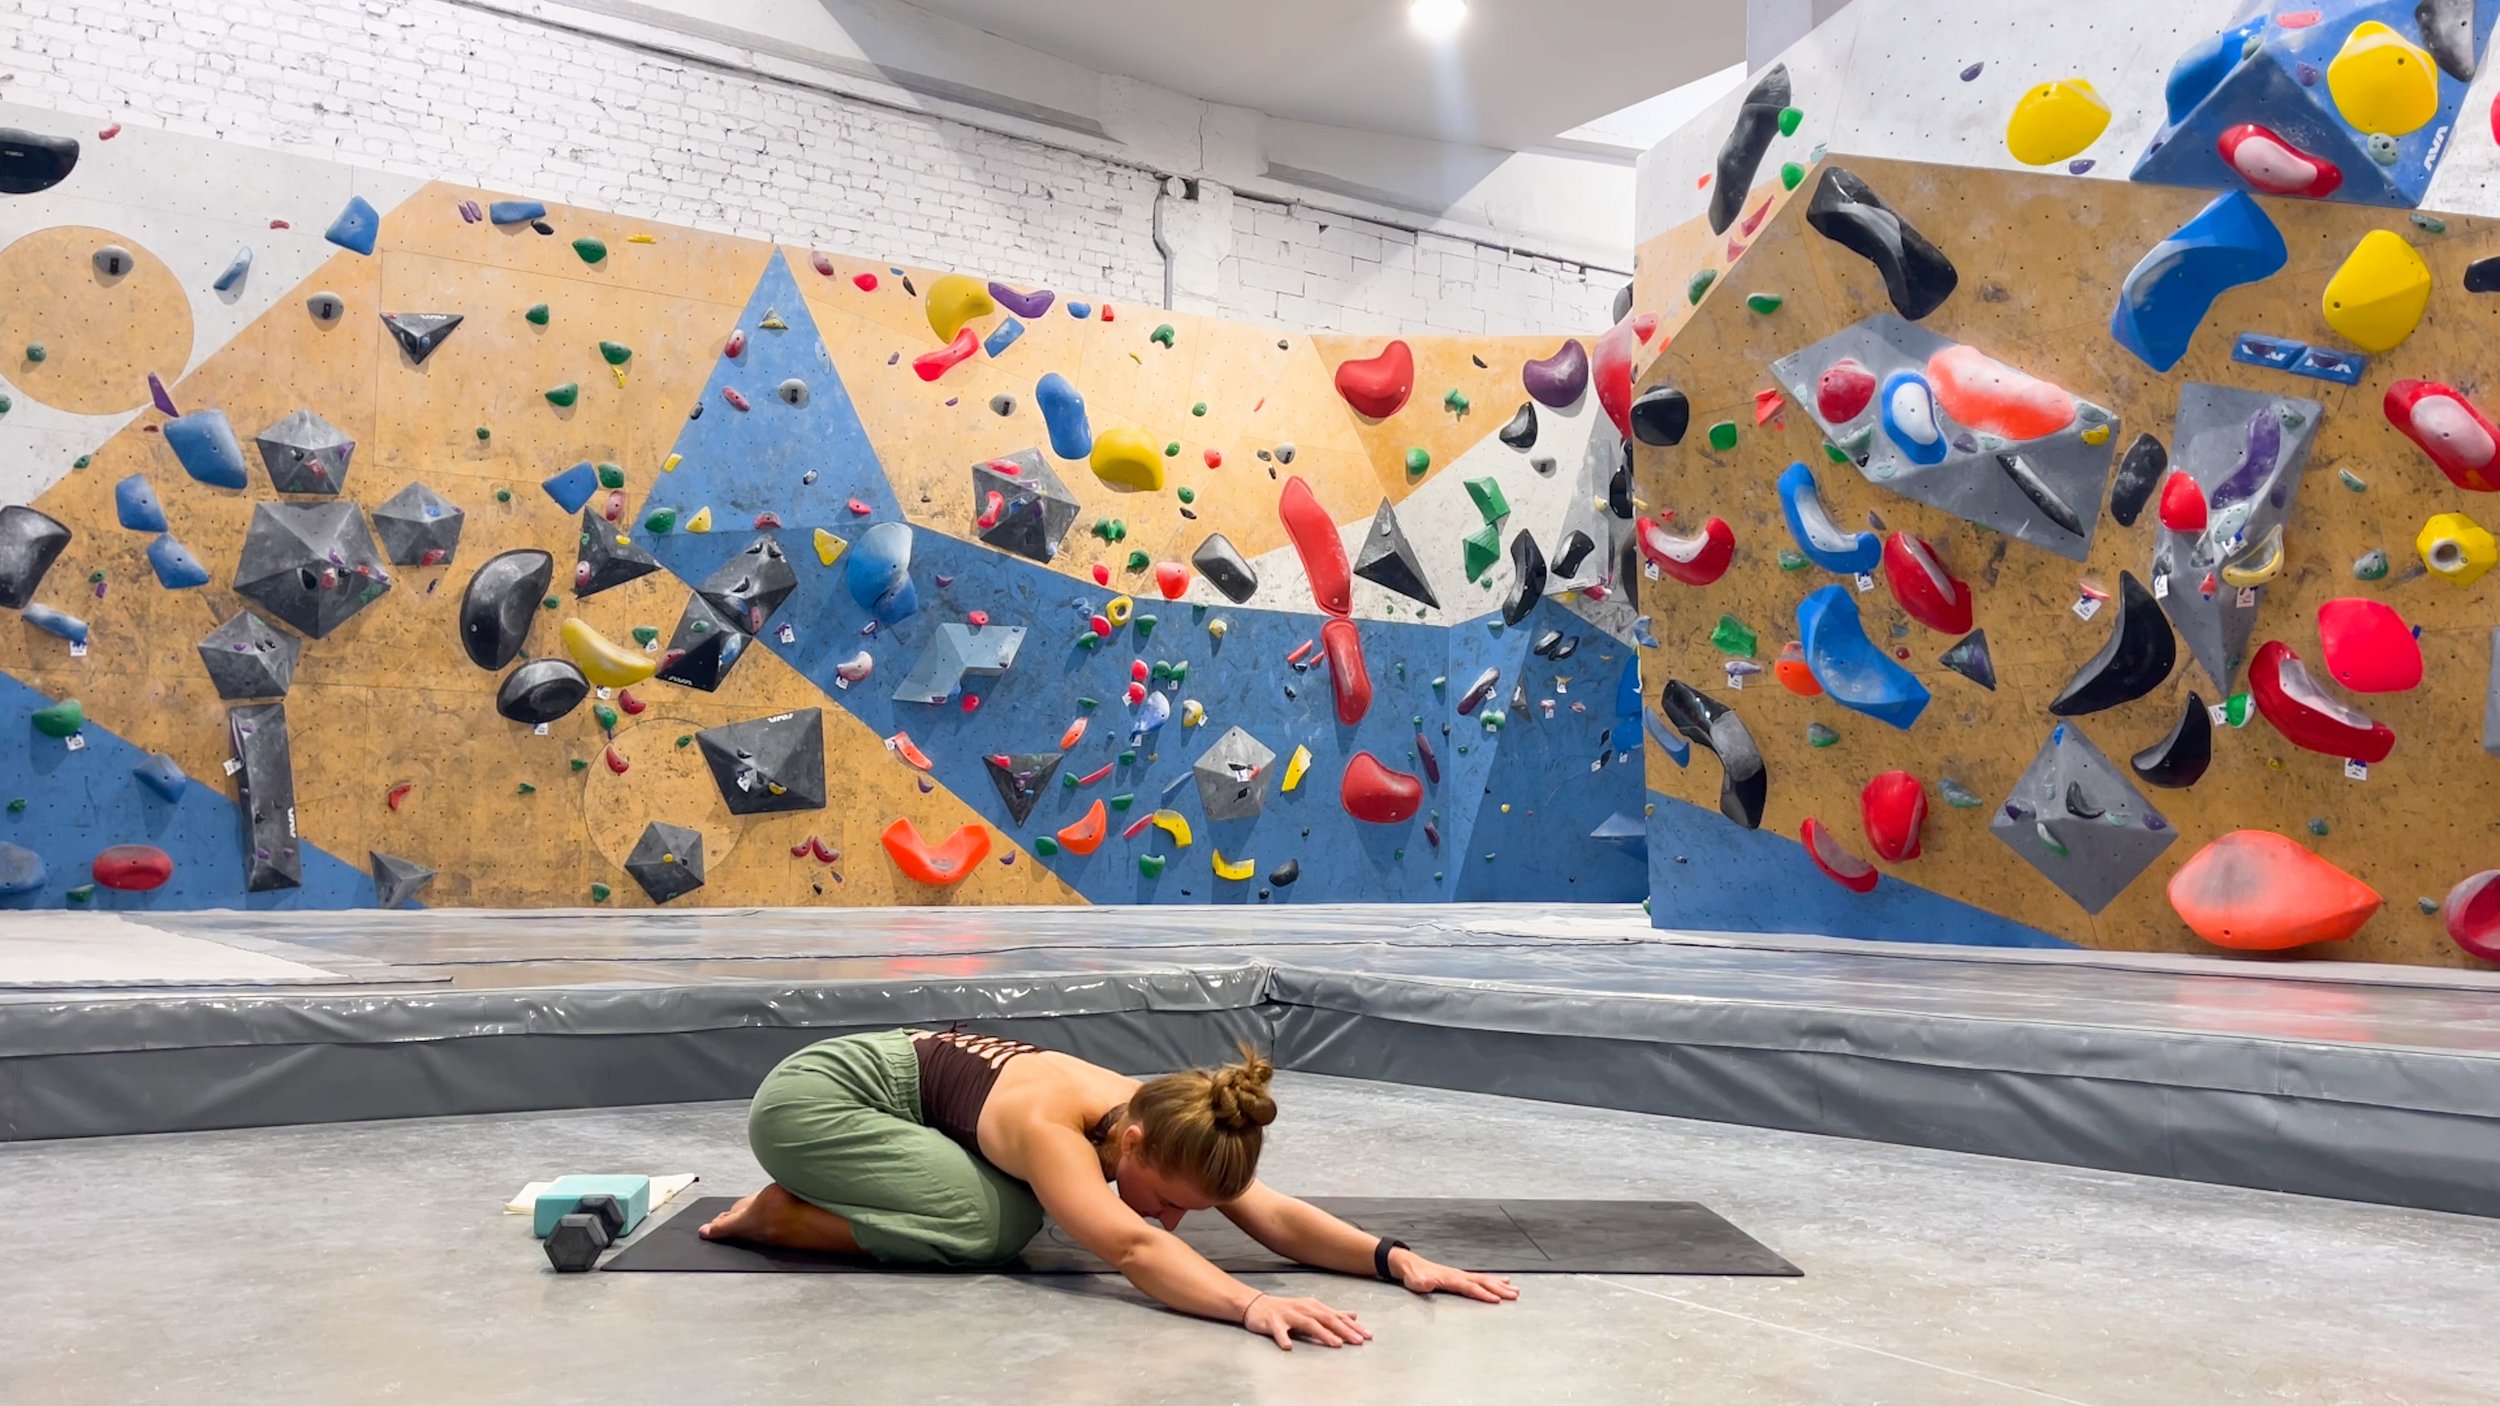
Child’s Pose with Side focus


Setup:
Start on your hands and knees, with knees slightly wider than your feet (it’s OK if the feet are close together/touching).
Sink your body backward and down. Your chest will get closer to the ground (and your thighs) as your hips/glutes get closer to your feet.
Movement:
From this position, you can remain in the center, or as we often recommend, explore moving your trunk and arms to one side and then the other.
Explore your flexibility limitations and focus on any areas that you find more difficult or tighter. This may mean moving your arms further to the side or stretching them further in front of you, or simply moving your chest in different positions relative to your thigh.
Purpose:
Hip flexion range of motion can have a huge impact on climbing performance. From improving your high-step ability to unlocking better, safer heel hooks, this is crucial. The child’s pose stretch is approachable, modifiable, and effective, while also serving to prepare us for slightly more challenging movements later in this routine.
Notes/Tips:
Use your hands to support your body weight if you feel any pain/pinching in the hip or knees.
Search for limitations and try to safely address them. If you feel like it’s harder to move to one side compared to the other, you might want to focus on this side a bit more.
You can also modify/intensify the stretch by playing with your hand placement. Reaching them further to the side or placing one hand on top of the other can increase the stretch in your lats/obliques/etc.
Downward Looking Dog with Alternating knee flexion/extension


Setup:
While on your hands and knees, walk your hands or feet back, keeping your legs and torso straight as comfortably possible but bending at your hips. You should be in an upside down ‘V’ position.
Movement:
Keep one leg straight while bending the other knee. The leg that is straight may feel an increase in stretch.
Alternate legs back and forth, holding for a short period each time.
Purpose:
This two-for-one stretch will help mobilize your hamstring muscles and sciatic nerve. This is useful for climbers, but also simply good preventative care -- especially for those who sit for long periods of time.
Notes/Tips:
You can change the intensity of the stretch based on how close your hands are towards your feet.
If you have shoulder pain during this, modify your position or discontinue.
Deep Squat (weight optional)


Setup:
Stand with feet at or slightly wider than hip distance apart.
[Optional] Hold onto a weight by your chest.
Movement:
Bend your hips and knees, bringing your chest forward as you sit down into a deep squat. Your elbows/arms should be able to go inside of your knees at the bottom of the motion.
Hold briefly, then stand back up and repeat.
Purpose:
Building off the child's pose stretch earlier, this loaded and upright version improves hip flexion mobility by combining your available range of motion with weight. This is important because having flexibility is one thing, but having the ability to move confidently in and out of that range is another.
Notes/Tips:
As you progress weight with this, bring it closer to your body so you put less stress on your arms/back and can focus on the movement.
At the bottom of the pose, you should try to keep your chest up. But while moving into the position, allow your chest to come forward naturally.
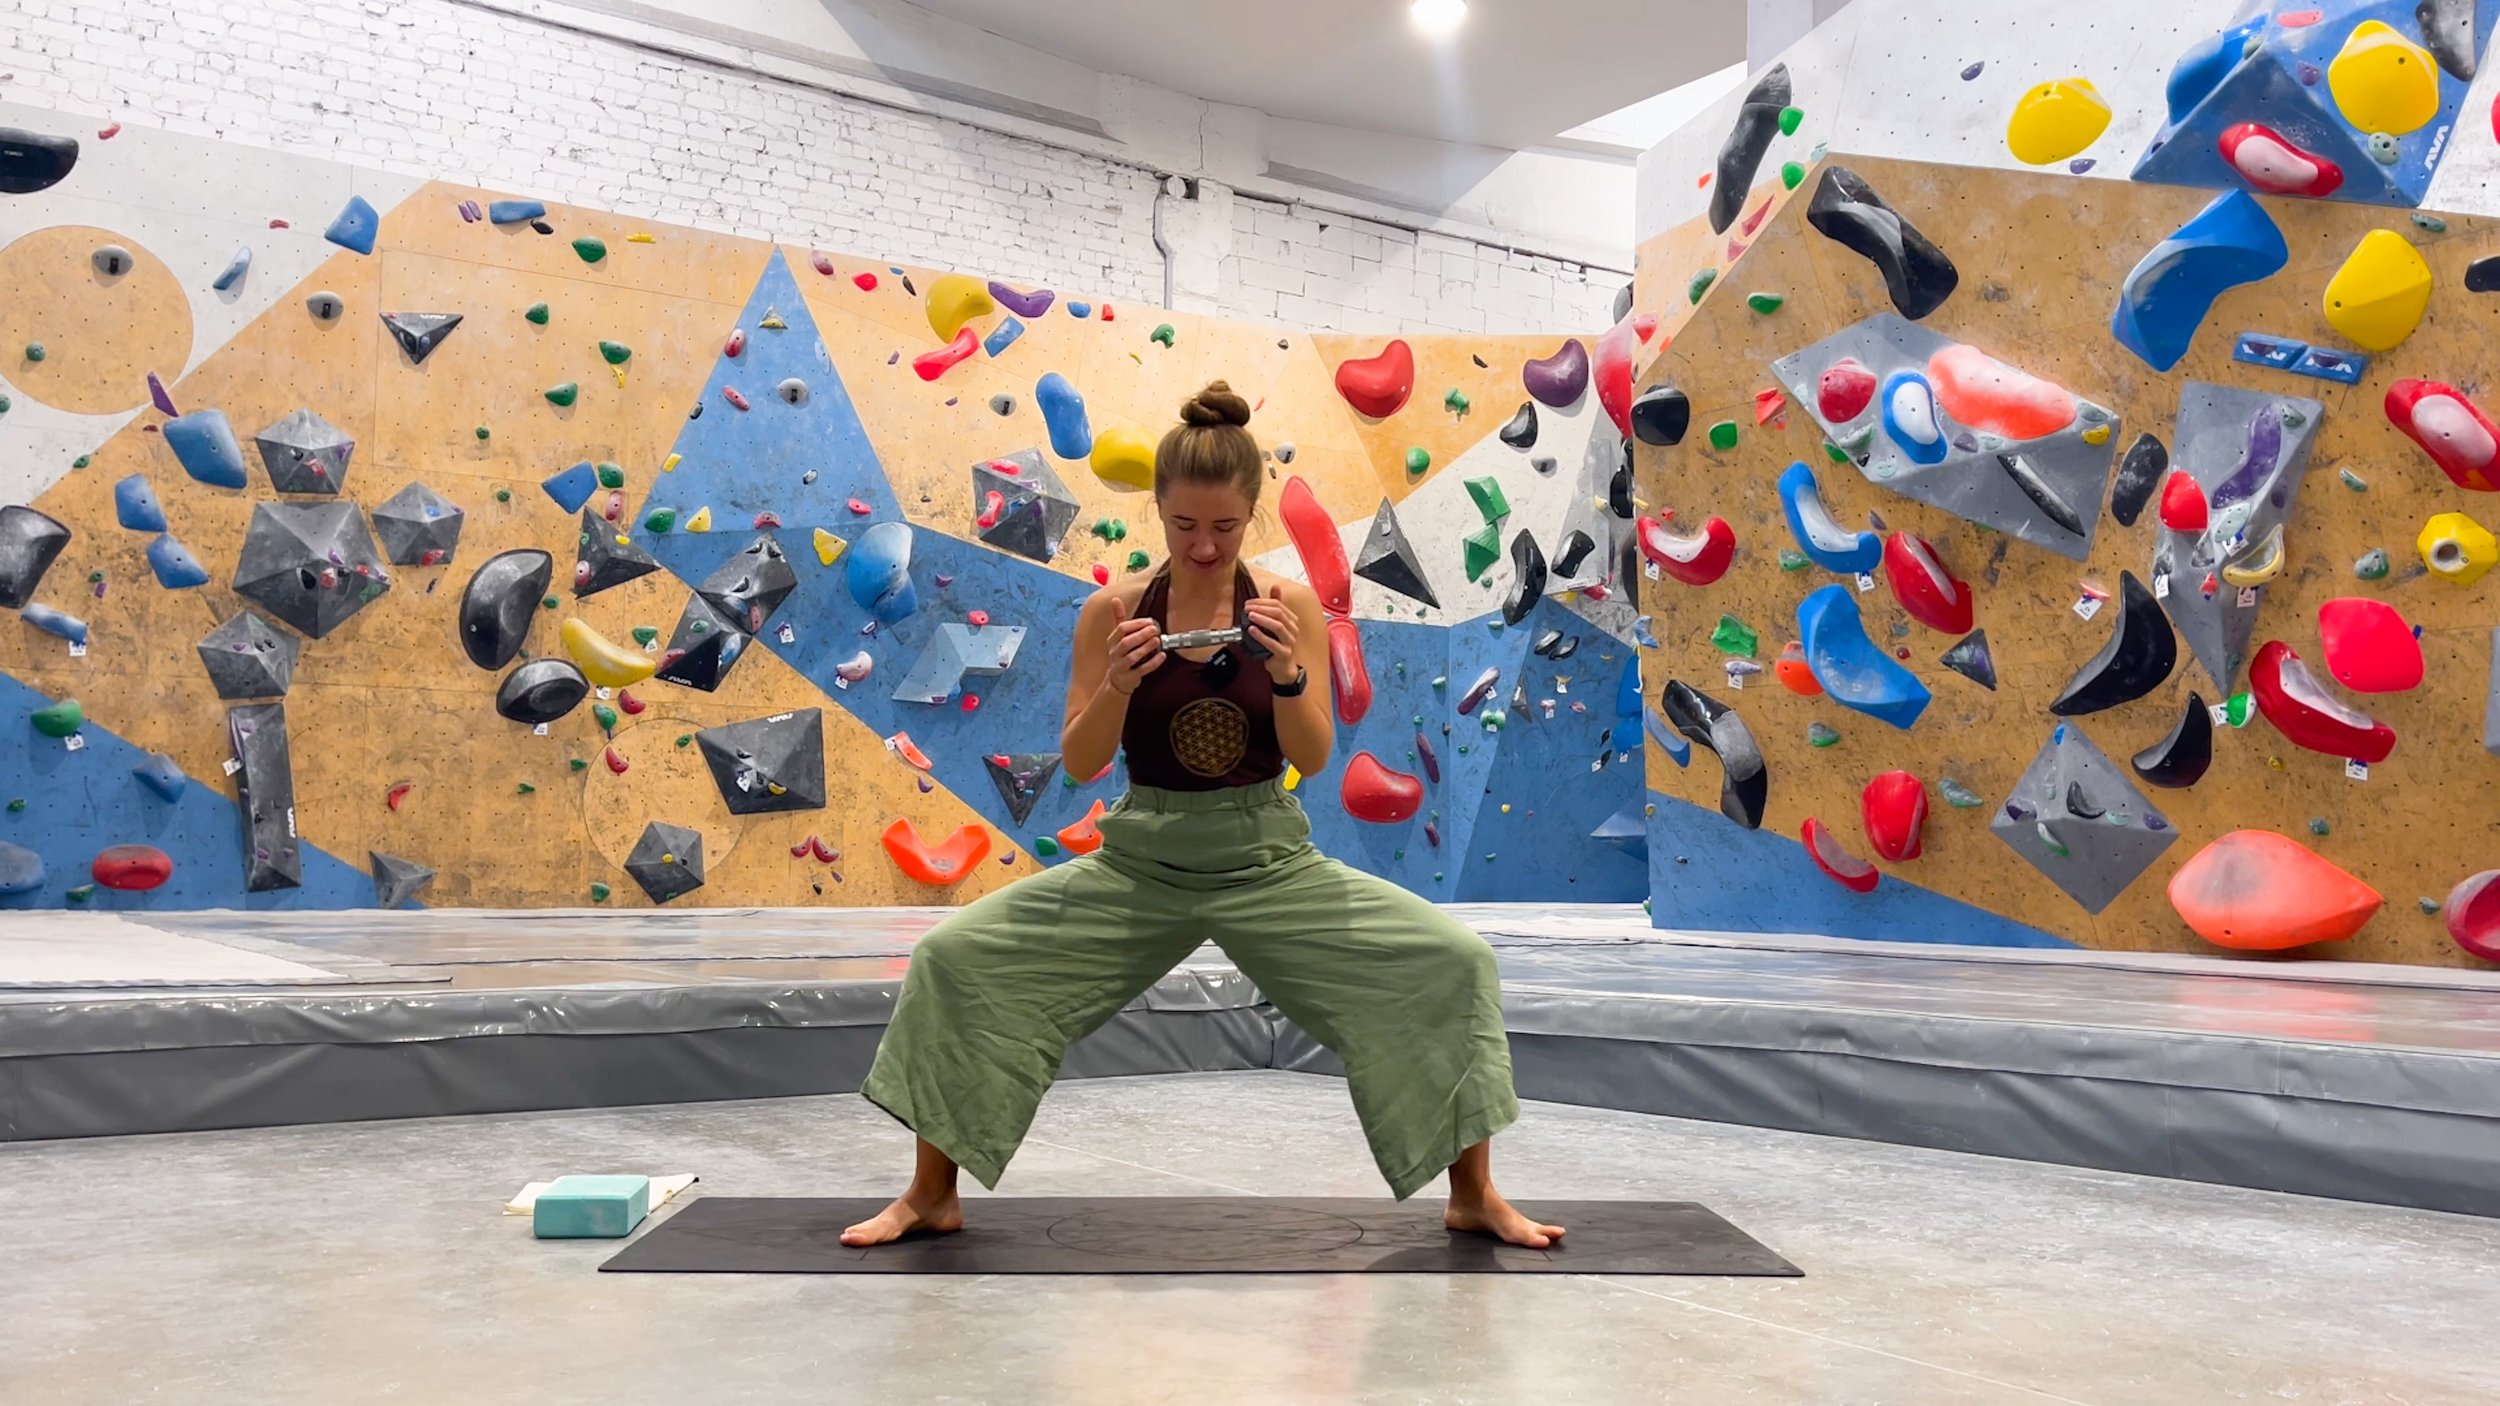
Goddess Pose


Setup:
Start in a standing position with feet wider than hips and slightly pointing out.
[Optional] Hold a weight in both arms by your chest
Movement:
Keep your chest up as you bend your knees and hips, moving into a squat position.
Move as deep as you comfortably can until you feel a comfortable stretch, then engage your glutes and keep your core tight as you stand back up.
Repeat but feel free to move your feet into different positions, such as slightly wider.
Purpose:
Here we’re combining external rotation with hip flexion, abduction, and external load! This movement improves mobility while also increasing glute and core awareness, which can help you unlock better body positions on the wall.
Notes/Tips:
As your feet go wider, you might find this to be more challenging and that you lose range of motion. That’s normal. Go slow(er) and respect your available range of motion. Don’t rush this motion.
Runner’s Lunge with Spine Rotation


Setup:
Place one leg in front of the other, bending the front leg and trying to keep the back leg as straight as possible. You will now be in a squat-like position on the front leg.
It’s OK if you need to be on your toes on the hindfoot.
Movement:
If the right leg is in front:
Bring your chest down towards the right leg, and bring the right hand down towards the ground. This may naturally rotate your chest/trunk to the left.
Bring your left arm up toward the sky, allowing your chest to open up / rotate out to the left. Rotate your head/neck with this motion, eventually looking up at the left arm.
Try to lift the right arm off the mat if you can, focusing on good control through your legs/hips/trunk.
Place your hand back down and return to the starting position.
Stand up and repeat on the other side.
Purpose:
The split stance position of the runner's lunge helps once again with hip mobility but now working on our anterior chain, such as the hip flexors and core. We often find ourselves in split stances on the wall when we’re perched on a high foot with the other leg straight below us.
Notes/Tips:
Try to drive the rotational movements with your core and hips.
Focus on depth of motion, quality rotation, and moving slowly with control.
Rectus Femoris Stretch

Setup:
Start in a half kneeling pose.
Your front leg will have the foot flat on the ground, with your knee and hip flexed.
The back leg will have the knee relatively straight, with the hip extended.
Make sure you have adequate padding under the leg behind you (the knee on the ground)
Movement:
Keep the knee on the ground, lift the foot up off the mat, and grab the foot with your hand.
If this is too challenging, use a stretch strap, scarf, etc.
Purpose:
The rectus femoris is one of our quad muscles, but also a hip flexor, and yet it can’t be effectively stretched with a classic quad or hip flexor stretch. So, it often gets missed or overlooked. It’s extremely active while walking (aka hiking to the crag), with toe hooks, and hiking your feet high on the wall. Tightness in the rec fem sometimes contributes to knee, hip, and/or lower back pain.
Notes/Tips:
Try to keep your chest upright. This will help drive your pelvis into more of a posterior tilt which will improve the stretch.
If this is too much, please use a strap to get into the position more comfortably.
Move the front leg forward while keeping your chest upright if you want to get deeper into the stretch.
You can also try to drive the pelvis forward (while maintaining good trunk positioning) to increase the stretch.
Warrior 3 and Half moon


Setup
Begin in a standard upright position with feet approximately shoulder-width apart.
Movement:
Stand on one leg and extend the other leg behind you (keeping the knee straight), shifting your trunk forward as the opposite leg raises up in the air.
Keep both legs as straight as you comfortably can.
Your body should form a straight line parallel with the floor, essentially making a ‘T’ with your body.
Hold this position briefly and then transition into the half moon.
To perform a half moon pose from warrior 3, simply rotate your body (hips, trunk, and foot) out to the side. If you were standing on the right leg, you should be rotating / looking to the left now.
Optional: raise your top arm up towards the sky (if on right leg, left arm towards the sky)
Hold briefly, then return to warrior 3.
Purpose:
This movement works on loading the hamstrings primarily, but by adding in the half moon twists you now get to work on hip and core control, which can help with things like toeing in on overhangs and using that posterior chain.
Notes/Tips:
To make this movement easier, use a block to assist your balance.
With warrior 3, your body will naturally try to make the pose easier by tilting your hips away from the standing leg. Fight this urge and keep your hips level with the ground.
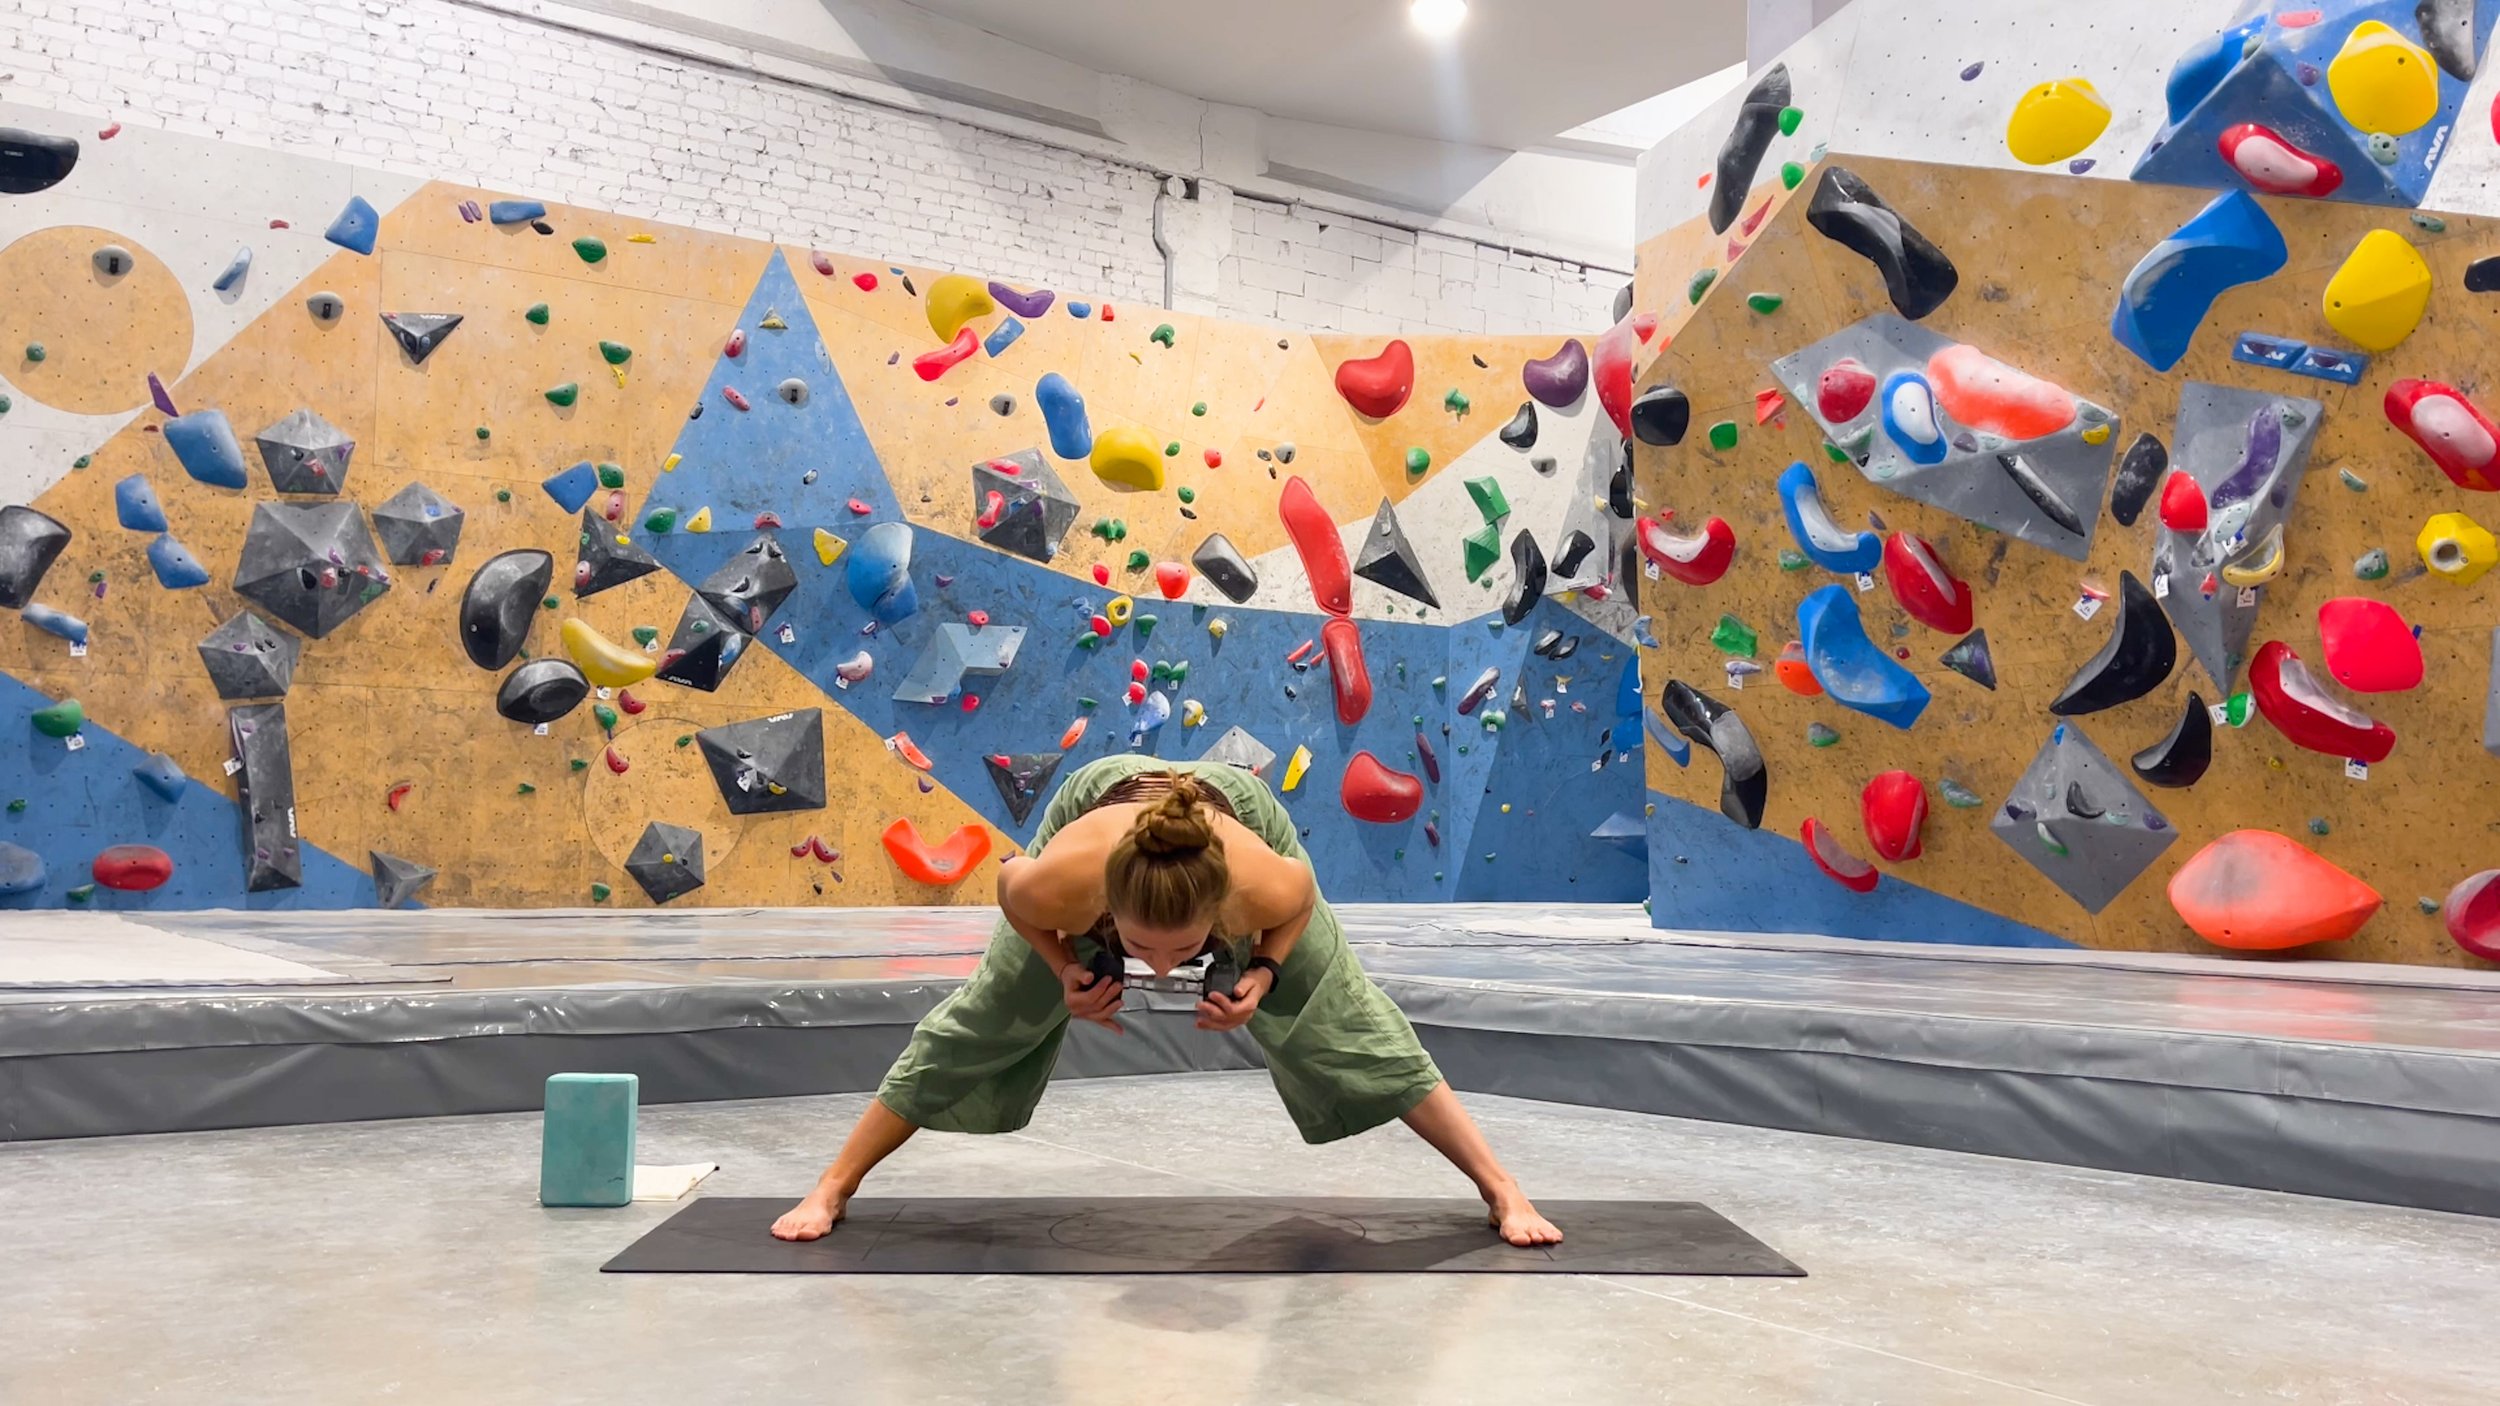
Wide Leg / Split Stance with Forward Fold and Load Progression

Setup:
Stand with your feet apart as wide as you comfortably can. If using a weight, hold it by your chest.
Movement:
Lean forward from the hips until you feel an increased stretch in your legs and possibly lower back.
While keeping your legs and core engaged, lift yourself back up, and repeat.
Bonus -- Forward Fold with Rotation: Reach one hand down to the ground and the other up in the air, allowing your chest to rotate freely.
Purpose:
A common position we find ourselves in on the wall is the wide leg stance. Moving through this range off the wall, especially with added weight, improves mobility of our adductors and hamstrings. With good focus, it can also improve body awareness so you can move in and out of these positions with more control.
Notes/Tips:
You should try to use your legs and glutes to lift yourself back up as you go in and out of this position to avoid straining your lower back. If you feel strain in your lower back, reduce your weight and focus on leg and glute activation.
There are two variations with this: you can try to keep your back straight or you can allow it to bend/flex. Both are OK! Deciding which to perform can be determined by individual needs/goals. You can also do a mixture of both. Bending your back is not harmful for it.
Cossack Squat


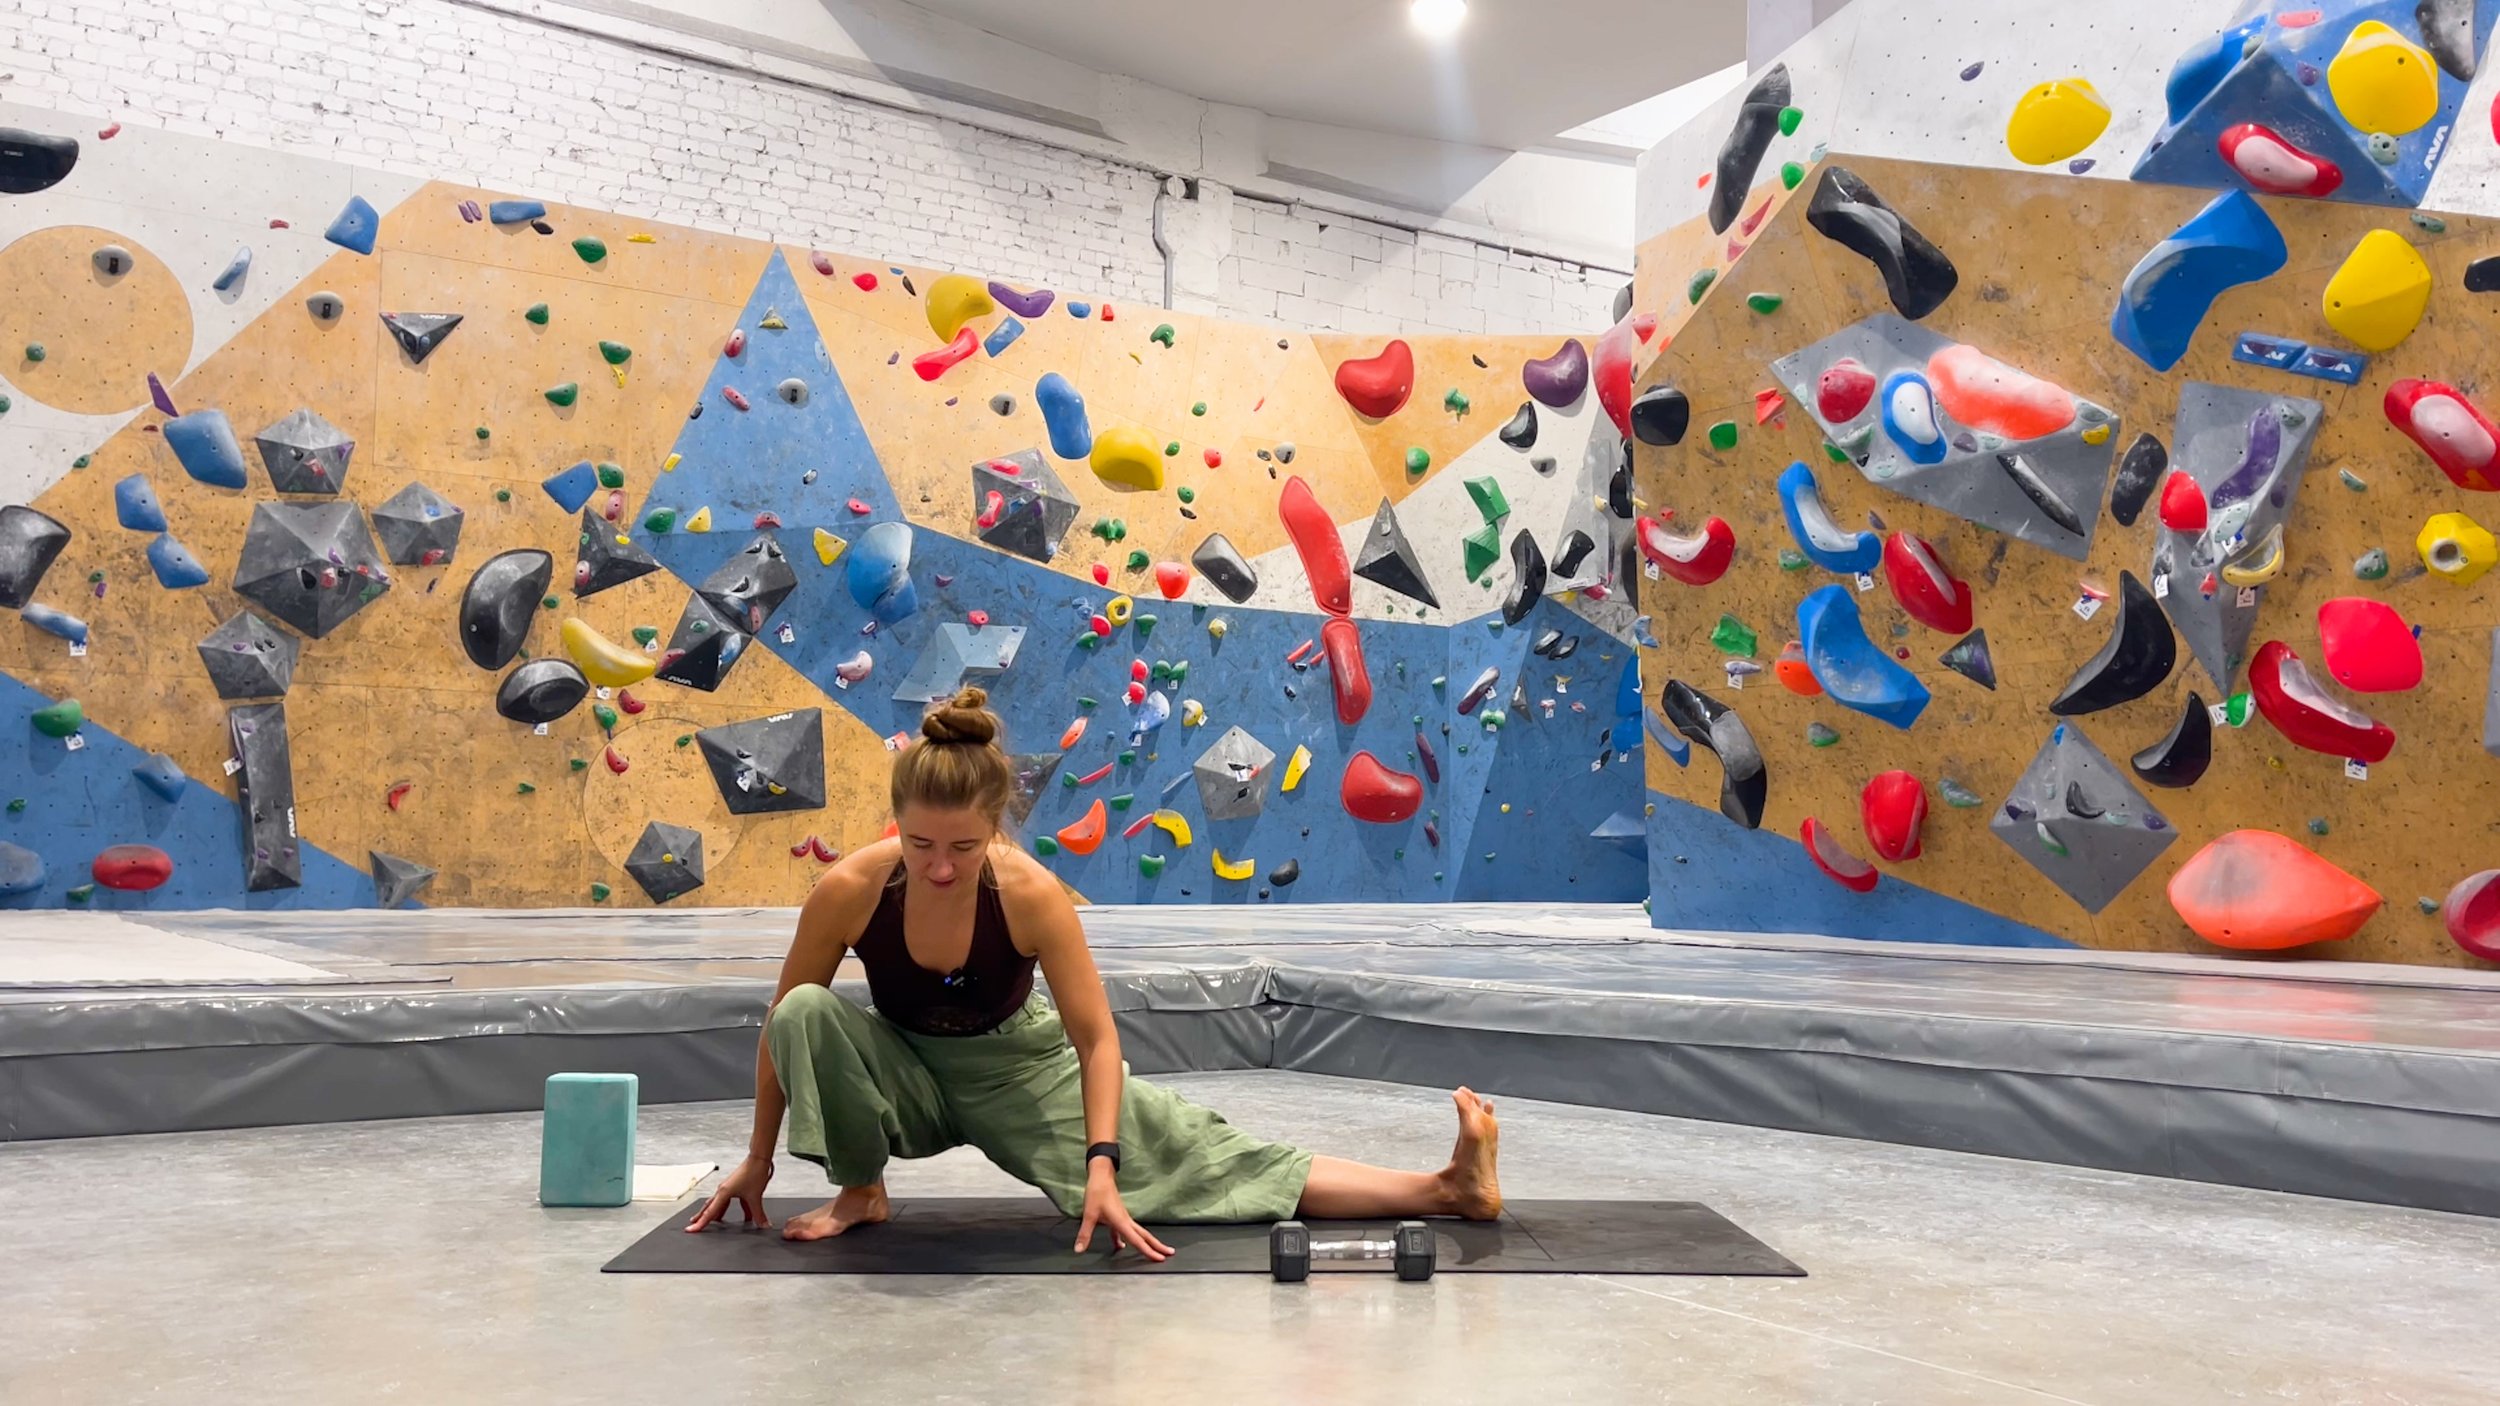


Setup:
Start in a moderately wide stance with your feet facing forward.
You may have to play with your starting position. Starting too wide may make this far too difficult, whereas starting too narrow may make it feel awkward.
Movement:
Shift your weight towards one side, allowing that knee and hip to bend, while keeping the opposite leg straight.
You will sit into a deep single leg squat on the side you have shifted your weight towards.
You should try to keep your entire foot on the ground
If you find yourself falling backward, you can either hold onto something, or allow your heel to lift off of the ground.
Most of your weight should remain distributed to the squatting leg.
Purpose:
The Cossack squat works on improving hip flexion mobility, but now with an emphasis on a single leg, which of course is more challenging, but also extremely useful for getting out of those high step positions on the wall. It also works on opposite leg adductor and hamstring mobility. Moving in and out of this side to side also works on coordination between the hip muscles and leg muscles to improve strength in those awkward movements and positions on the wall.
Notes/Tips:
A weight can be useful as a counter-balance and may actually make this slightly easier to work on.
If the counter-balance weight is not enough, hold on to a sturdy object in front of you.
While it’s good to allow your off leg to move into a comfortable position (rotating up or down),
Hip Internal Rotation


Setup:
Start in a sitting position with one leg straight and out to the side, and the other knee bent.
Movement:
Keep the straight leg where it is, but drop the bent knee inward and towards the ground.
Keep the chest in the same position.
Raise the knee back up, and repeat.
Purpose:
Hip internal rotation is needed for drop-knees and maintaining healthy knees in general. If you’re limited in this range of motion, you may find your entire body has to move when performing drop knees, or it may simply increase the strain/stress on your knee (not great) which will compromise your technique and possibly the health of your knees.
Notes/Tips:
If you feel pressure or pain on your knee while doing this, it may be a hip internal rotation limitation. Don’t push through pain but don’t ignore this mobility drill either.
For an extra stretch here, try to keep your chest facing forward (at a 90 degree angle from your straight leg) as you do the exercise, rather than allowing your chest to rotate with your hip.
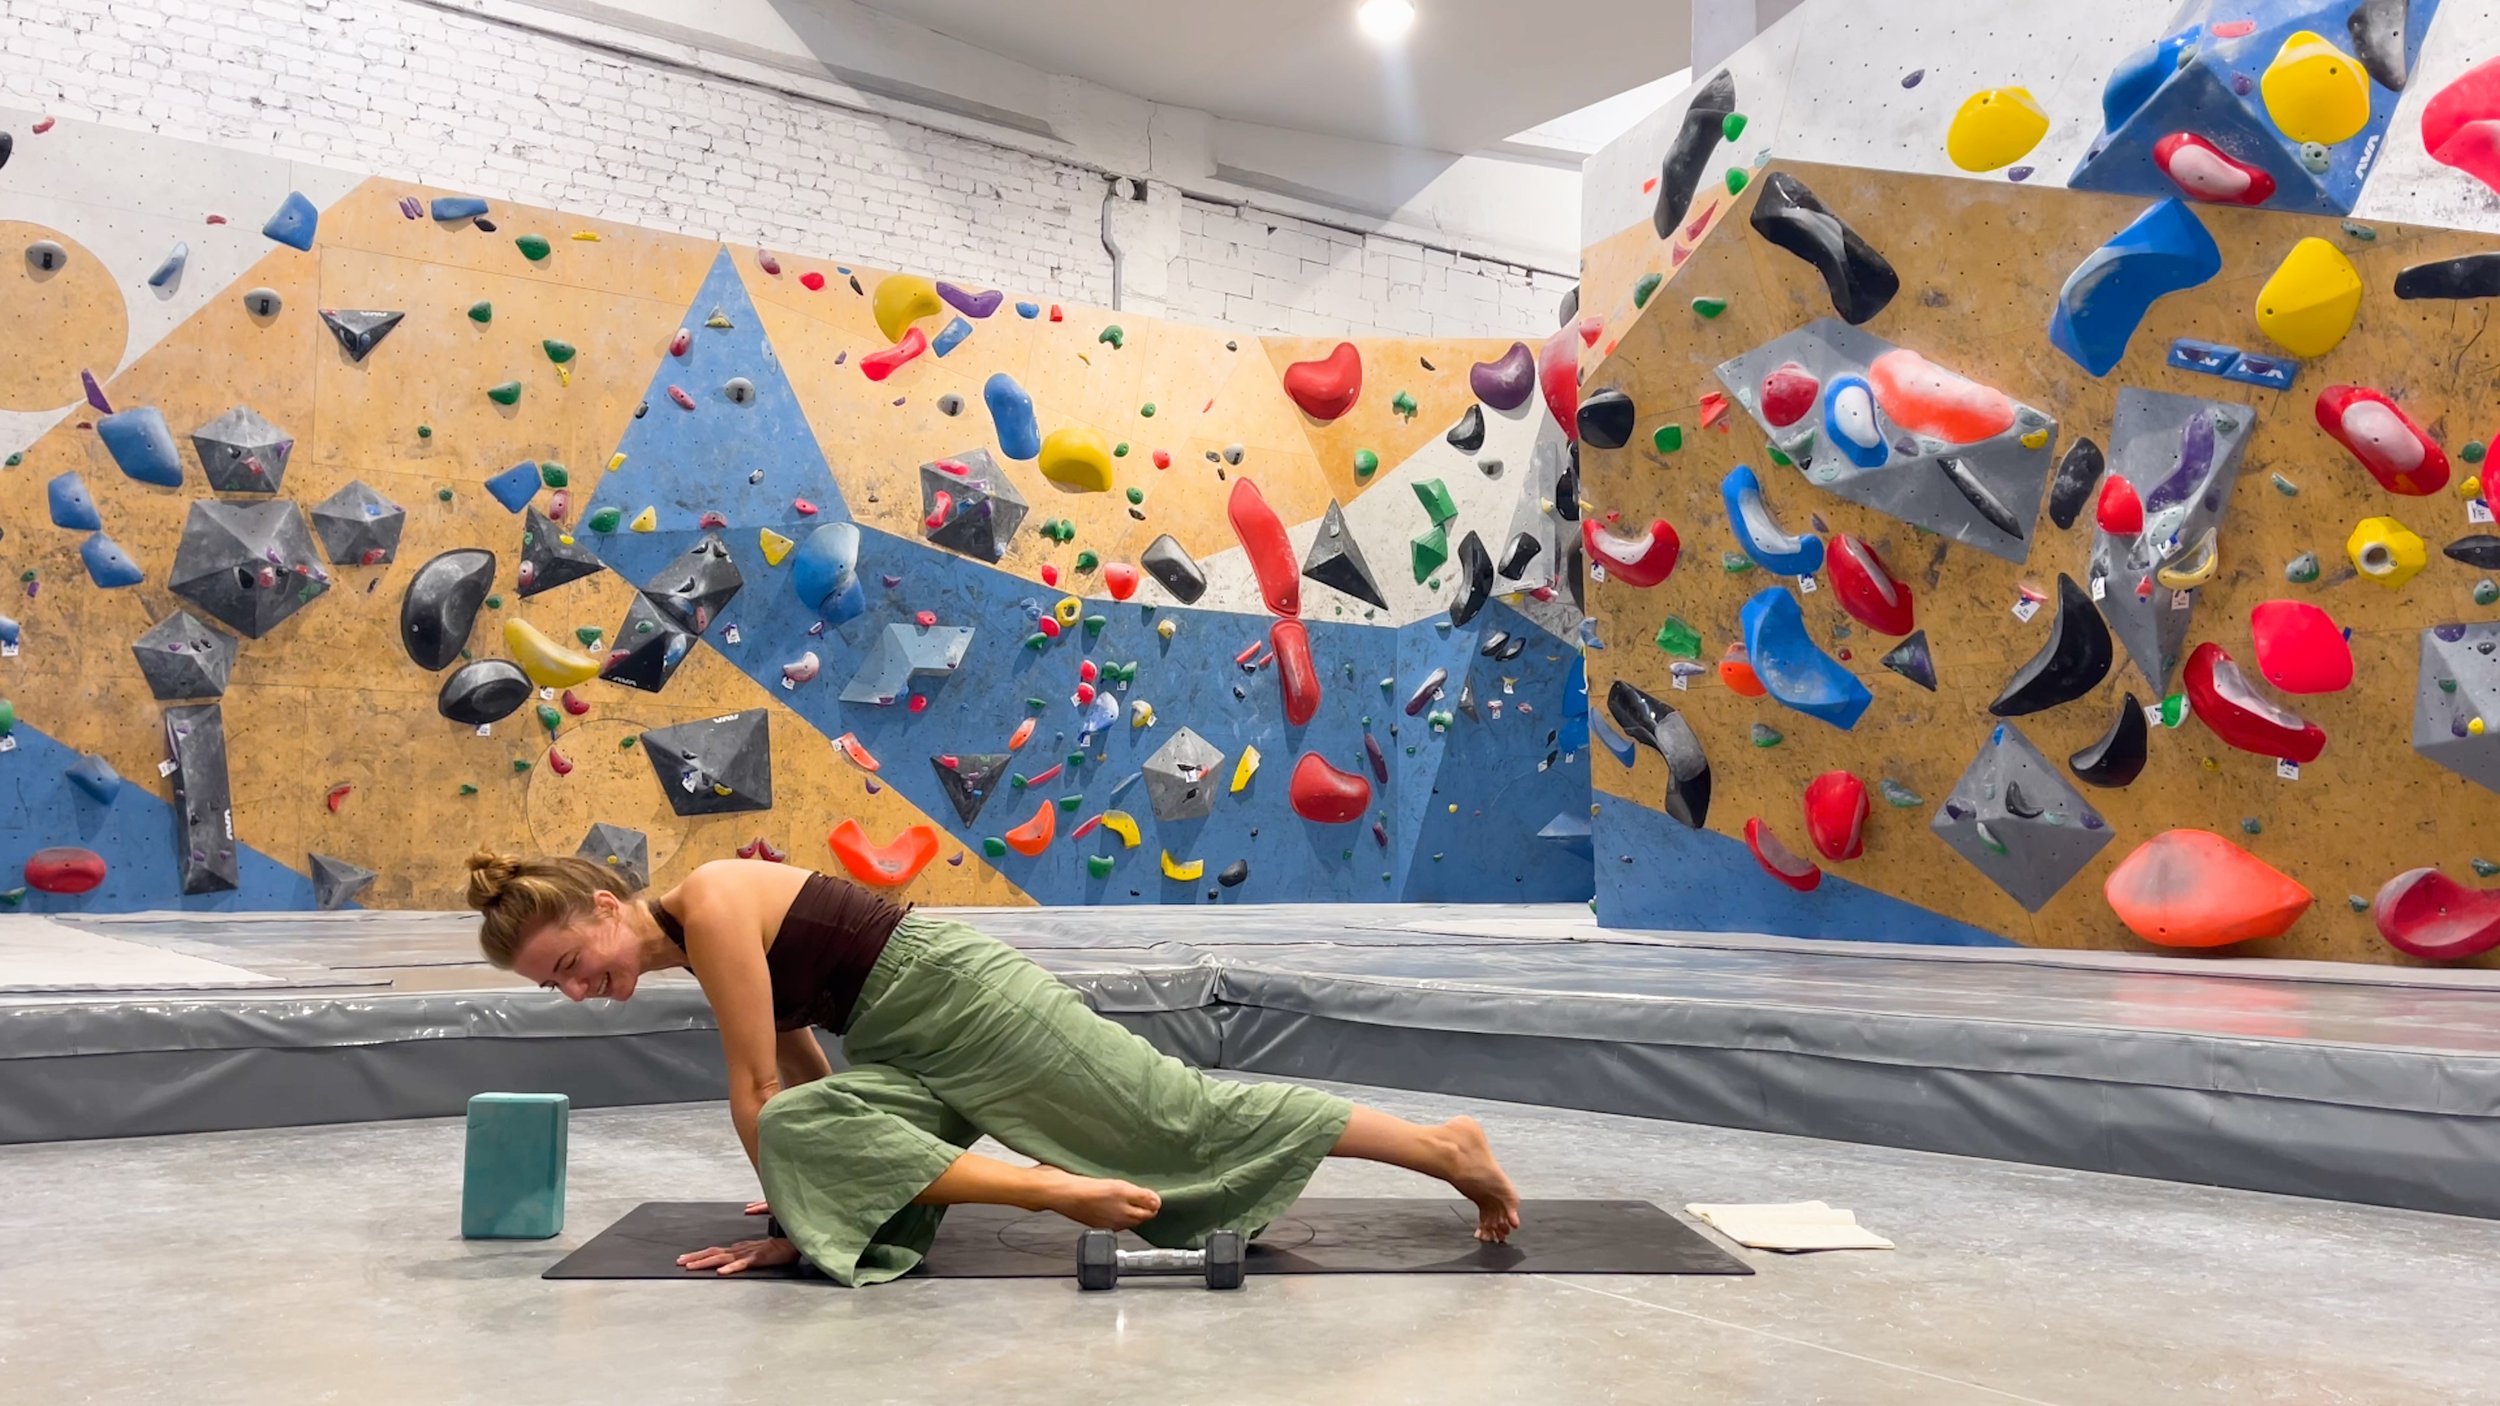
Pigeon Pose


Setup:
Begin in a tabletop position on your hands and knees.
Place your hands directly under your shoulders and your knees under your hips.
If performing on the right knee, slide your right knee forward towards your right hand, positioning it directly behind your right wrist.
Straighten your right knee, moving the foot/ankle closer to the left hand.
Your lower leg/tibia may now be oblique or even perpendicular to your body.
Extend your left leg straight behind you as you sink down into the stretch.
Movement:
Bring your chest down towards the ground.
You may even be able to or want to move from your hands to your elbows to increase the stretch.
Try to keep the foot and knee in the same position. The foot may want to naturally slide backward as you bring your chest down. If that happens, use your hand to hold the foot in place, or simply back off of the stretch, raising your chest back up.
Purpose:
This pose focuses on improving hip external rotation, especially while the hip is flexed, which is necessary for things like quality or unusually stressful heel hooks. It can also loosen up the piriformis which we often see cause discomfort in the rehab world (which may get tight from sitting or driving 5 hours to your favorite crag).
Notes/Tips:
Performing with a light weight and moving up and down, pushing through your glutes, can add hip strength in this position. Just make sure your knee is padded and that this does not cause discomfort on the knee.
It can be very useful to play with the positioning or angle of the target leg, pertaining specifically to the angle of the lower leg (tibia).
If it is pointed directly underneath you, you will feel a very different stretch than if the lower leg is perpendicular to your chest.
I often prefer the lower leg perpendicular as that is more reminiscent of a heel hook position.
Plank Knee Drivers


Setup:
Start in a plank position. Performing this on your hands is easier than on your elbows, but both setups can be useful.
Movement:
Drive one knee towards the same sided arm (right knee to right arm, for example), getting as close to the arm, or even moving beyond, if possible.
Place the foot back to the starting position, then drive the knee up towards the opposite arm (right knee to left arm). Once again, drive beyond the knee if possible.
Purpose:
Having good hip flexion range of motion is absolutely useful, BUT you also need the strength to hike your leg up high without external assistance. This motion focuses on allowing us to drive our knees up as high as we can, while strengthening our hip flexors and obliques.
For added resistance, use a circular resistance band around your feet
Notes/Tips:
Don’t just settle for a “good” range of motion. Try and drive your knees up as high as you comfortably can.
While doing this, don’t compromise form. You may notice that you are lifting your hips/butt up in the air for more mobility. While that is OK, imagine the effect it has while climbing. That will likely mean you are pushing yourself away from the wall, which may not be beneficial (changes how you can hold onto whatever hold you are on, pushes you off your foot, etc). So, try to keep the hips down while you practice this.
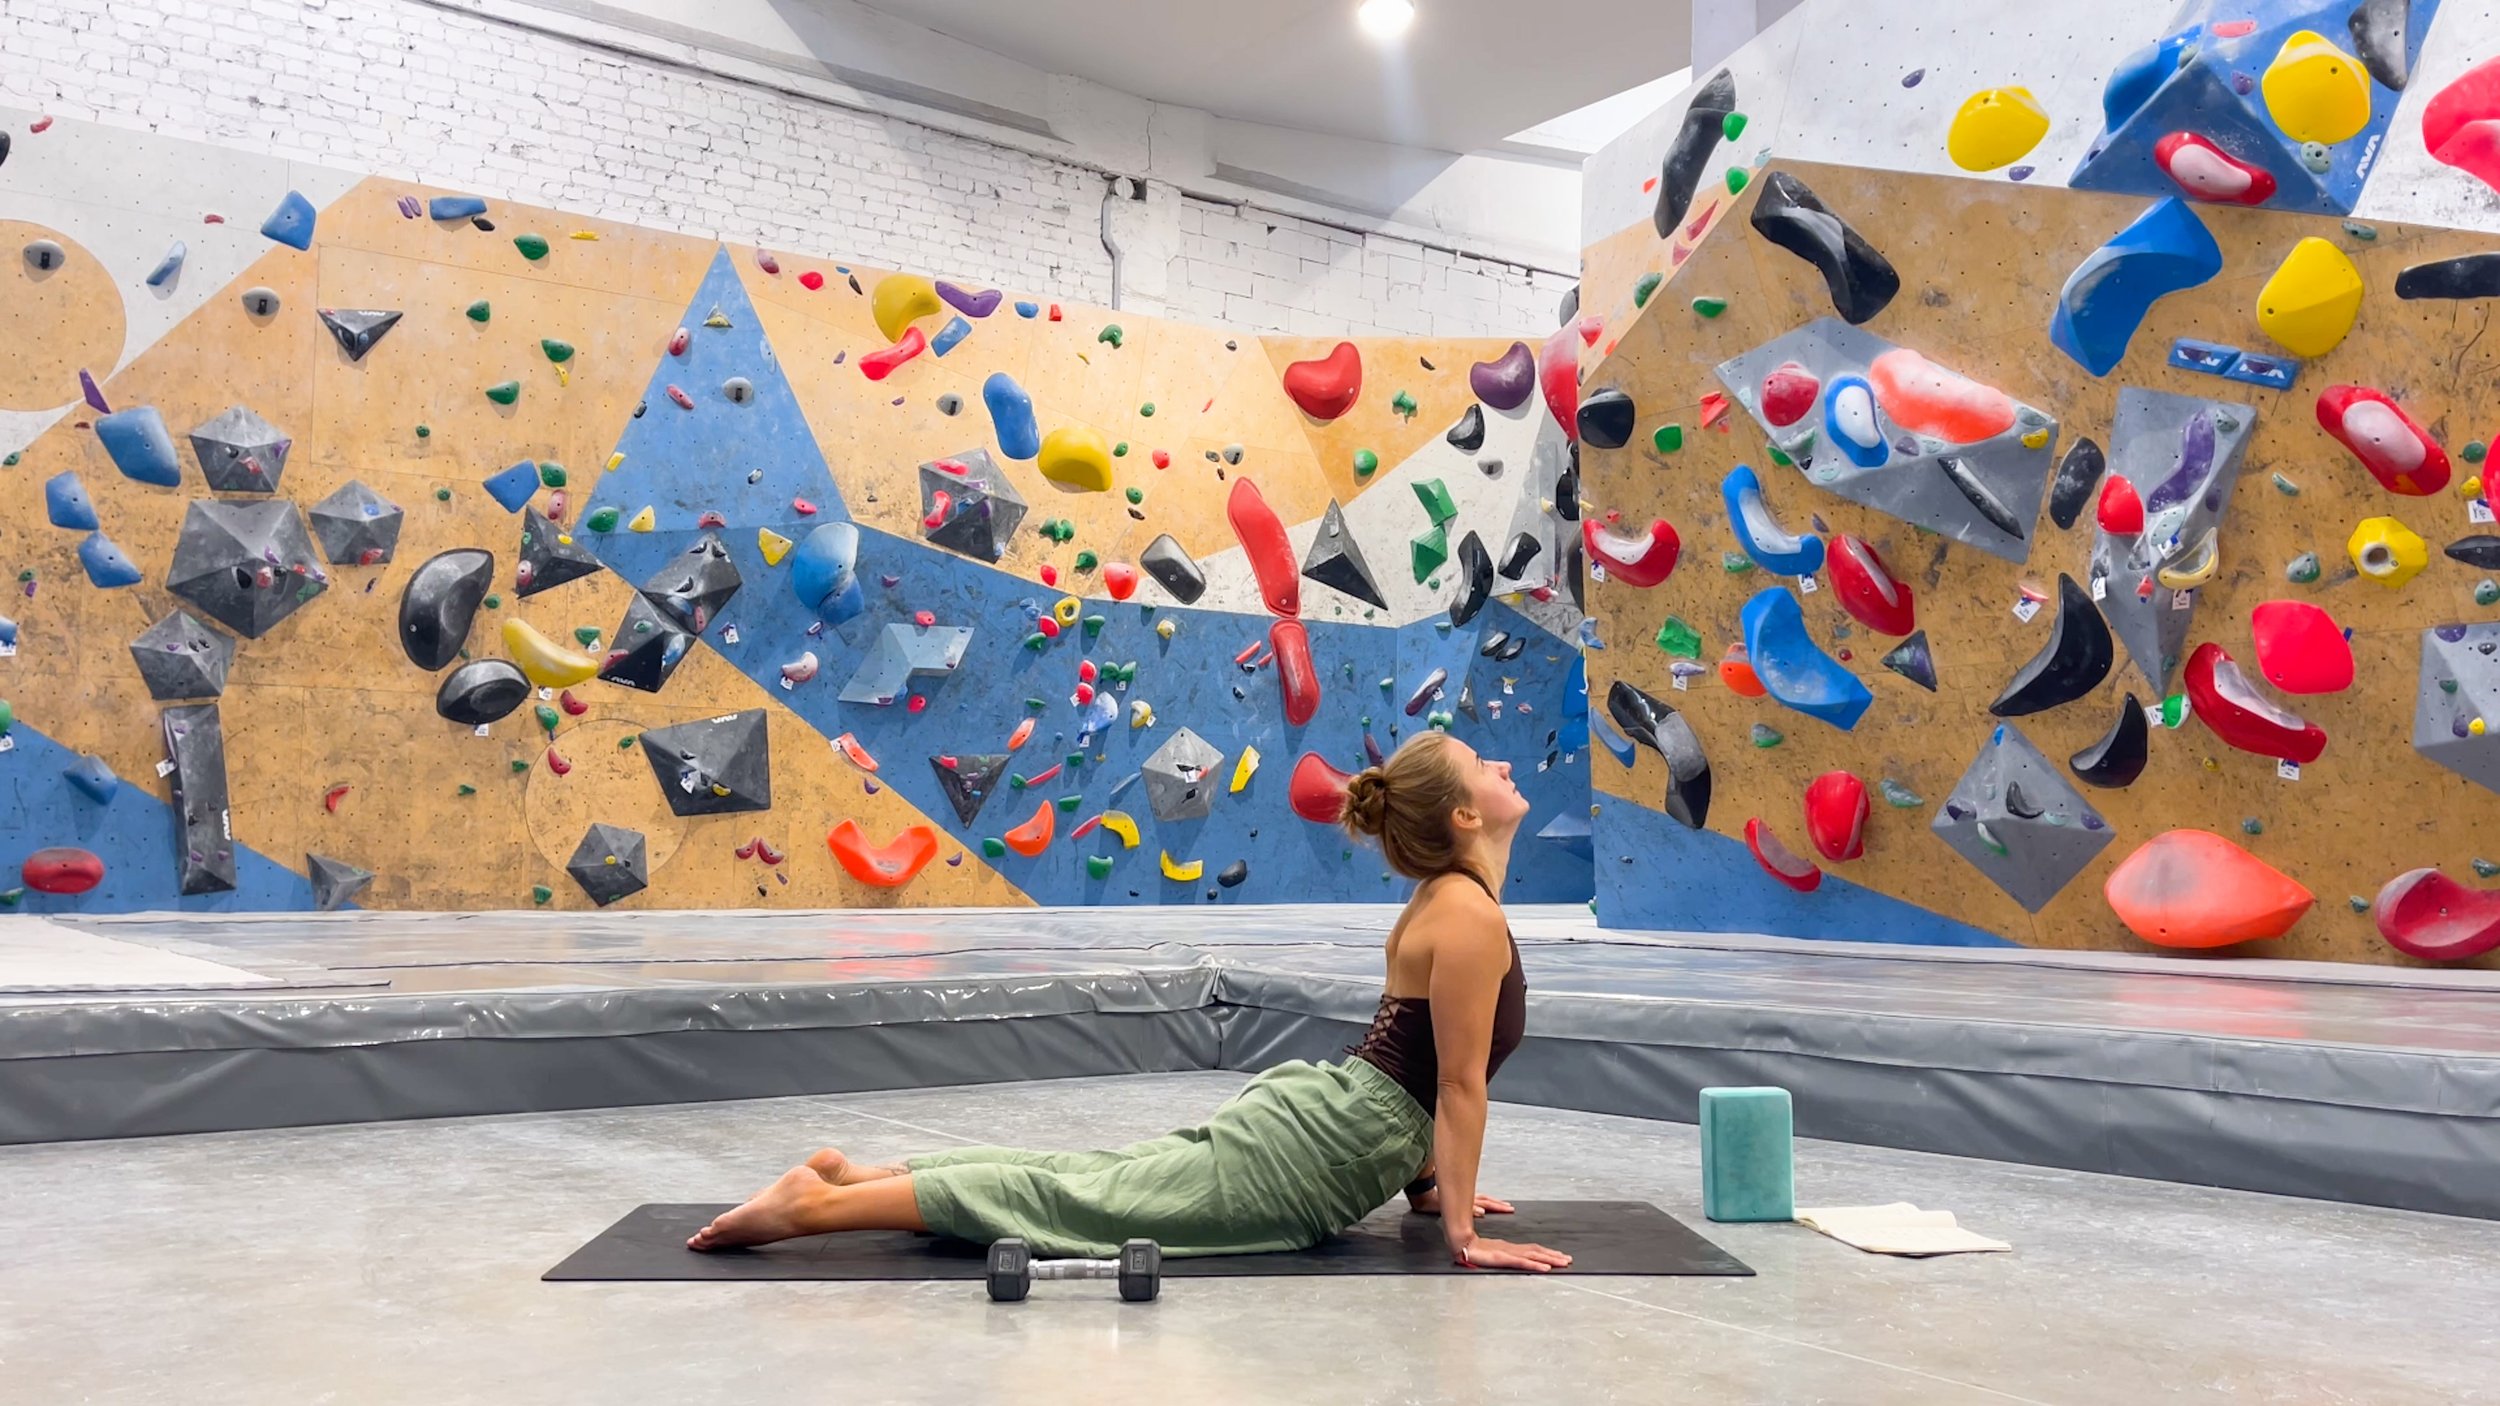
Puppy Pose to Upward Dog
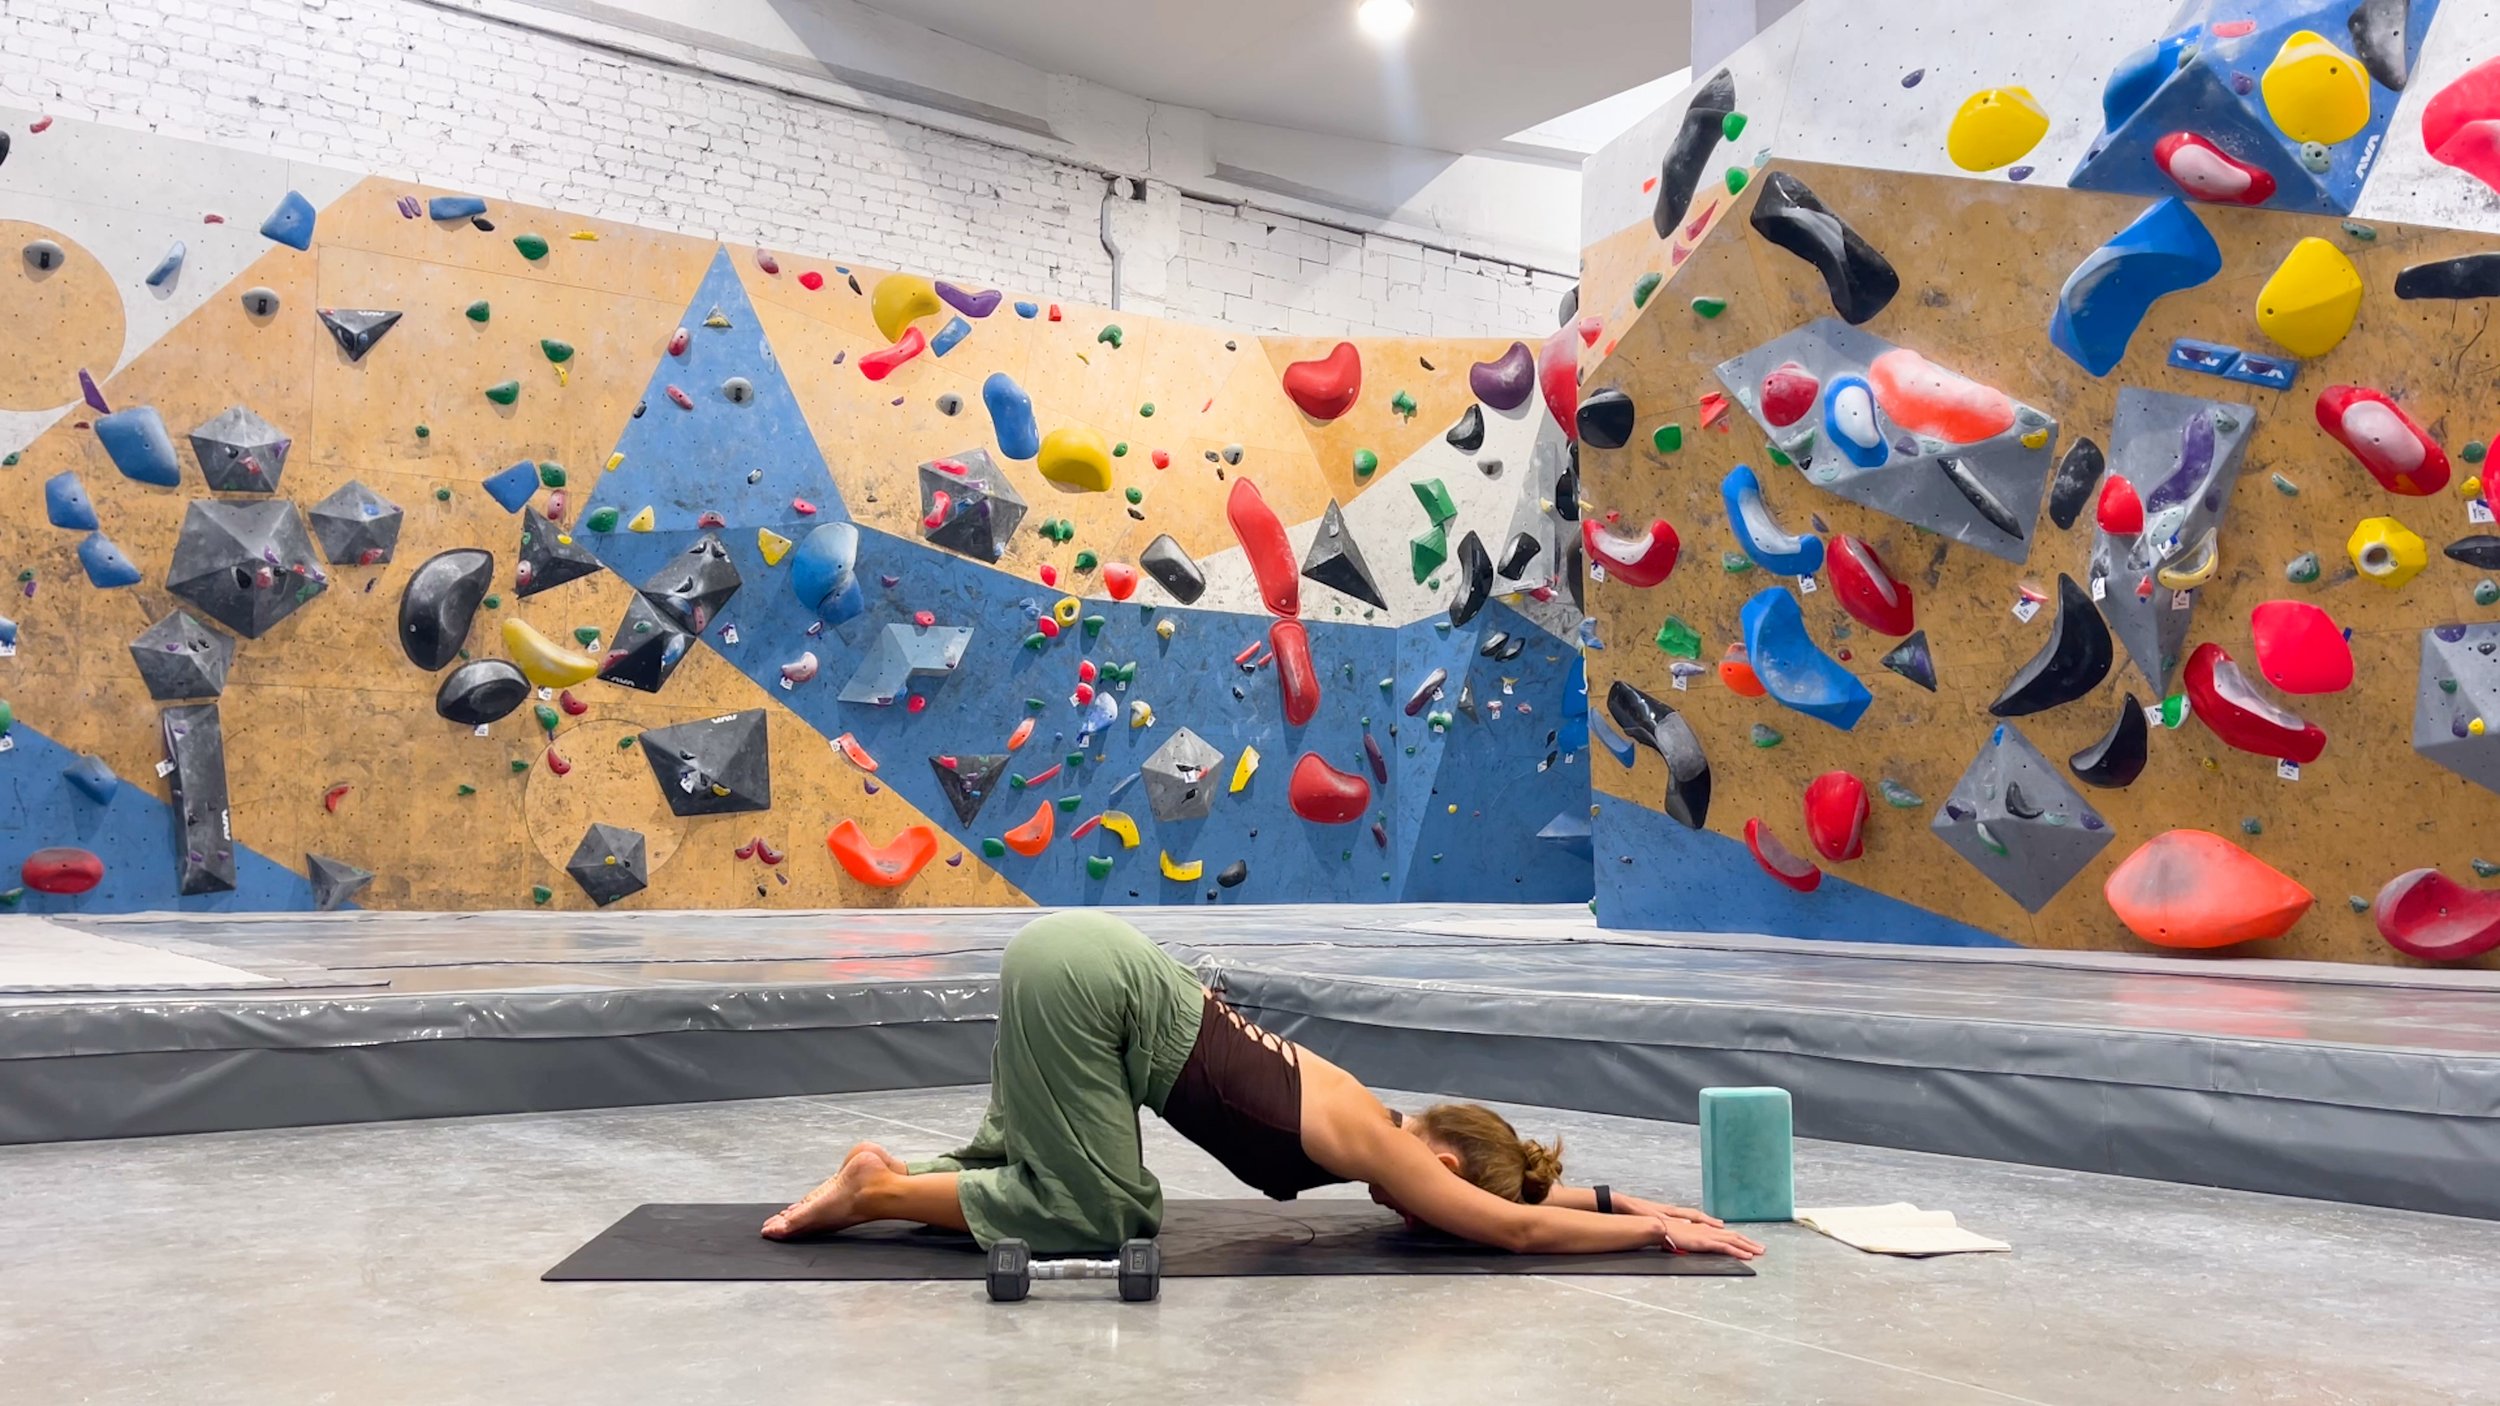
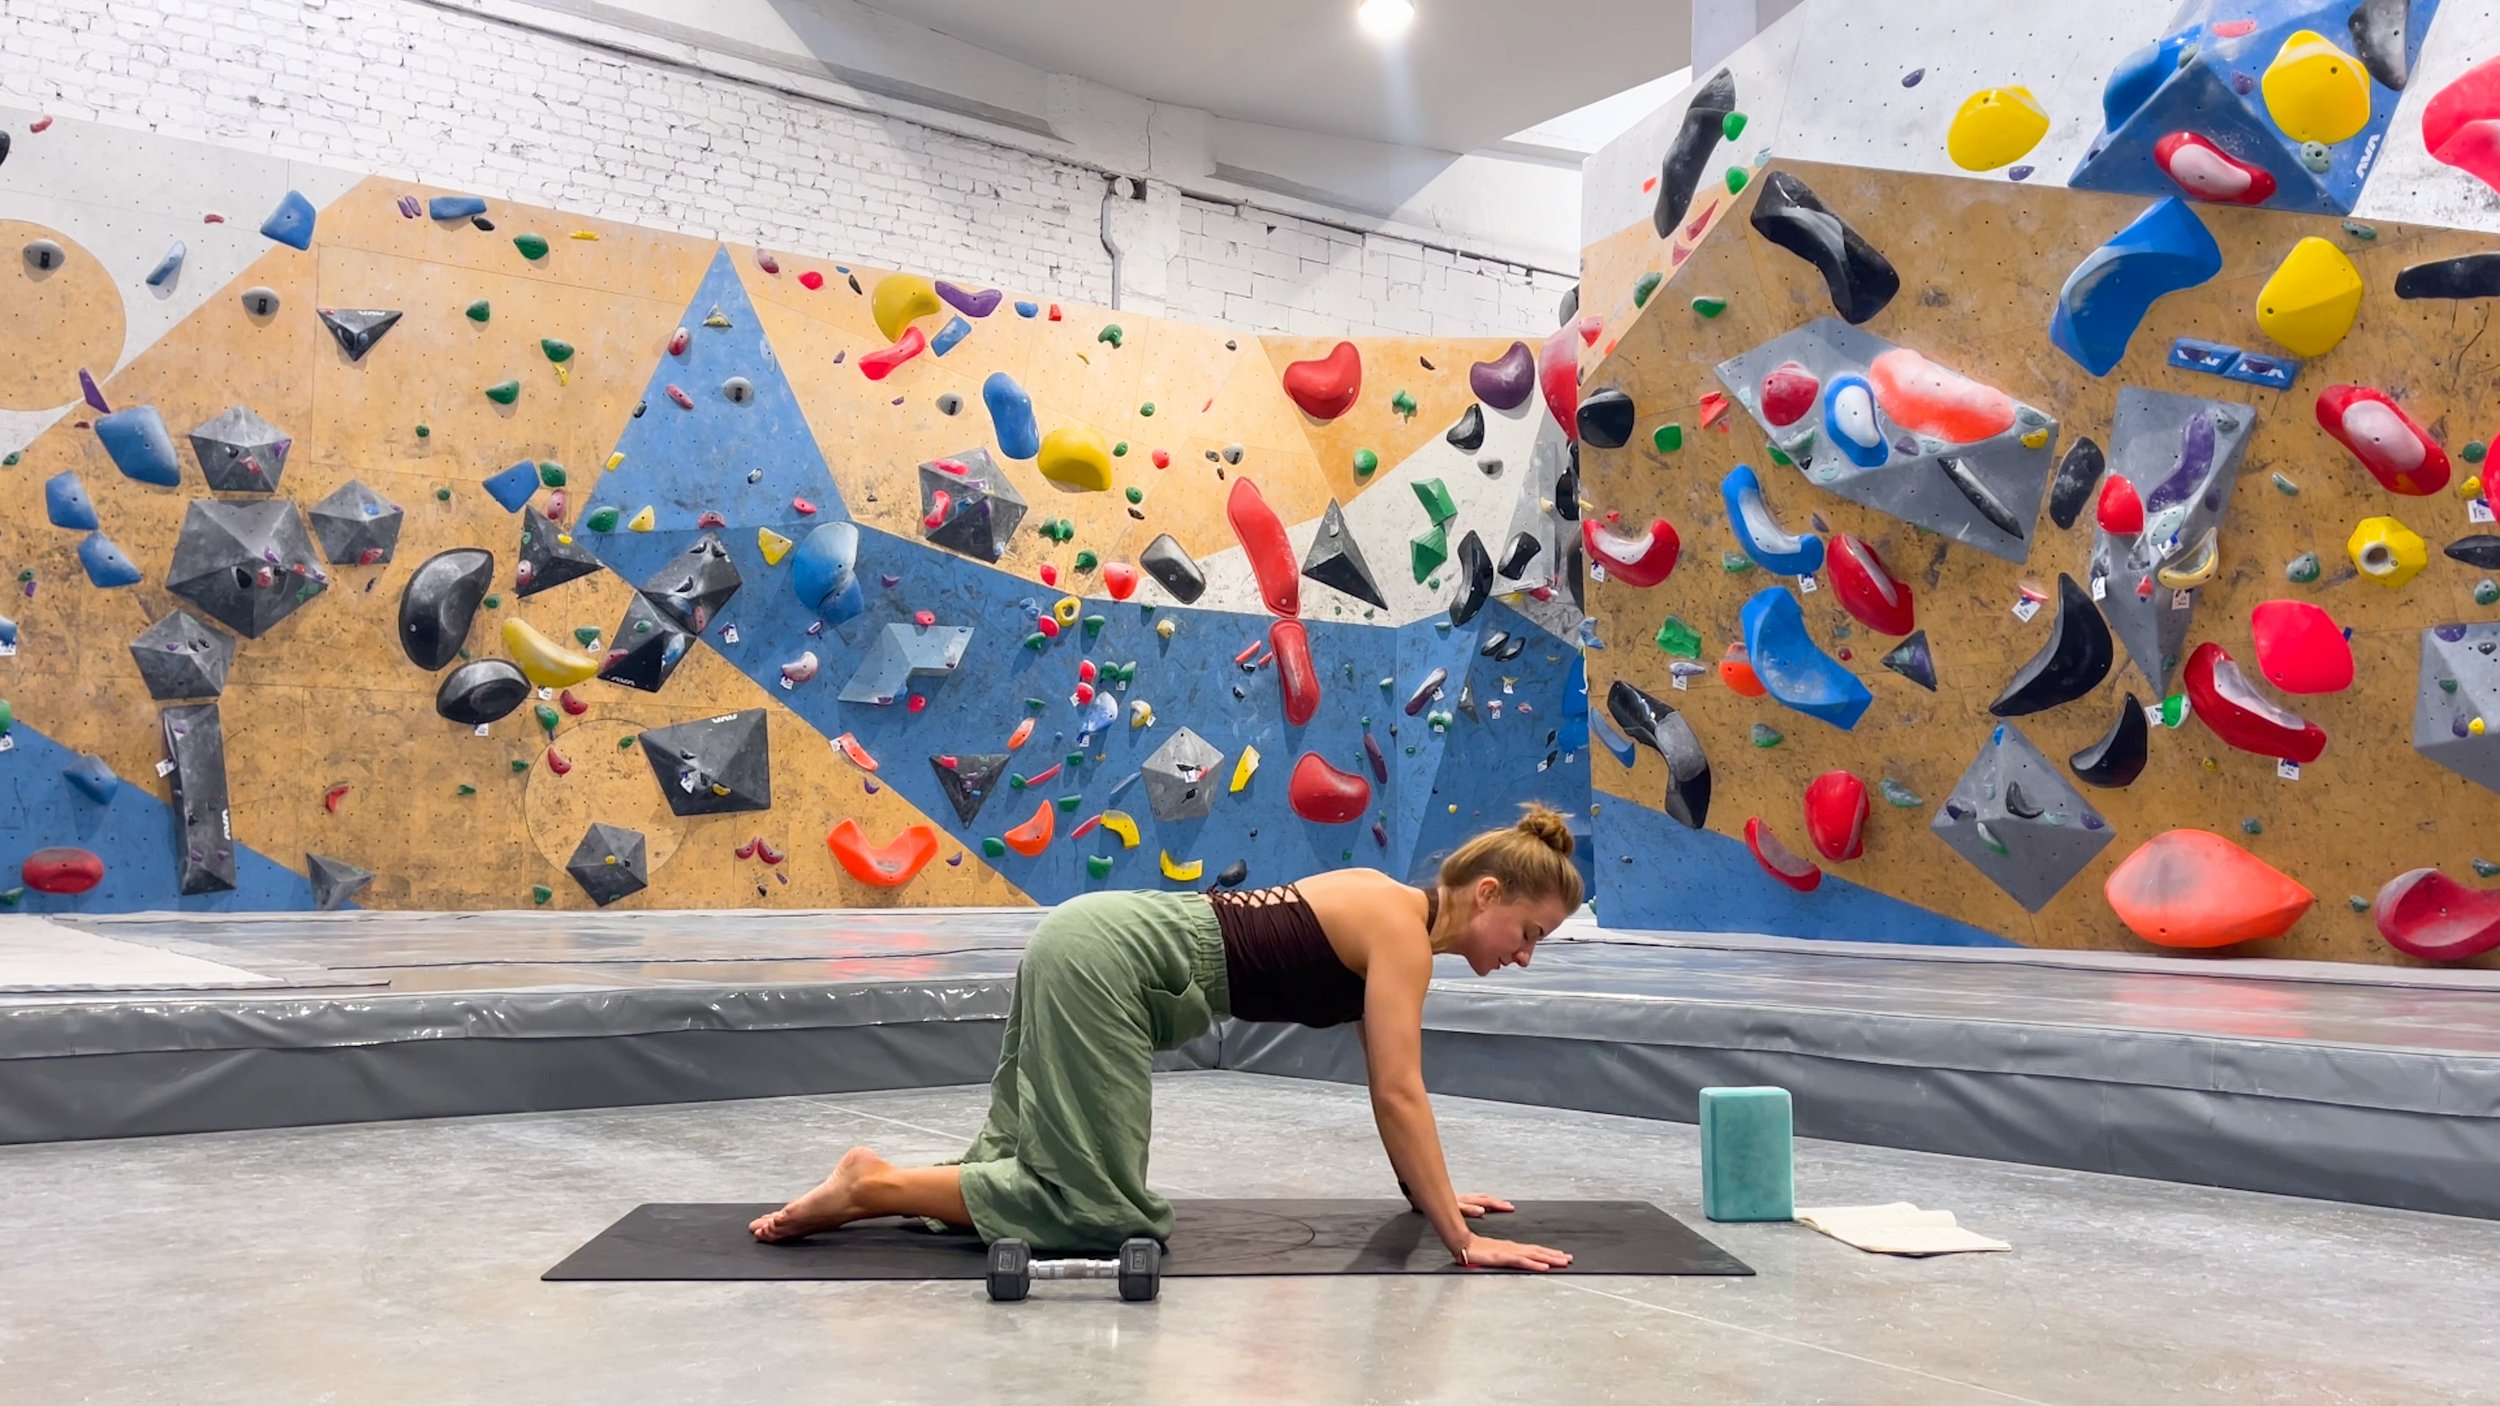
Setup:
Start on hands and knees, preferably on a padded surface such as a yoga mat.
Movement:
Keep your arms straight and drop your chest towards the ground, but keep your hips up.
You may need to adjust where your knees are to feel the stretch appropriately.
Hold the stretch for a breath or two, then move back to hands and knees.
From here, we will go into upward dog. Drop the thighs towards the ground while keeping your arms straight and chest up.
You should now feel more extension in the lower back
Hold for a breath or two, then return to hands and knees, and repeat the process moving from puppy pose to upward dog.
Purpose:
Spine extension is seriously lacking in many people I work with, especially climbers who sit around and rest in kyphotic postures (and who have computer-based jobs). The puppy pose works on thoracic extension while also improving shoulder extension, while the upward dog helps improve lumbar extension. Another win-win for climbing and life.
Notes/Tips:
It’s OK to play with different arm positions in puppy pose and upward dog.
During puppy pose, you can try to place your arms to the right or left, wider or more narrow.
During the upward dog, you can play with your hands being directly under the shoulders, or further away, to feel a slightly different stretch.
Arm Circles with ER (+weight)


Setup:
Lie on your side with your knees bent.
Your arms should be directly in front of you and hands together/touching.
Movement:
If you are lying on your right side, rotate your chest to the left as you lift your left arm up, allowing you to rotate as far as you comfortably can.
Your knees should remain on the ground, and your right arm should remain down.
Move your left arm slowly overhead, and in an externally rotated position, moving through a full circle until your hands are back together.
Return to the starting position, and repeat.
Once you have performed a few circles on one side, turn over and repeat on the other.
Purpose:
One thing I see all the time in climbers and patients is a forward, rounded shoulder. Now, I will never call myself posture police, but I think we can agree that good mobility in the shoulder is beneficial in climbing, which this stretch helps address. Coupling that work thoracic rotation is important because our shoulder blade moves with our thorax. Plus, this stretch can help lengthen the pec minor, which may help prevent nerve compression in the shoulder/chest region.
Notes/Tips:
Stop and hold for a breath or two wherever you feel tight or restricted.
You can increase the intensity by adding in a very light weight in the moving hand.
You may want to hold onto a weight with the non-moving hand as well
DISCLAIMER
As always, exercises are to be performed assuming your own risk and should not be done if you feel you are at risk for injury. See a medical professional if you have concerns before starting new exercises.
Written and Presented by Jason Hooper, PT, DPT, OCS, SCS, CAFS
IG: @hoopersbetaofficial
Filming and Editing by Emile Modesitt
www.emilemodesitt.com
IG: @emile166